Pick one of your existing 3ds Max models that uses V-Ray materials to refurbish for PixelSquid (the closer the model is to the PixelSquid spec, the easier it will be to refurbish). Models that are CheckMate Pro are a good choice, as they are already verified to pass many of the PixelSquid specification points.
After loading the chosen model into 3ds Max, you should prepare and light the scene using the PixelSquid Studio Tool.
Run the Inspection Script to get information about what changes may be required in order for the model to work for PixelSquid.
Work on refurbishing the model so that it not only works for PixelSquid, but also appears photo-real within the calibrated lighting generated by the PixelSquid Studio tool. The changes may be as simple as fine-tuning your existing materials.
NOTE:
The calibrated light rigs are designed to reveal problems in materials and keep quality consistent to work in the PixelSquid pipeline. If you find materials created outside of the calibrated rig look incorrect, the materials must be updated to work within the calibrated rig in order to be approved.Read the Render Elements & Contribution document to better understand the importance of contribution layers.
Once your model is refurbished, run the Inspection Script again to see if there are any potential issues remaining with the model that may not be visible until later during model’s processing.
Read and familiarize yourself with the PixelSquid Submission and Review process.
Common Fail Points
Below are a list of the most common reasons that we might fail a submission. Please read through these carefully and follow the links to the relevant articles.
Real-World Scale
Check the size of the asset and verify that it is real-world size, a 1:1 ratio. The scene units should also be assigned to Centimeters.
Real-world scale is accepted within 1% of the real-world equivalent. If there is not an exact real-world counterpart (such as a human character or an unbranded car), the model must use the size/scale of comparable objects in real-life.
There is an exception for exceedingly large/small models such as planets or an ant, for example.
This is explained in point 2.3.2 of the PixelSquid Specification.

Asset Broken Apart Logically
- If an asset is made of separate pieces in the real world, it should be separated into those same separate pieces in the Refurb Asset.
- Do not separate assets that would result in an overwhelming amount of individual objects. Assets to keep unseparated include: the hundreds of leaves on a tree (although the leaves should be separate from the trunk, for example), each spoke on a bicycle wheel, each scale on a snake.
- We’ve created a Scene Organization Best Practices document that should help with more details. Several additional examples of object groups with images of too few, too many and just right organization are also available.
Only Use V-Ray Materials
- Each scene object should have its own individual material. Refrain from using Multi-Sub Object materials.
- Ensure that each material is set to function in real-world lighting and has realistic settings. For reference on how to create realistic materials, please refer to our V-Ray Material Guide
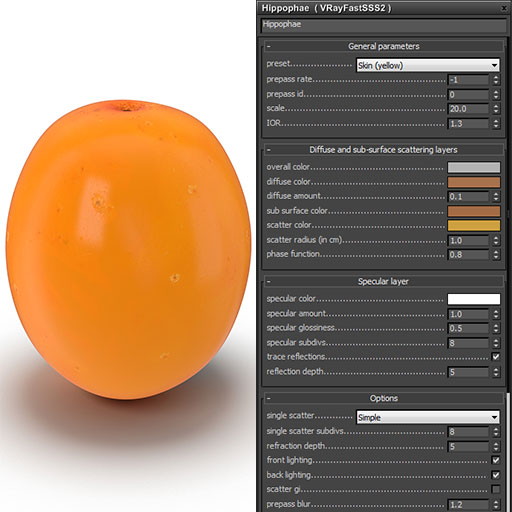
- If using Subsurface Scattering, always use the VrayFastSSS2 Material. If using this material, be sure and add the VraySSS2 Render Element to the scene.
- Color value should never be set at 0 (pure black) or 255 (pure white).
- More best practice settings can be found on the Rendering QuickTips page.
Dark Diffuse Color for Metals
Make sure the Diffuse color of most metal materials is dark in order to keep them looking rich and contrasty. The metal material can use a small amount of color, but the RGB Value should usually be less than 50. In other words, If the metal has a colored reflection (such as gold) Then the color you want the gold to be should be plugged into the Reflection color and the Diffuse color should be a much darker version of that reflection color.
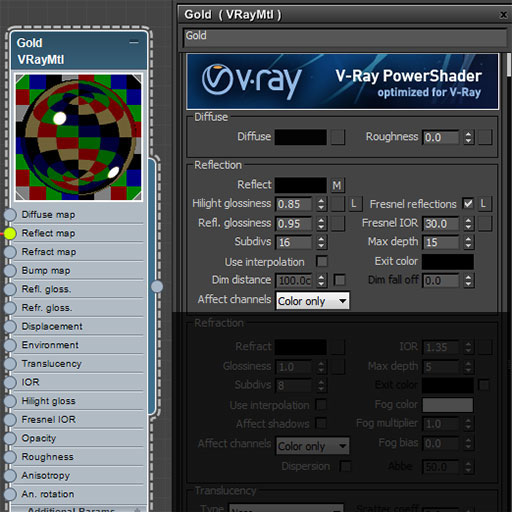
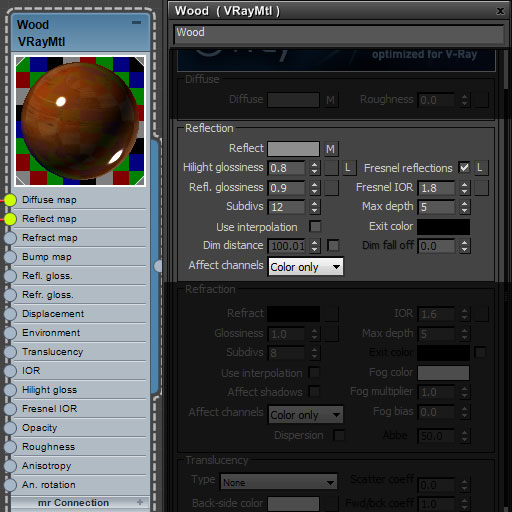
Always Use Fresnel Reflections for Certain Materials
These materials should always use Fresnel Reflections and typically using these IOR settings:
- Water – 1.3
- Glass/Acrylic – 1.5-1.6
- Shiny plastics – 2.2-3
- Polished woods and paint – 3.2-5
- Dull Metals – 12-18
- Reflective metals – 25-40
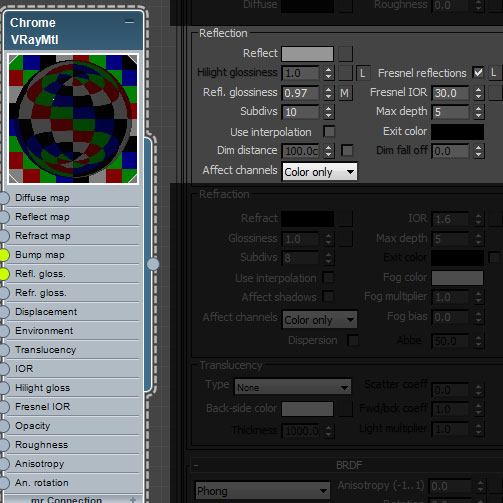
Realistic Material Highlights
Try unlocking the Hilight glossiness and Reflection glossiness and giving the Hilight glossiness a value that is .1-.2 less than the Reflection glossiness. This is a great way to give bright highlights a realistic glow and soften the harshness of sharp highlights.
Translucency Settings
You should almost never use the Translucency settings of the VRay material. Instead, use the VRayFastSSS2 material.
Gamma Settings
Be sure to set-up your computer monitor, Photoshop and 3DsMax correctly for accurate color. Learn more here.
Object Modeled Photo-Real
Make sure the object is modeled to hold up at a high resolution and is photoreal.

Flipped Faces & Unwelded Vertices
Watch out for geometry errors, such as flipped faces or unwelded vertices.
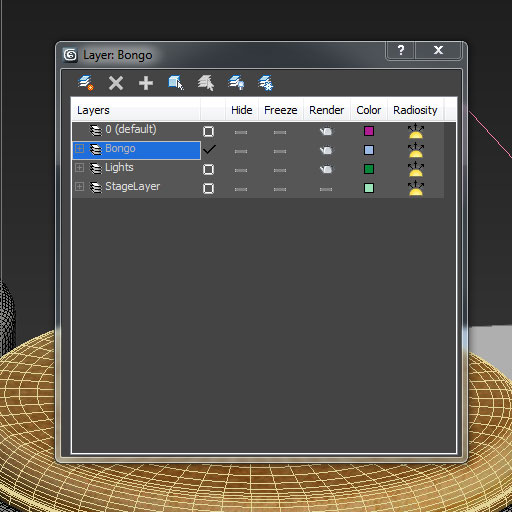
Descriptive Names
Object should be assigned to a layer with a descriptive name and should not reside in the Default layer. For example, a sailboat would be on its own layer, titled Sailboat.
Remove Animation
The scene file should not include animation on any assets.
Editable Poly Only
All scene geometry should be Editable Poly; convert all Editable Mesh, Splines, NURBS, and Patches to Edit Poly.
3ds Max Design Users
If you are using 3ds Max Design, you must turn off the “Use Real-World Scale” setting in the General tab under Customize–>Preferences.
More Information
A guide to best practices and and render settings can be found on our Rendering QuickTips page. This is a great resource to use at all points of the model creation process
We have also created a guide for Scene Organization and Management which will show you the best way to set up and organize your scene. These tips will save you time and make sure that your model is easy to edit and work with.