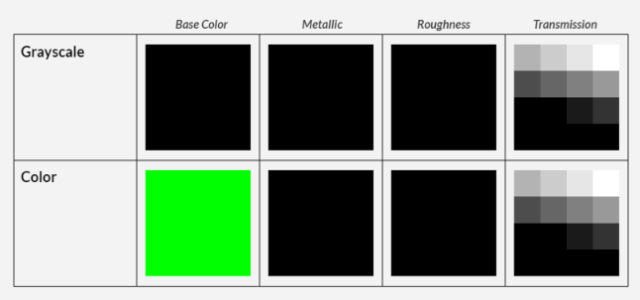
The point of this page is to help our contributors in the creation of transparent textures and materials. This is not to say our way is superior, but in fact a way to achieve the most consistent conversion results to date. The following notes are based on real time friendly modern day practices, so most content should flow seamlessly into current DCC and RT applications.
3ds Max / V-Ray
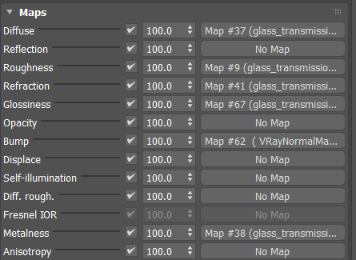
Note that this workflow within 3ds Max uses the VRayMtl shader, and is based upon having all supported map contributions set to 100%
The Basics
In the world of 3D, there is opacity, and there is transparency.
When we say opacity, we typically mean an opacity cutout. Which means an object or part of an object is either visible or not visible.
The opacity map should contain only pure black or pure white values to determine which areas of the object will be visible and not. This should be the only method in which opacity maps are used.
Besides this mention, opacity will not be discussed in this guide.

When the term transparency is used, we refer to objects that are translucent, such as glass or water.
With V-Ray as the renderer, the map used for transparency is called the refraction map.
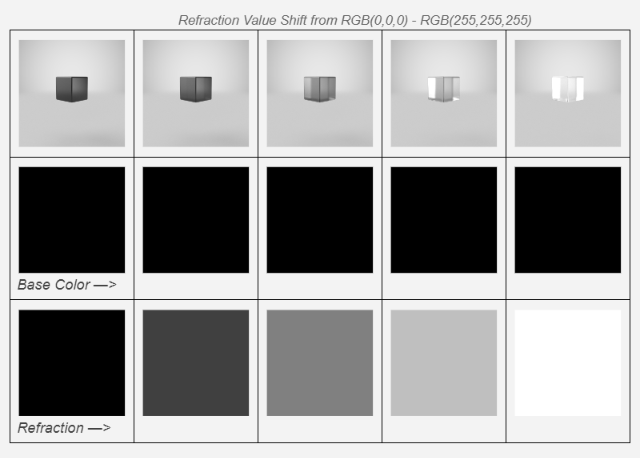
The refraction map can be set as any RGB value you would like.
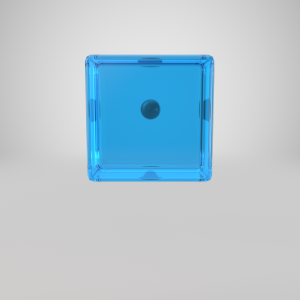
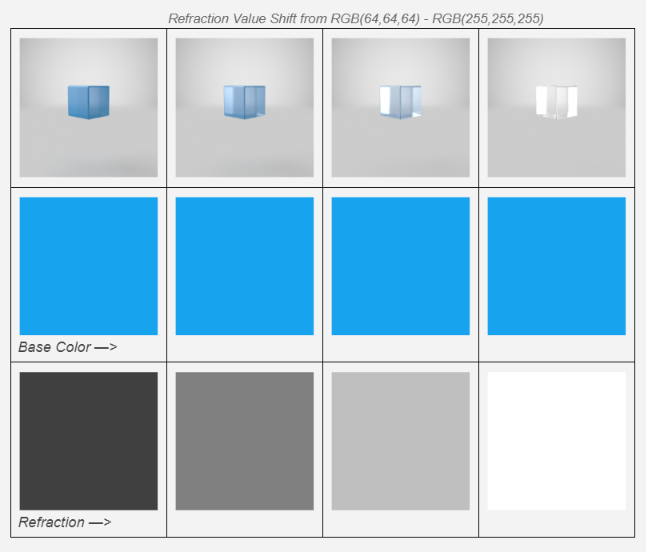
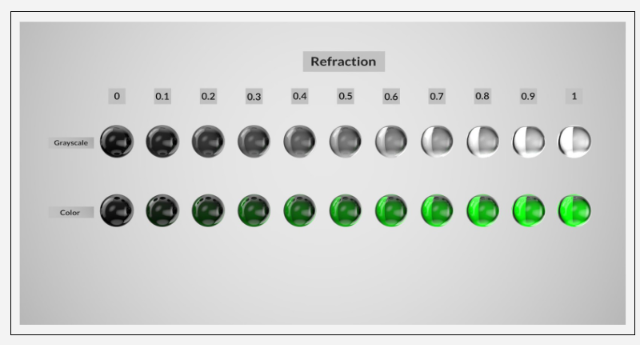
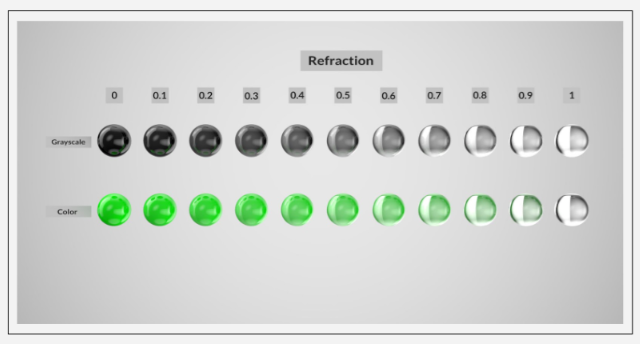
The Brighter the Refraction Color value, the more transparent the object becomes.
Depending on the Refraction Color value, the Base Color can sometimes be a bystander. For example, if the Refraction map is pure white, the Base Color does not contribute to the final render.
A unique aspect of the VRayMtl shader is how it handles Refraction Roughness or should I say Glossiness? You will notice that when enabling the “Use roughness” attribute, Refraction Glossiness does not switch to its roughness counterpart.
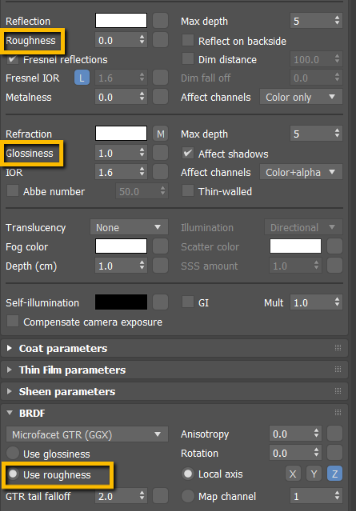
This can be problematic because depending on the roughness values used for the transparent object, the refraction glossiness parameter value could have adverse effects if left at default.
Take the examples below. The first example’s values contradict each other and would lead to inaccurate renders. The second and third examples are correct.


What does this mean? Simply put, we need to invert the roughness map and apply it to the Refraction Glossiness parameter for our models to render correctly.
There are currently two ways in which we can do this.
The first method is achieved by selecting the roughness texture map, navigating to the Output drop down menu, and selecting the Invert checkbox.

The second method is achieved by applying an OSL: Invert node. The roughness map should be plugged into the Input parameter, while the Out parameter is connected to the Refraction Glossiness parameter slot.

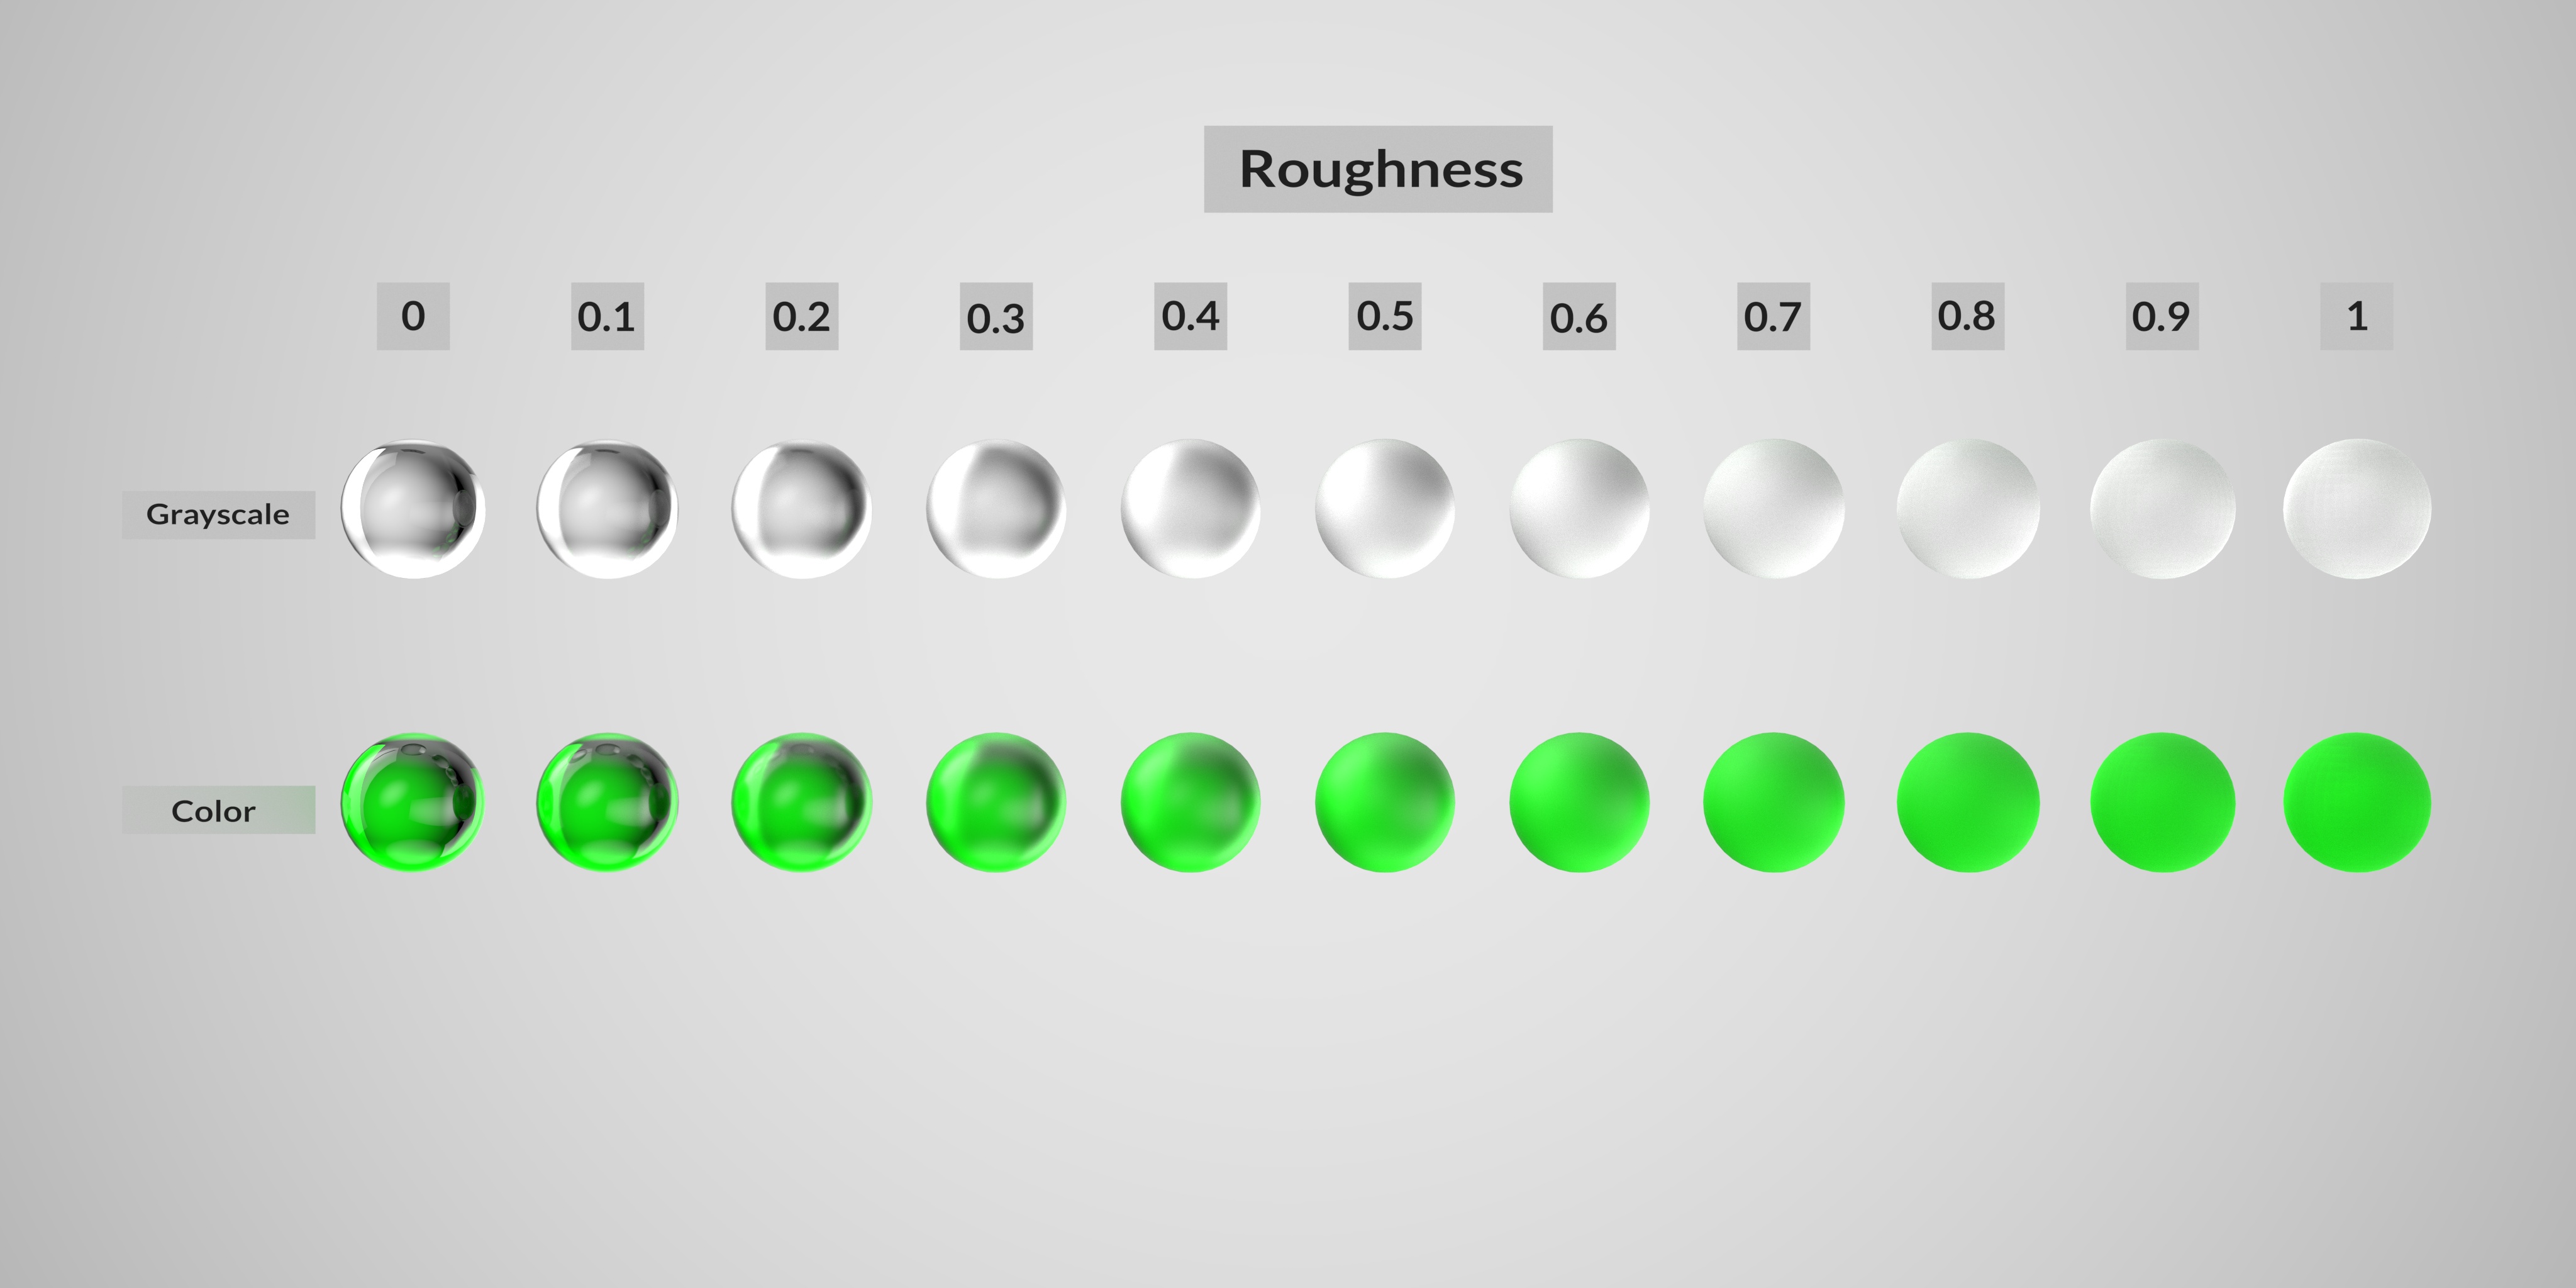
The Roughness map is a great way to reduce the amount of transparency. By brightening the roughness, the objects becomes less transparent. Potential applications of this method would be for areas that are worn down, scratched, dirty, or frosted glass.
The Workflow
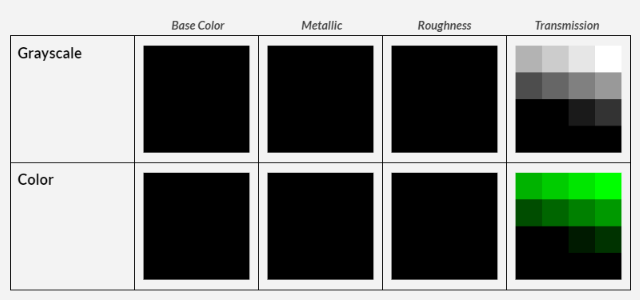
3ds Max’s VRayMtl shader can use color values within the Diffuse Color and Refraction Color parameters. Because of this we provide two different workflows that artists may use when creating transparent materials.
Workflow 01 (Color in Refraction)
Workflow 02 (Color in Diffuse)
Notice that in both workflows, the glass with color only uses color within the Base Color map or the Refraction map. Never both. When color is introduced into both, this can lead to poor conversion results due to RT limitations.

When dealing with grayscale or color glass, we typically keep the Base Color map pure black. We find this gives the most accurate results throughout all DCC applications.
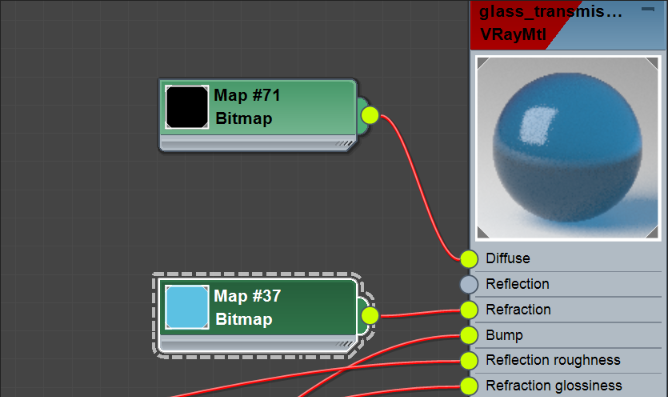
Avoid using bright Base Color values when there is color within the Refraction map. As you can see in the example below, the intended Refraction color becomes non existent.
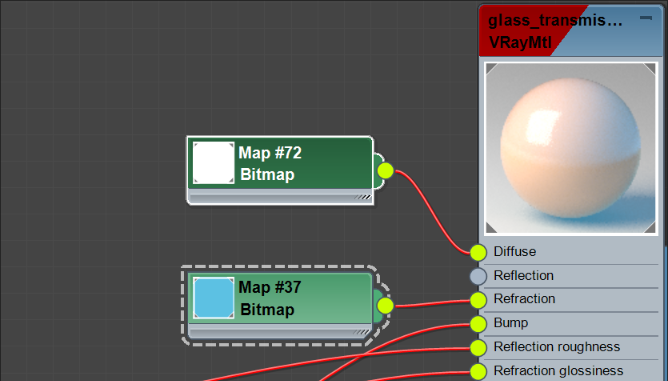
Summary
Now let’s bring it all together.
First to decide if you are creating grayscale or glass with color. Once this is decided, the process is simple.
Base Color – For most cases, keep the Base Color map pure black or close to it.
Refraction – Select desired value for the Refraction Color. The brighter the value, the more transparent the object becomes. Test render and adjust if color or visibility through the transparent object is not to your liking.
Roughness – Adjust the grayscale value until desired look is achieved. Brighter the map is, the more diffuse highlights become, and less transparent the object becomes as well. Make sure to invert the roughness map and plug into the Refraction Glossiness parameter based off of the two examples given above.
We hope this information helps. Please keep an eye out for future SCv2 updates!

