
While you may think you can just use a VrayLight mat to create light, it is possible to create a more realistic look by adding a few extra elements.
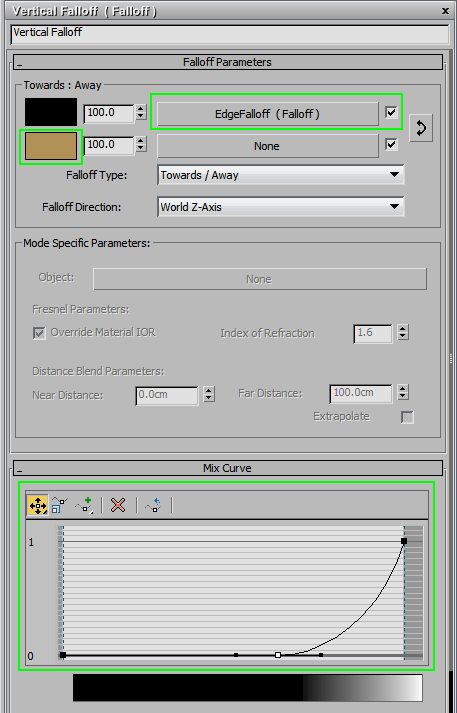
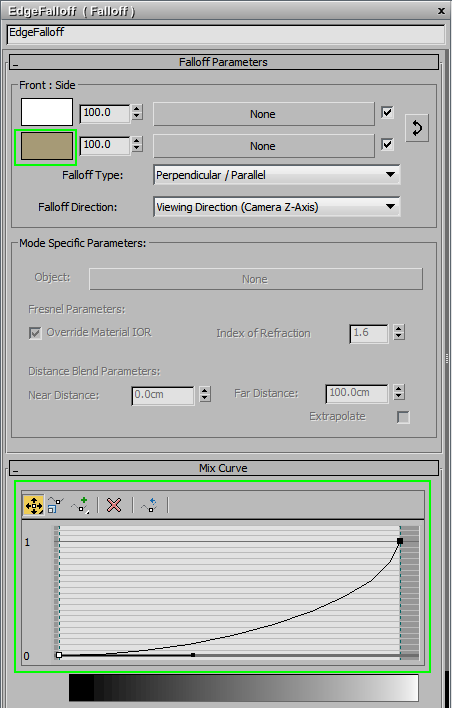
Use a combination of two Falloff maps to control the VrayLightMtl. One of them will make the bottom of the bulb a bit darker and the second will make the edges of the bulb darker as well. The options are pretty self explanatory:
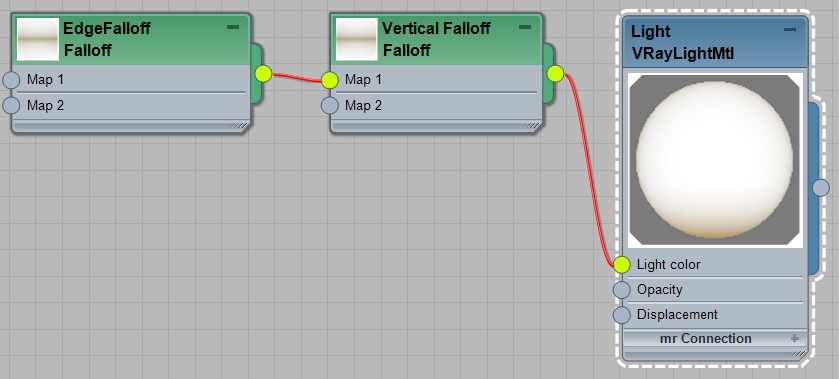
Here are our settings:
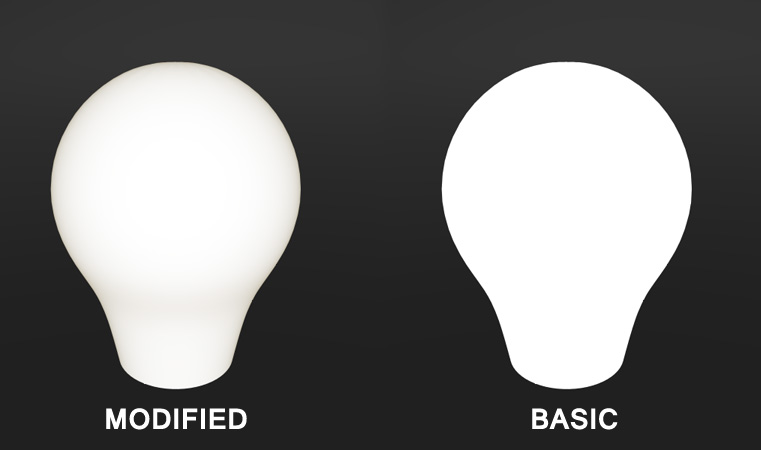
Now compare the basic VRayLight with the modified version:
To make the bulb brighter or darker, change either the colors or the Light multiplier. There is one thing to keep in mind: this is a material that will be visible in the render, so it is not something that should be used for illuminating the scene. To illuminate the scene, create a VRaySphereLight, roughly the same size as the bulb, and place it over the bulb model. Make sure you set the light to exclude the bulb, so it only illuminates the scene. This setup allows you to control both the look of the lightbulb and the intensity of the lighting in the scene.
This is all a cheat, of course; the physically correct way to do this would be a perfect lightbulb model, with a matted glass shader and a strong, small light source inside. Lighting a scene with something like that would be murderous on the render time, not to mention the amount of noise.


