
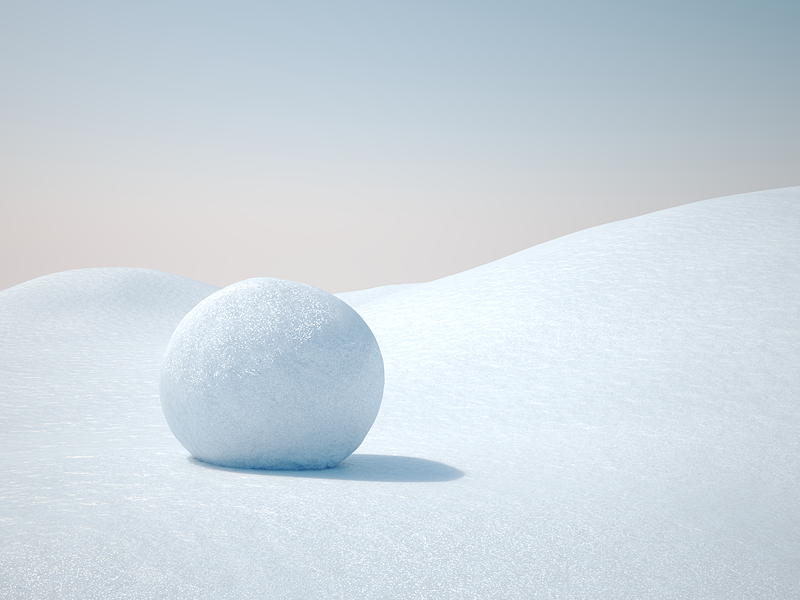
Snow can be a tricky material. It has two main features: SSS and sparkling flakes that reflect light in different directions. To create the shader, we will blend together a VrayFastSSS2 material and VrayFlakesMtl.
The SSS part should be set up as follows: Colors create the bluish cast for the snow. Set large radius and Phase to 0.8, so light mostly goes forward within the object. Scatter type can be left as ‘simple’ for fast results.

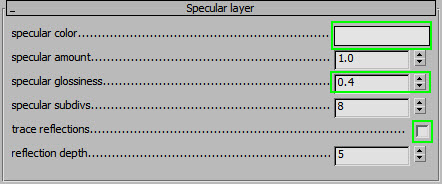
Speculars can be tuned down a little and made a bit blurrier than the default. Choosing to use no ‘trace reflections’ seems to work better with this “faked” approach.
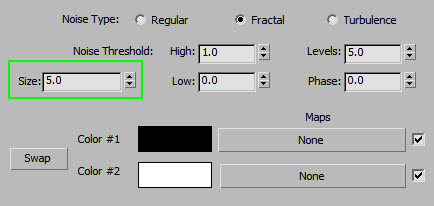
Finally, a bump map is needed. In this case, a simple mix of two differently-sized noise maps works just fine. If you need a different look for the snow, you can change the noise size or type, or use a custom texture.
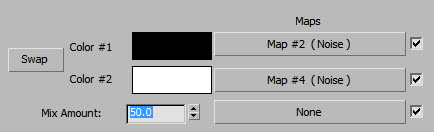

This is how the first (SSS) layer looks:

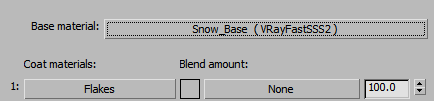
The second layer is VrayFlakesMtl. Use it to add a sparkling effect to the snow.
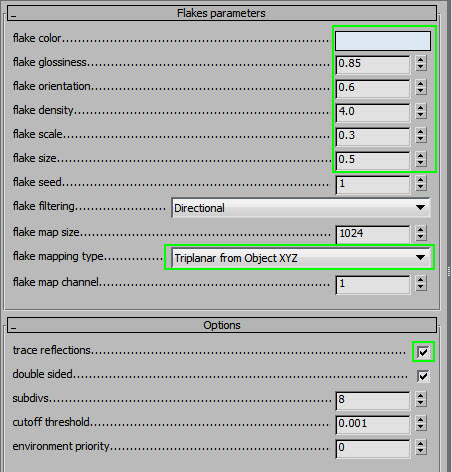
You can adjust the density, scale, and size of the flakes to fit your object better. The other settings should probably stay as they are.
If the flakes are too large, just reduce the Flake Scale value to something like 0.005~0.05.
Triplanar mapping ensures that the flakes look good, regardless of the UVs.
Flake orientation is set up to reflect at wider range of angles than just near the reflection hotspot. This makes it look like the flakes are facing random directions, rather than being perpendicular to the surface (it helps to make the snow look less flat and more fluffy). For wet, hard snow, reduce the orientation value a bit.
If you want to change the amount of sparkles in the snow, just change the Blend amount color in the material.
Comments
Very nice material .
Tested without modifications of the default settings of the VrayFlakes.
Very interesting rendering !
Thanks for sharing.