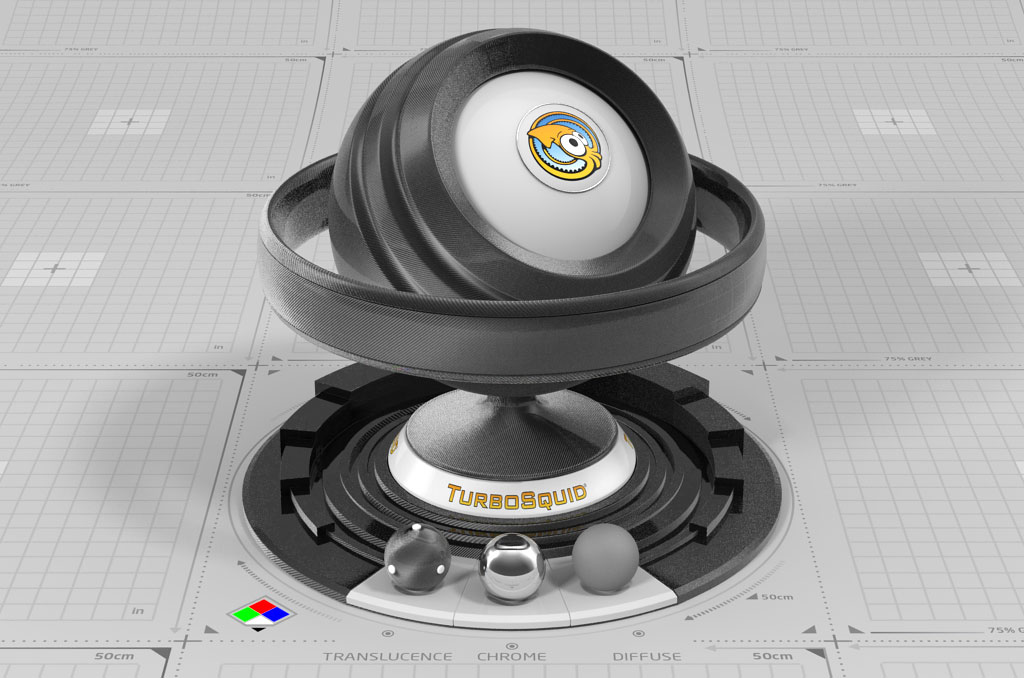
Carbon fiber is a complex material that can be tricky.

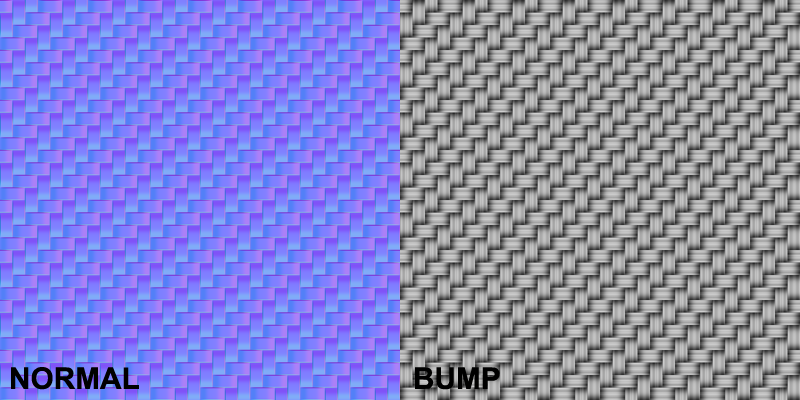
We can break this material down to two layers: woven carbon fiber that reflects light in two distinct directions, depending on the weave direction; and a clear coat that is pretty smooth and reflective.
The first layer is Dark grey Diffuse, some blurred Fresnel reflections, and– most importantly– Anisotropy that is set up to reflect light, depending on the angle of weave.
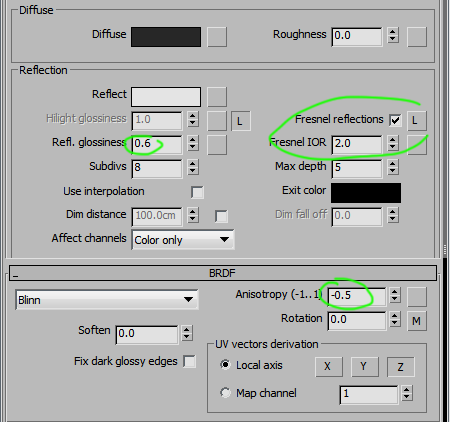
To achieve this look, use the map in the An.Rotation slot.
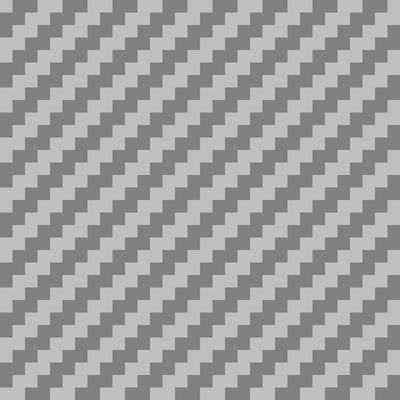
Finally, the Bump slot also has a Normal map to create the weave effect, combined with a Bump map that contains smaller details, for extreme closeups.
All the weave textures need to have the same tiling options. Depending on the Objects UVs, you may need to increase or decrease the tiling amount.
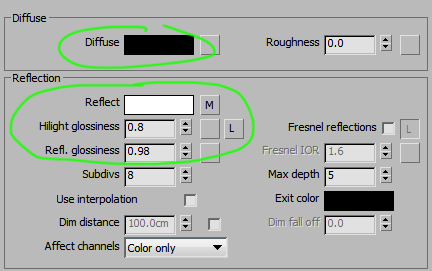
The coat layer for this material is all about the reflections.
It has no Diffuse (black) and it’s very reflective (with a texture map for some slight imperfections) in the Reflect slot. Highlight Gloss is unlinked and lowered to add a bit of fake specular bloom.
Fresnel is OFF, since we’ll use a Fresnel map to blend this layer onto the base layer. Otherwise, the effect would be squared.
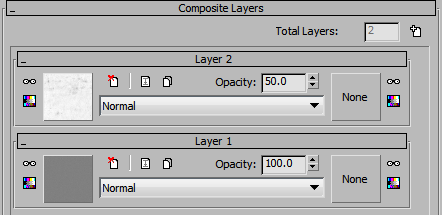
Use a weak Bump map– which is a composite of some small scratches and a Noise map– for a bit of the ‘orange peel’ effect.
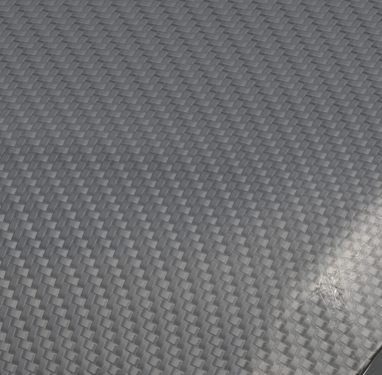
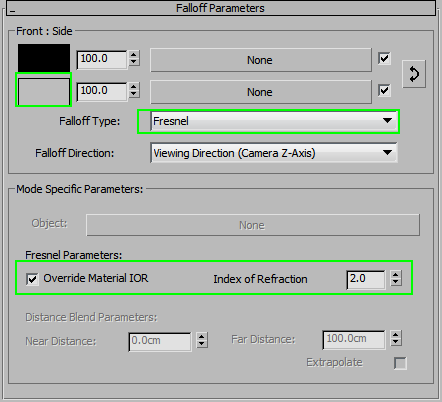
These two layers are mixed together in a V-ray Blend. Blend amount is controlled by a Falloff map, set to Fresnel, with an IOR of 2. You can control the intensity of this coat by adjusting the second color slot in this map. Make it lighter to increase the clear coat strength, or darker to lower it.