

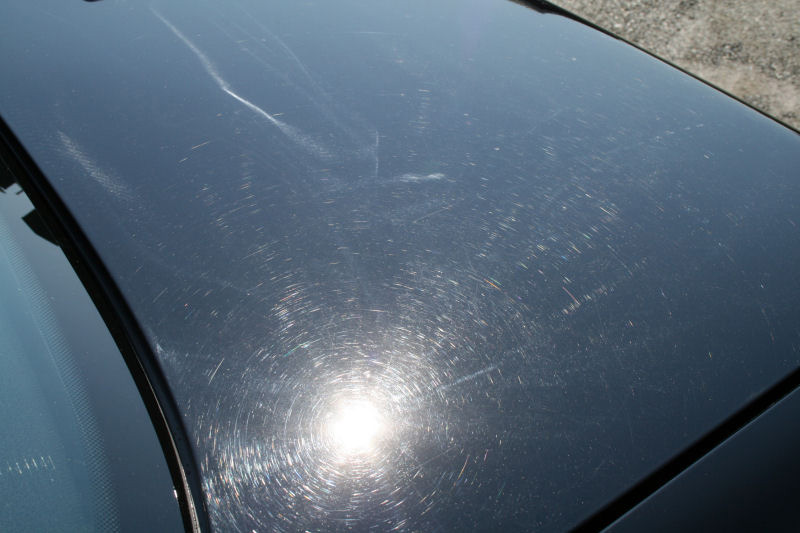
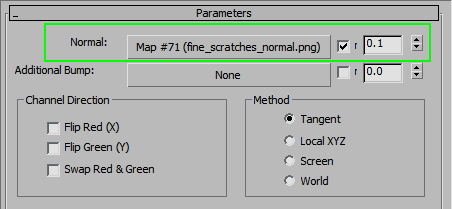
This effect can be quite difficult to replicate in 3D. The scratches are so thin that a regular bump map will not work; we have to resort to a Normal map, which is much better at showing fine detail.
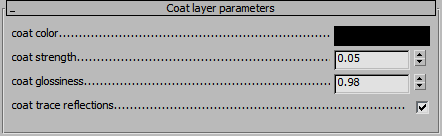
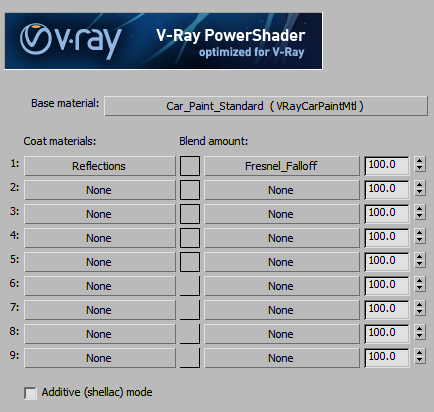
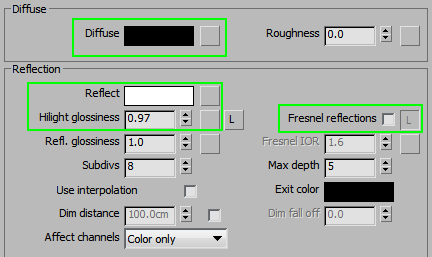
Since this effect is visible only in reflections, we have to break up the material into multiple parts. Create a base material as usual, but if it has strong, glossy reflections, turn them off altogether. In this example, we are using a VRayCarPaintMtl, which has those type of reflections. To turn them off, change the coat layer color to pure black. We will add the reflections as a separate layer in VrayBlend.
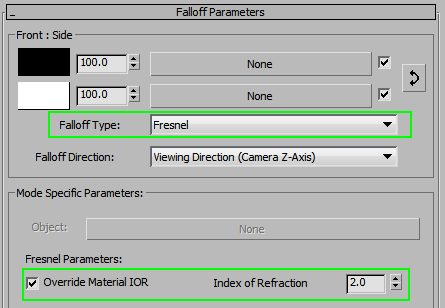
This second layer is another VrayBlend. The mask is a Falloff map, set to Fresnel, and Fresnel value is adjusted between 1.6~2.4, depending on the strength of the Reflections.
To create the reflection layer, use a material with pure black diffuse, pure white reflections, and a Normal Bump map in the Bump slot. The strength of this map is pretty low, because otherwise, the scratches won’t look quite right. Be sure to unlink the Specular gloss and lower it a bit, to create some fake highlight blooming.
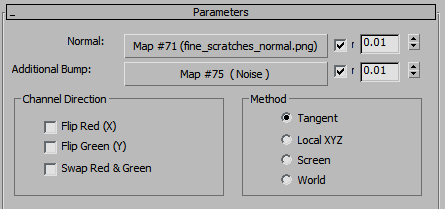
To get rid of the black scratches in the highlight spot, we need another layer (it’s exactly the same, but the Normal map strength is much lower). When the two are blended together, we get a white highlight with a circular scratch effect around it.

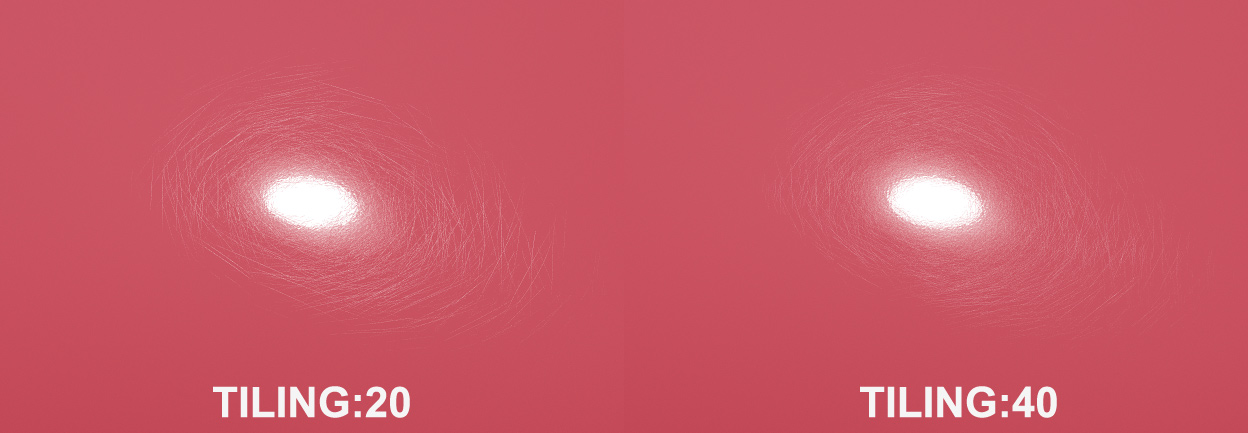
The length of the scratches can be adjusted by changing the Tiling of the Normal Map.
If you want to add in the ‘orange peel’ effect that is so often visible on painted or lacquered surfaces, add it to the Bump slot in the second level of the reflection layer.
You can also use this “scratched” coat on any material: wood, plastic, etc.