This material tutorial will cover ‘regular’ fabrics like cotton, wool, linen, basic polyester, etc. These are fabrics that look a bit soft but are not shiny or velvety. Most fabrics fall into this category.
Diffuse and Softness
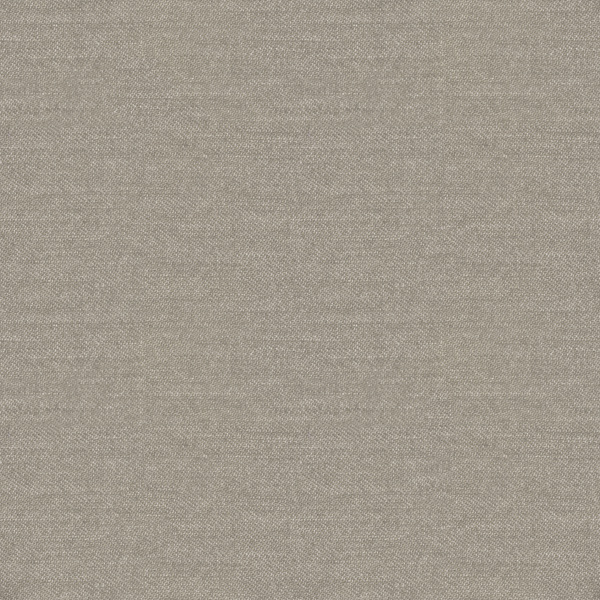
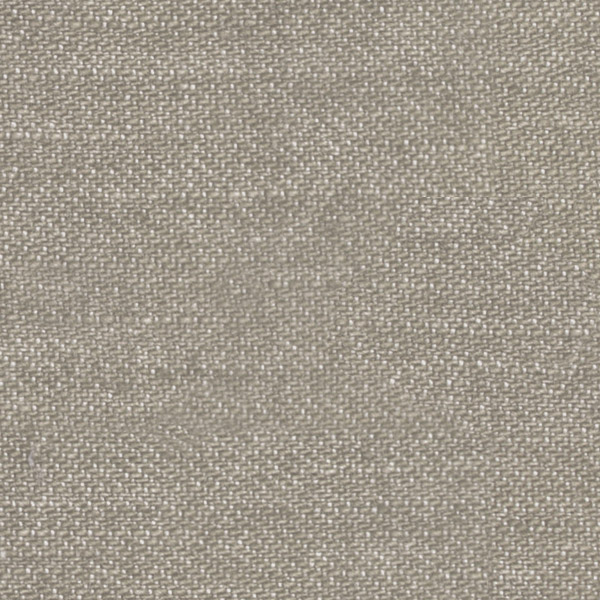
The best way to start creating a fabric shader is by using a good photo. The pictured fabric must be flat, and it should be as straight as possible. It’s not always possible to find this exact kind of photo, but if one is available, then it’s the best thing to use.
Once you have your photo, the first step is to create a tileable Diffuse map. It can be a bit tricky to make it seamless, but if your starting photo is large enough to include the whole pattern, it should be doable with some use of the Offset filter and Clone stamp tool.
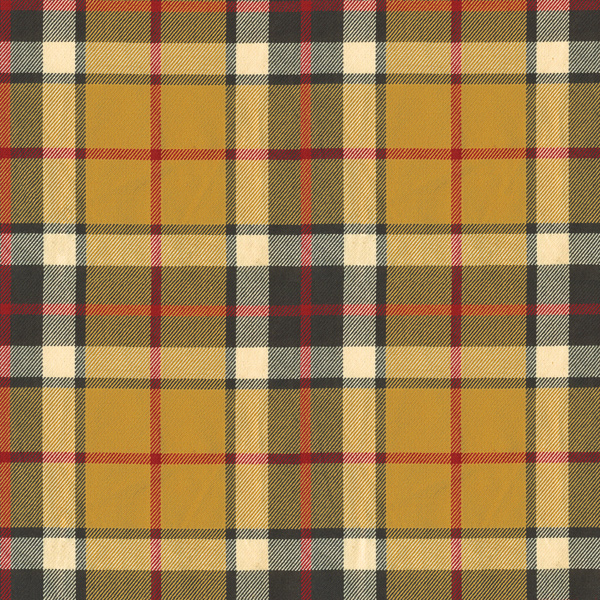
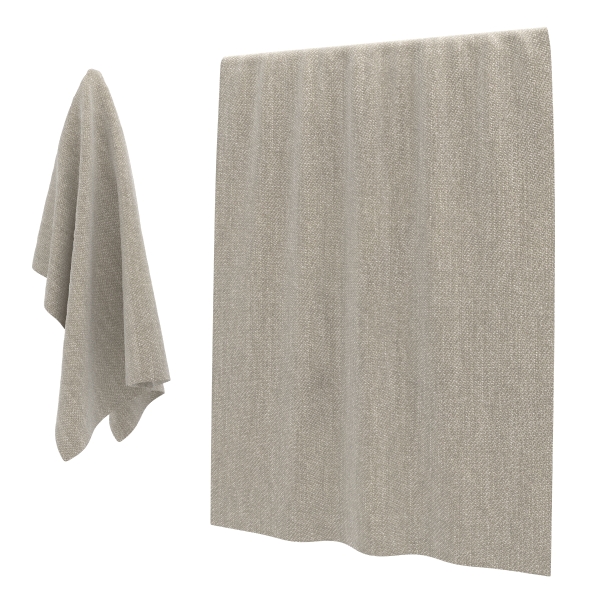
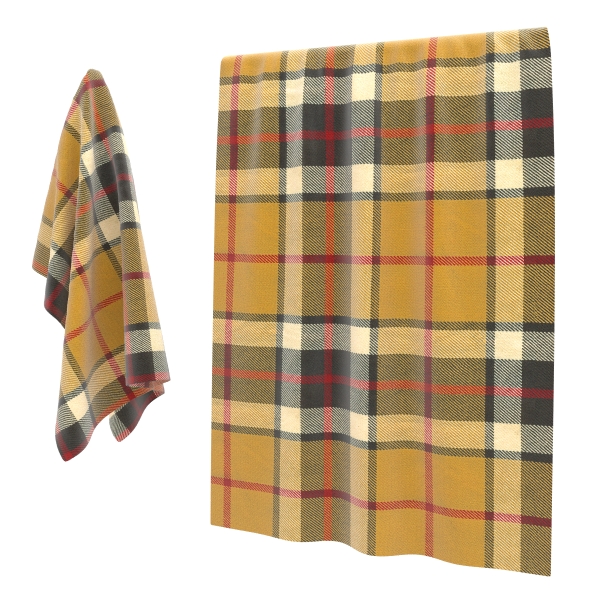
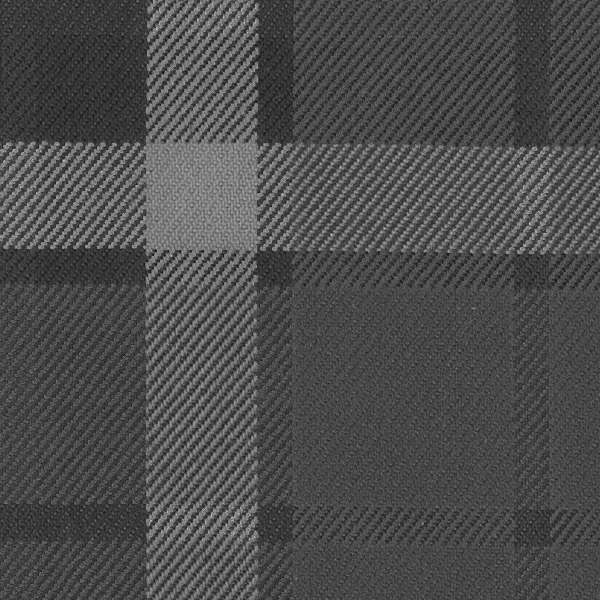
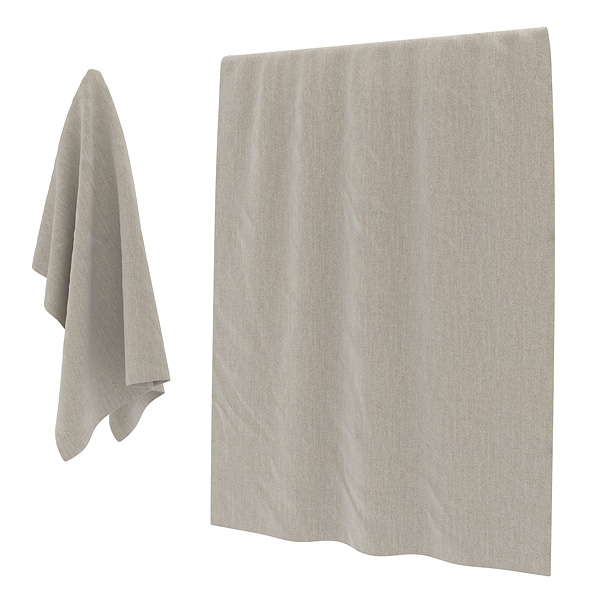
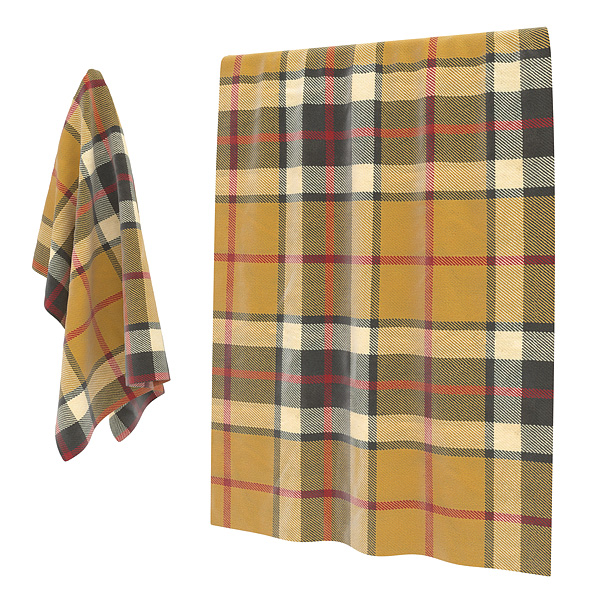
We’ve made two diffuse maps for this tutorial: one is plain and the other has a plaid pattern. The patterned fabric will need some extra work to achieve a good result.
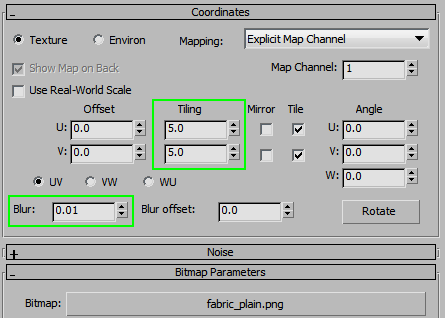
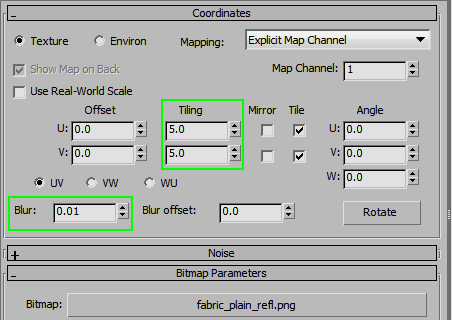
Let’s start by creating a VrayMtl and assigning the texture to the Diffuse slot. When images have small, detailed patterns (like the threads in most fabrics), you want to make sure you always reduce the Blur of the texture to 0.01. That way, the details will not get washed out and will still look crisp from further away.
Adjust the Tiling as needed.
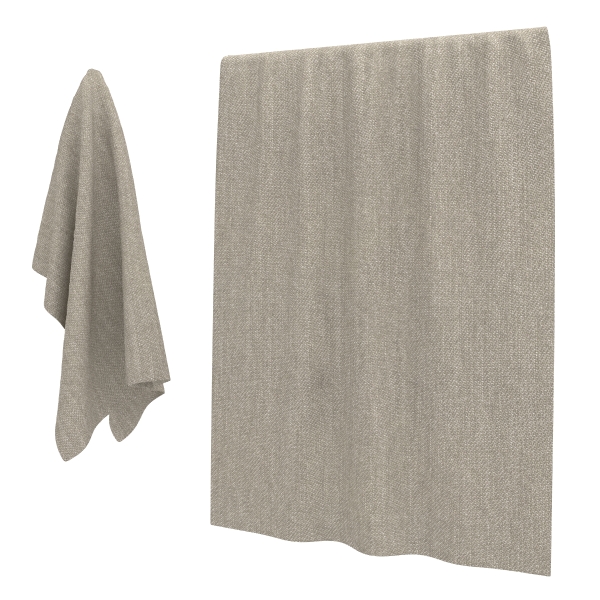
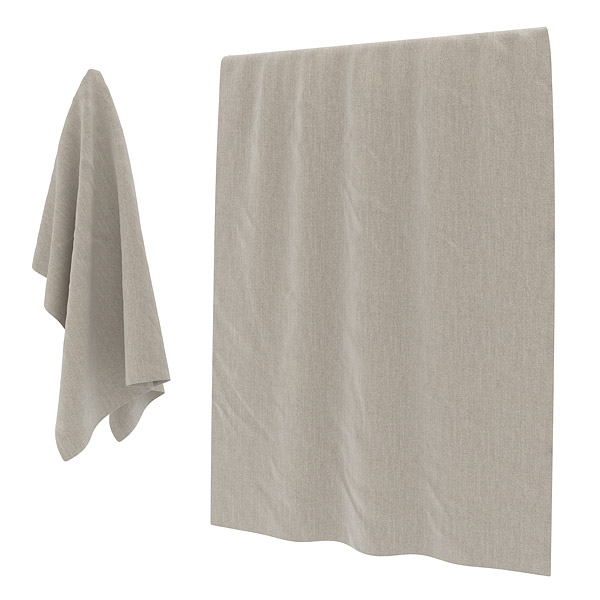
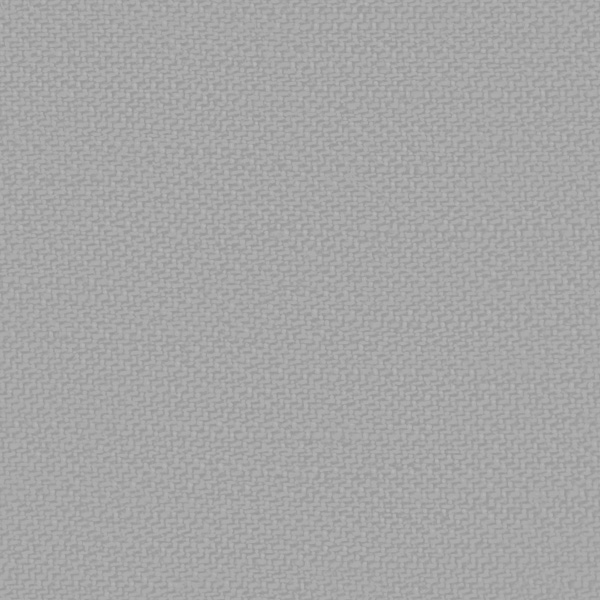
Here’s the test render of the plain fabric:
Currently, it looks sort of flat and a bit boring. It should look ‘softer’ and a bit more 3-dimensional.
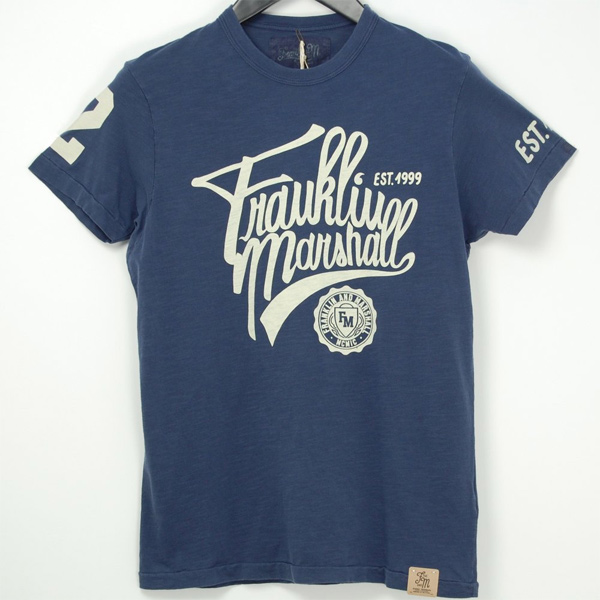
Micro fibers that stick out in all directions are what give most fabrics a “soft” look. Look at this photo of a cotton t-shirt as an example. Notice the lighter-colored areas around all the folds and creases; these are the micro fibers catching the light and reflecting it.
To re-create this kind of hair geometry in 3D is not feasible with current technology, but there is a good way to fake it. The best thing about this “faked” look is that it is fast – hundreds of times faster than using real hair.
Change the Diffuse map to a Falloff map. We can use it to give the ‘edge’ of the object a different color. However, if you use the default settings, the result is much too strong and unnatural.

We’ll do two things to make this look more realistic.
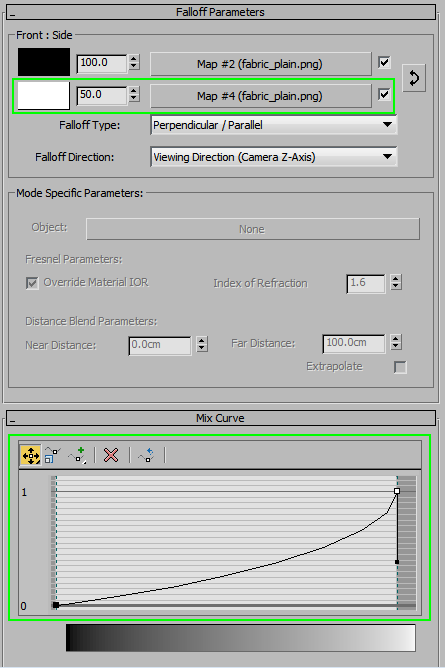
First, copy the Diffuse texture to the second Falloff slot and reduce the amount to 50 (this will mix it with 50% of the white color swatch). You can also make a new texture for this purpose if you wish; just take the image and make it lighter and less saturated in Photoshop.
Next, adjust the Falloff Curve as pictured in the screenshot (below). This will make sure the effect is mostly at the very edge of the fold. This curve is different for different fabrics, so play around with it until it fits your reference.
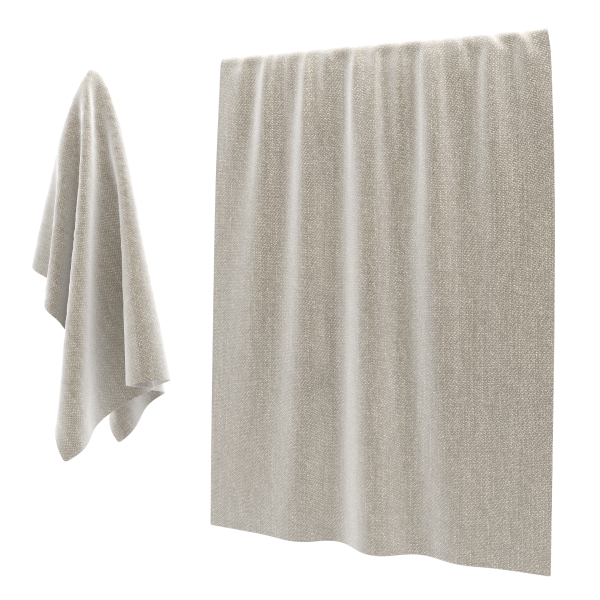
Now it’s starting to look like fabric! Let’s do the same thing with the plaid fabric.
For lighter fabrics, you might need to make the second Falloff slot a bit lighter. For dark fabrics, you might need to make it darker. Use your eyes to make a judgement.
Normal Maps
Right now, our fabrics are perfectly smooth. It’s not a very realistic look for them, so add some bump to show the weave pattern. It’s especially useful for realistic closeups. Download and install Nvidia Texture Tools for Photoshop for this next step.
Generate some normal maps to use in the Bump slot. Start with the plain fabric.
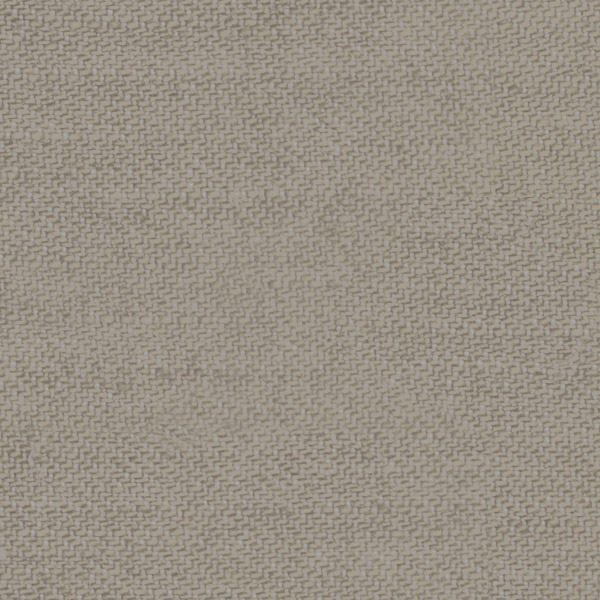
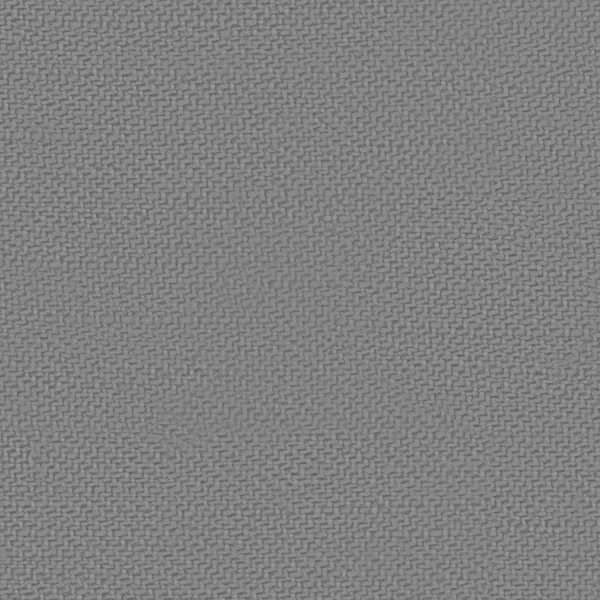
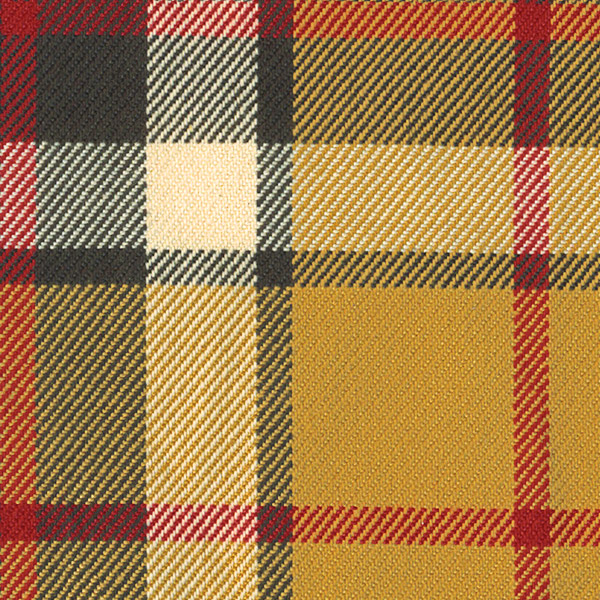
Here’s our starting image. Notice that there are white threads and brown threads. If we run the NormalMap generator now, those white areas will stick out way more than the rest of the fabric.
We recommend following these steps below on each different layer. You’ll reuse some of the resulting steps later, when creating Reflect and Glossiness maps.
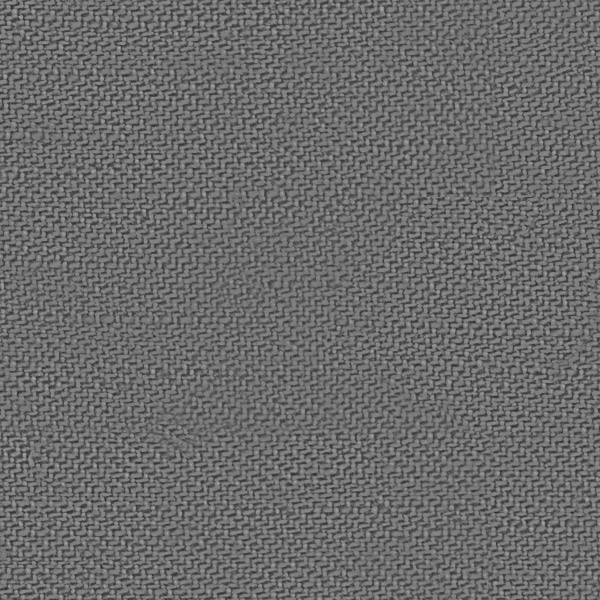
Get rid of color variation in the source map. Select all the white thread areas with the Color Range tool and darken them a bit to match the brightness of the rest of the image.
Desaturate.
Run a High Pass filter to even it out some more.
Increase the Contrast with Curves a bit.
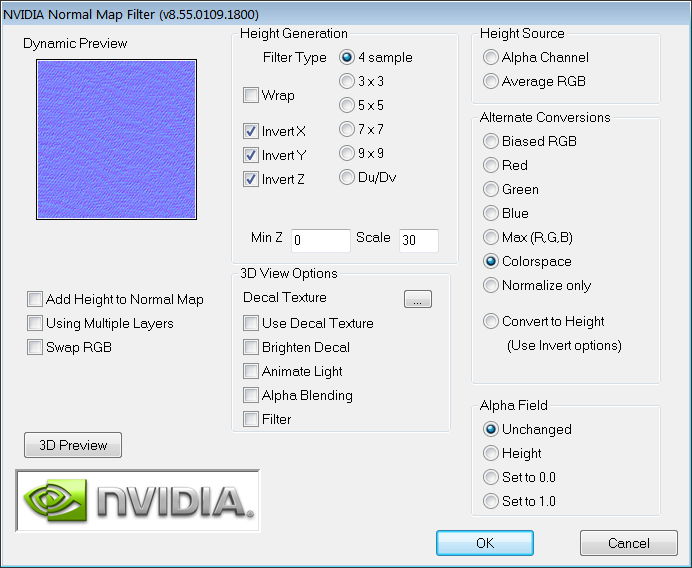
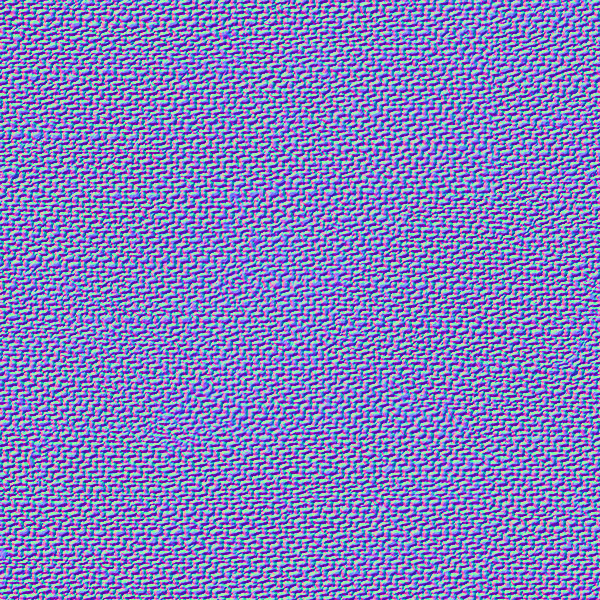
Use Nvidia NormalMapFilter with these settings to generate the Normal map. Different fabrics might need different Scale settings and some of them might look better if the ‘Flip’ options stay off.
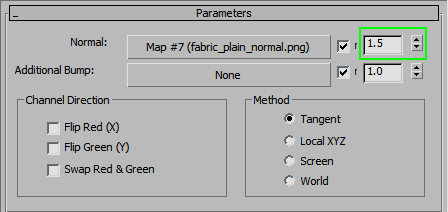
Now it’s ready to be assigned to the Bump slot. Use NormalBump Map with the generated texture in the first slot. Adjust the strength as necessary (for our purposes, we used 1.5).
This looks much better. Click on the image to see the high-res detail.
Do the same thing for the patterned fabric. This one will be a bit trickier because of all the different colors. If we do not try to even them out, the result will have some squares that are higher and smoother than others, even though we are looking for a flat fabric with flat weave pattern.
Again, we recommend using the following steps on each different layer, so the resulting steps can be reused later, when creating Reflect and Glossiness maps.
Start with this image.
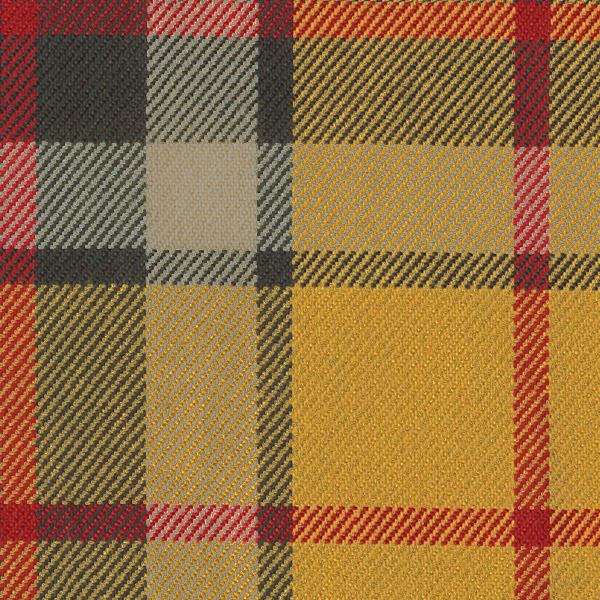
Use Color Range for darkening the lightest areas a bit.
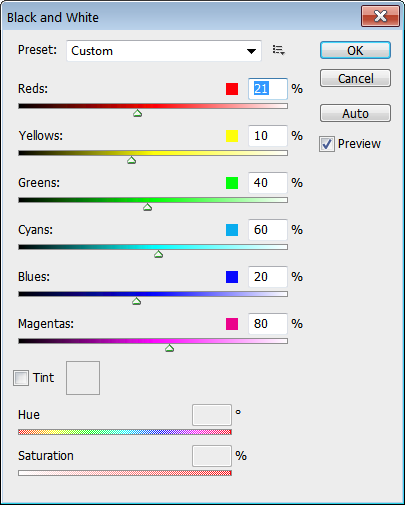
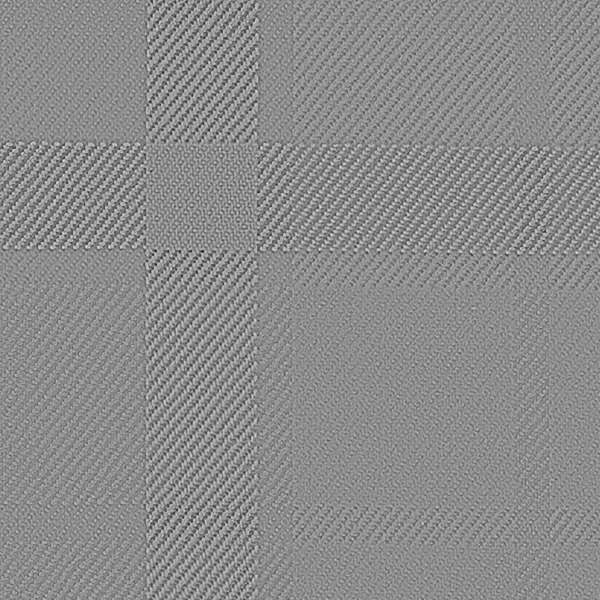
Use the Black and White filter, adjusted to even out the gray colors as much as possible.
Use the High Pass filter to even it out some more.
Use the median filter to smooth the sharp edges a bit. A low value like 1~2 pixels.
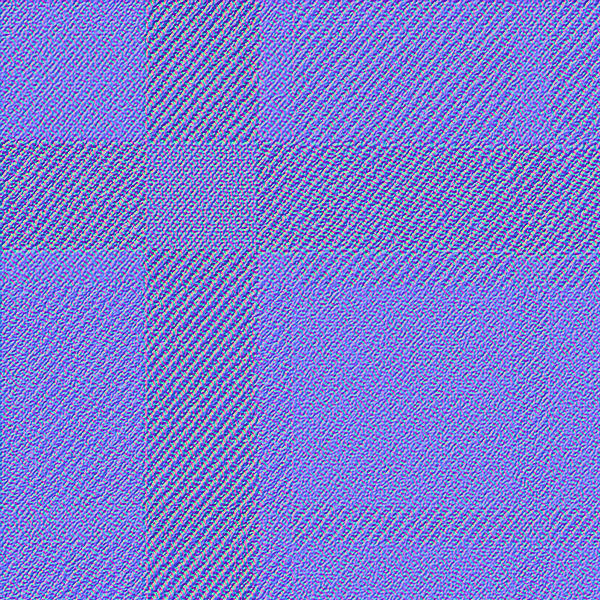
Nvidia NormalMapFilter (using the same settings as before) will generate the final map.
The result is not perfect, but for such a high contrast pattern, this will be just fine.
Bump Maps
In addition to the Normal Bump we used for the weave, we also want to use some sort of a wrinkle map. This will help to make the fabric look a bit more natural.
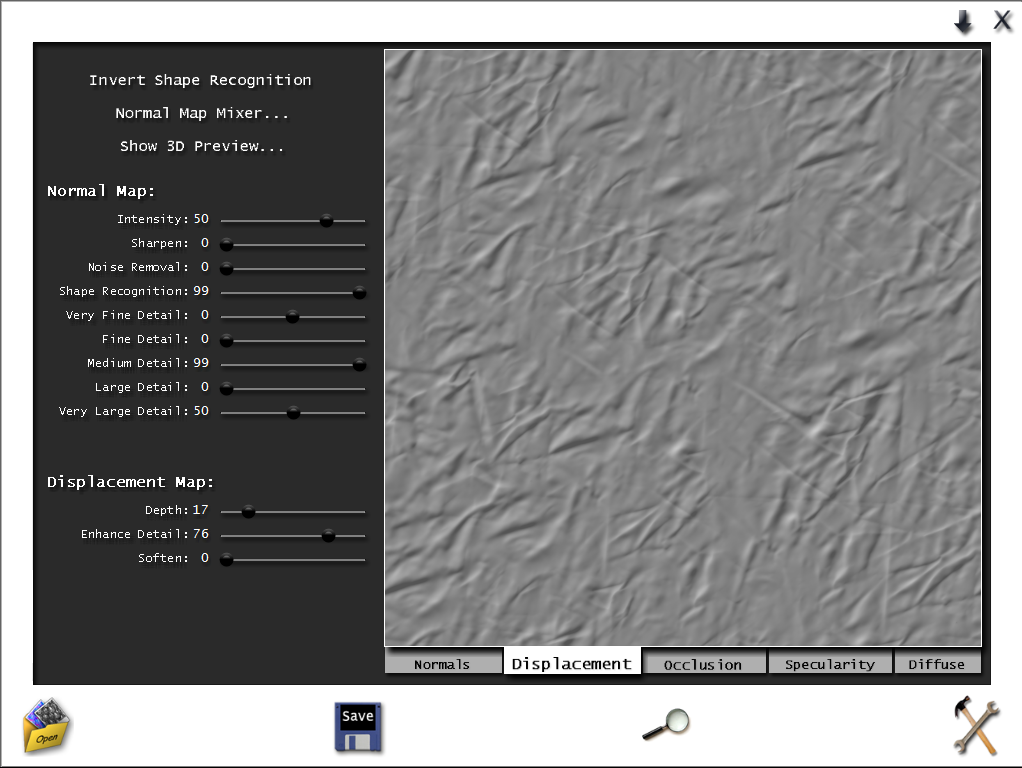
Wrinkles can be created by generating a height map from something like wrinkled paper, foil, or fabric. You can use CrazyBump software for this step; it can take a photo and, with some tweaking, create a decent height map from it.
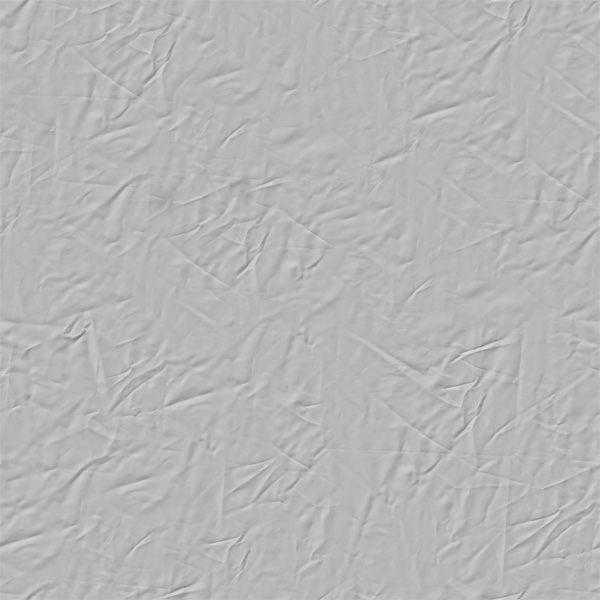
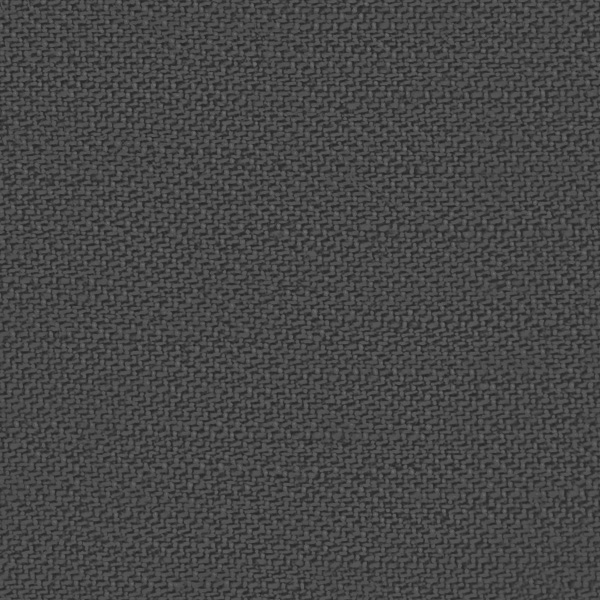
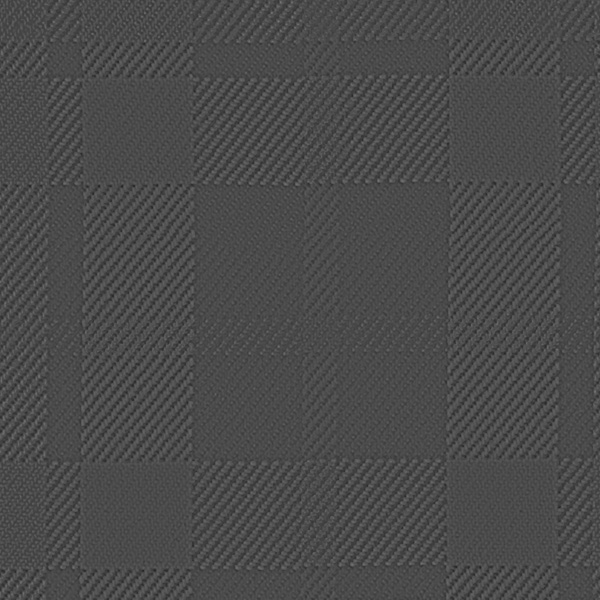
Here is the source we’ll use for this example. It is a tileable texture.
And here is the result from Crazybump:
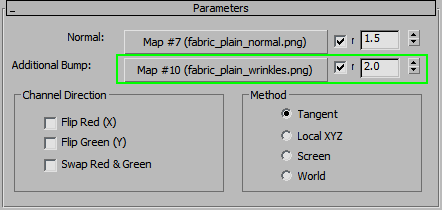
Assign it to the Normal Bump’s second slot and increase the strength to 2. Below is the resulting render (we also increased the fabric texture tiling a bit to make the pattern size more realistic).
Different maps give different results, so experiment a bit with converting some photos to height maps. You can also scale and rotate the wrinkle pattern using bitmap Tiling and Rotation options in 3Ds max (as we did for the plaid fabric). Since the texture is tileable, it is very easy to do.
Reflect Maps
The last step for these fabrics is adding some weak, diffused reflections.
Open the image you used for Normal maps, and repeat the last step before generating normals.
First, add a Hue/Saturation adjustment layer and reduce the Lightness to get a dark grey image. This is our Reflection map:
Next, add another Hue/Saturation layer and increase the Lightness to get the Gloss map. It should be a bit lighter than medium grey. This will give us blurred reflections, but not so blurry that it causes a lot of noise and a slow render speed.
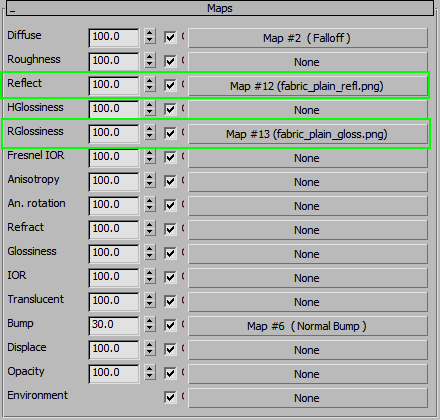
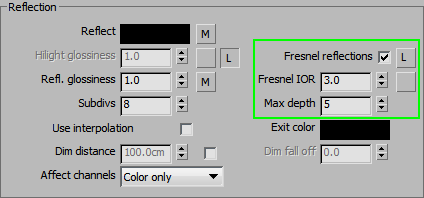
Now assign the maps to the appropriate slots, using the same tiling and Blur settings as the Diffuse texture. Enable Fresnel and set IOR to 3~4 Once you do that, the basic fabric material is finished!
For the plaid fabric, we’ll repeat the same steps.
Start with the last step before normal map creation and adjust lightness for the Reflection map.
Make it brighter for the Gloss map.
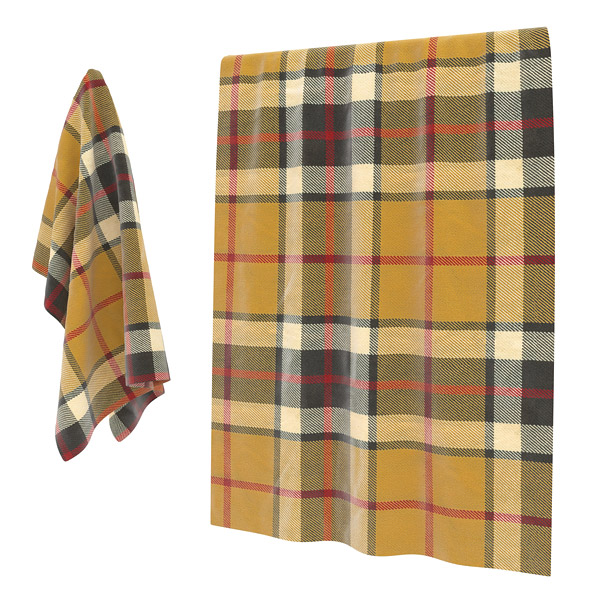
This is the result after setting the maps up exactly the same way as the plain fabric.
Stitching
It’s always best to model stitching using geometry. However, since this is a tutorial on shader creation, we’ll go through a flexible texture-based method.
This method is using a VrayBlendMtl and a b&w mask of the stitching. The main advantage is that you do not have to include the stitching in every map (Diffuse, Normal, Bump, etc.) It’s also easy to change the color and look of the stitching without adjusting any bitmaps. The main advantage to this is the ability to quickly swap out the fabric material for any other fabric and retain the same stitching.
If you were to add stitching directly to the textures, each object would need a new set of maps and each texture would need the stitching added, which is a very time and resource intensive approach.
If you use this method, you only need one mask for every object and you can change the fabric material and stitching color to whatever you need very quickly.
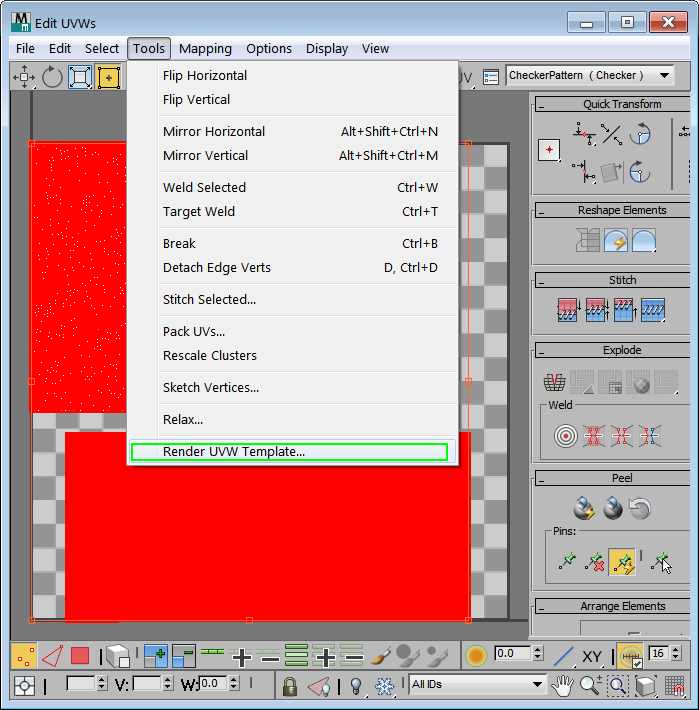
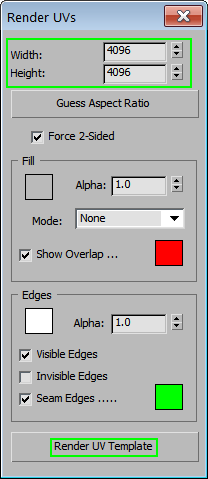
The first step is creating the B&W stitching mask. First, render out the object’s UVs at around 4k resolution. Add an Unwrap UVW modifier and open the UV editor to do that.
Open that image in your favorite vector image editor that has decent curve drawing tools and stroke effects for the lines.
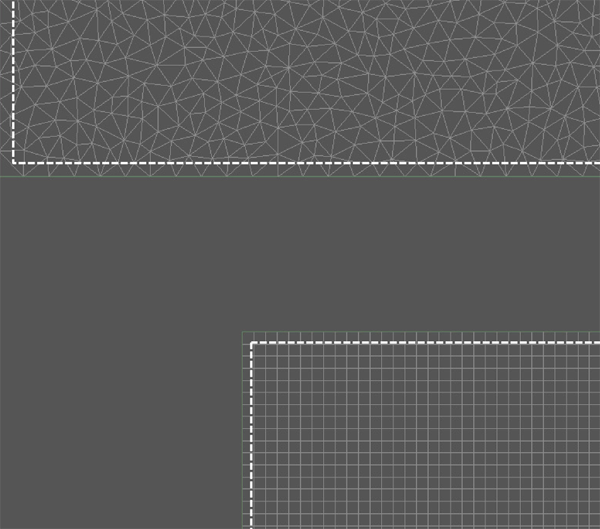
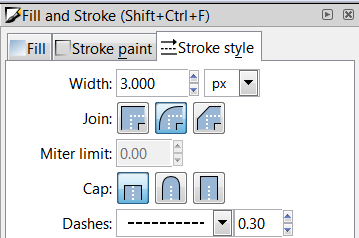
Draw the lines in the appropriate locations– around seams or near the edges– wherever the object requires it. Give those lines white color and dashed stroke. Try to keep the stroke thickness at least 3px for good quality results. If that is not possible (stroke looks very thick), try increasing the image size until it looks correct.
This is the result (using Inkscape).
Delete the background and export the image as a png file. Open it in Photoshop (it should now have a transparent background). Add a black layer below the stitching, and create a mask.
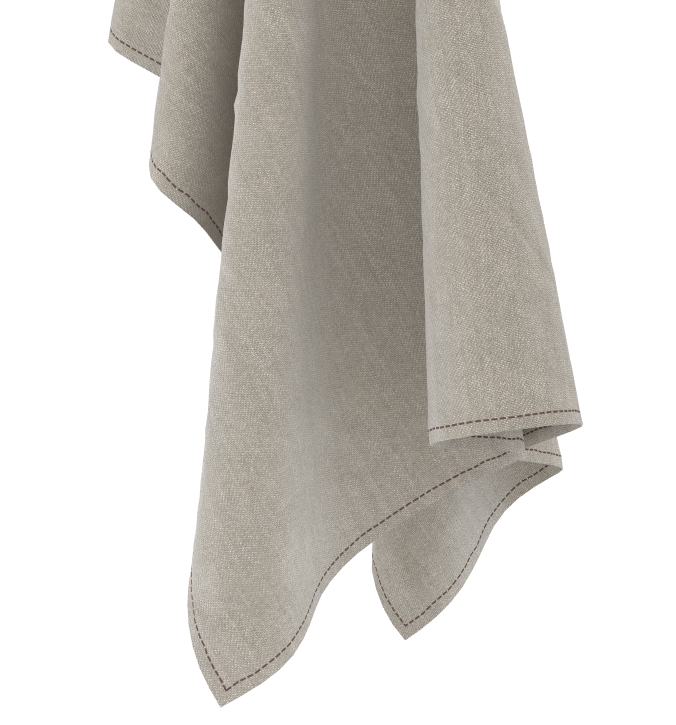
We can now create a VrayBlendMtl with our plain fabric in the Base slot and a simple brownish material in the Coat slot (give it some weak, blurry reflections). Use the b&w image as a mask, which will be the stitching.
To make it even more realistic, create a Bump map for the stitching. Open your mask in Photoshop, select the white areas, and blur them with a radius of 1 px. Now, the stitches should have nice, rounded outlines. Save the image as a different file.
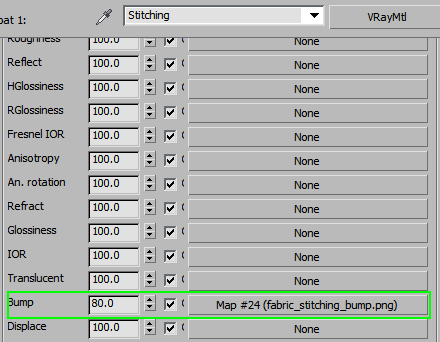
Assign it to the Bump slot of the Coat material and increase the Bump amount to 80 for a stronger effect. The difference is not very obvious, but every little bit helps to achieve more realistic results.
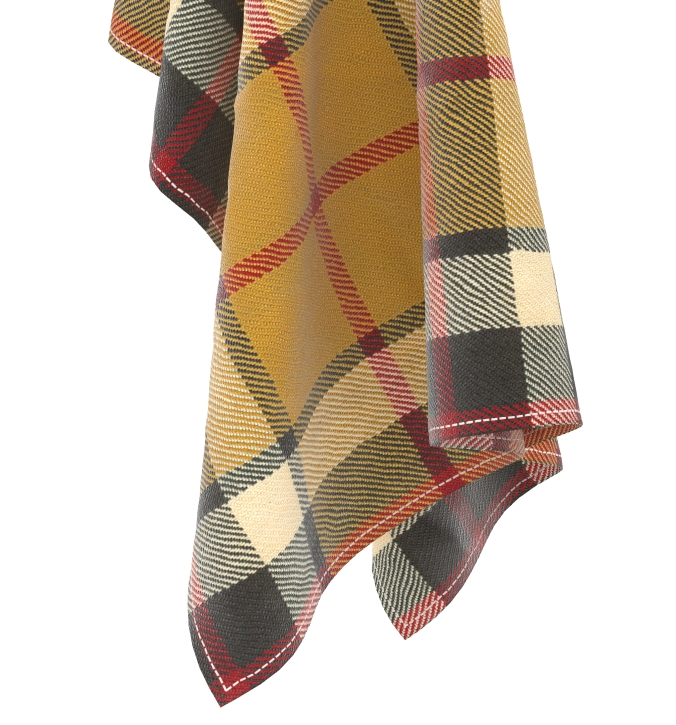
If you want to change the fabric, just swap out your base Mtl for a different one. Adjust the color of the stitching for a better fit and you are done.
If you need to adjust the size and pattern of the stitching, just go back to your vector image and change the stroke settings.


Comments
This tutorial is great.
I needed to thank you for tgis wonderful
read!! I certainly lokved everry bit of it. I’ve got you saved as a favorite to check out new things you post…