Leather materials can have hundreds of different variations, so it’s impossible to cover them all. There are, however, some common elements that are found in most kinds of leather: rich Diffuse color, blurry Reflections, and the characteristic Bump pattern which shows off the grain of the leather.
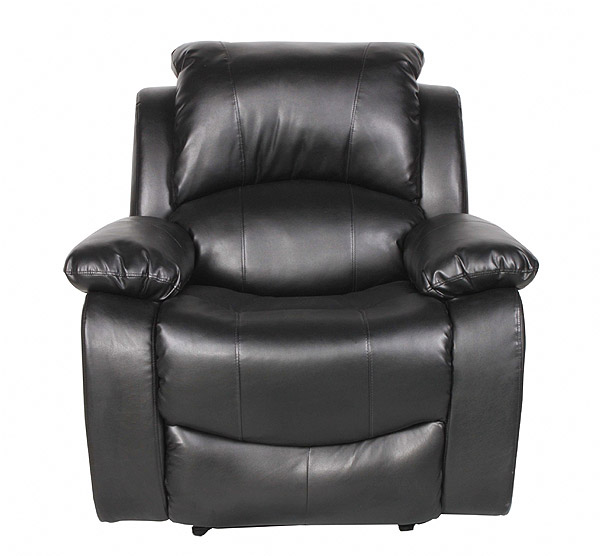
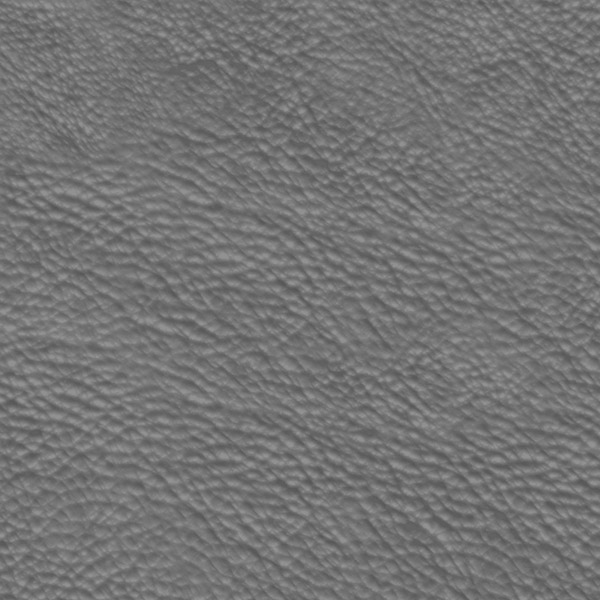
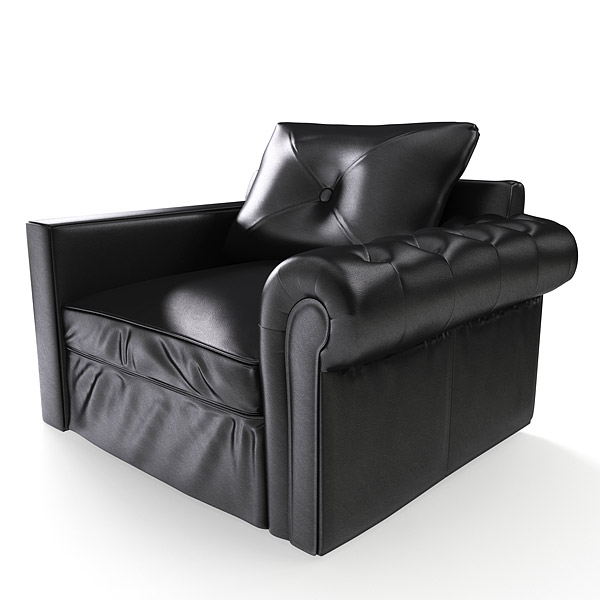
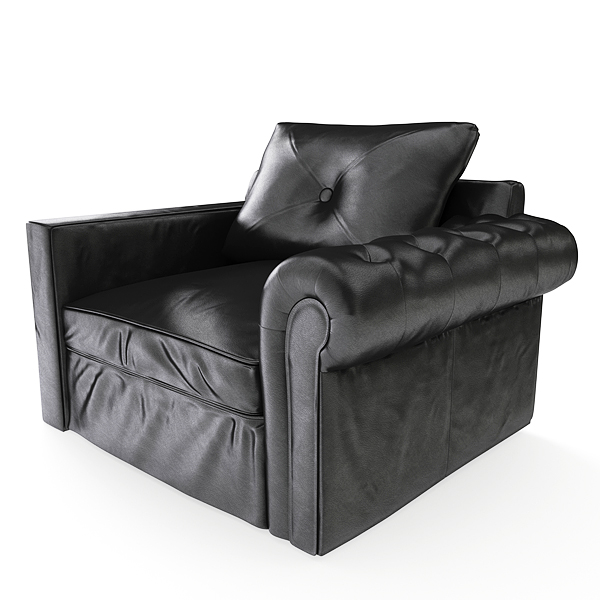
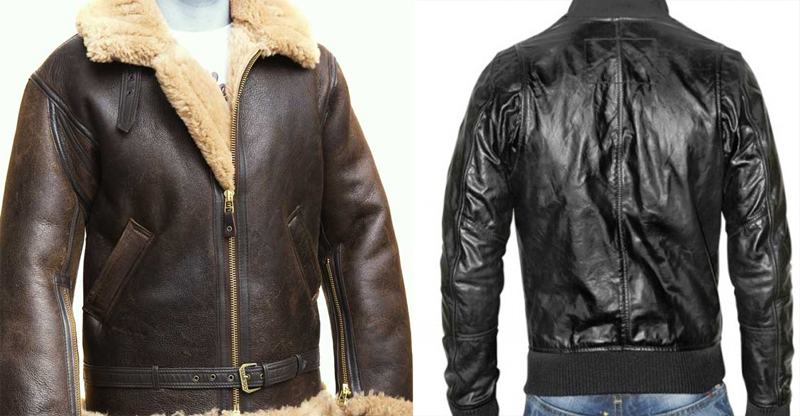
Basic ‘modern’ leather does not have much color variation. In fact, the material can look satisfactory with a simple color swatch in the Diffuse slot. Take a look at the reference photo below to see an example of basic black leather. The color could also be solid brown, gray, or anything else.
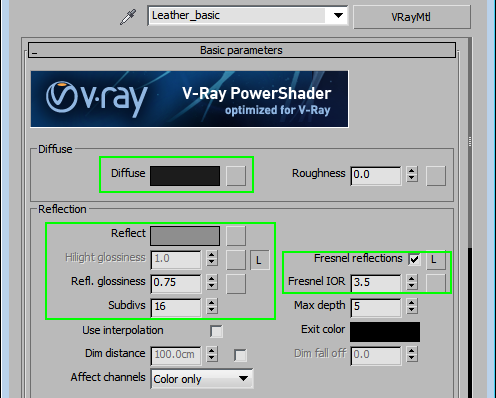
Let’s start with a black [2;2;2] color in the Diffuse slot and give it some reflections [70;70;70], with Fresnel IOR at 3.5, and a Glossiness of 0.75 (leather usually has Gloss at 0.65-0.8, depending on the finish). This is the base for our simple leather material.
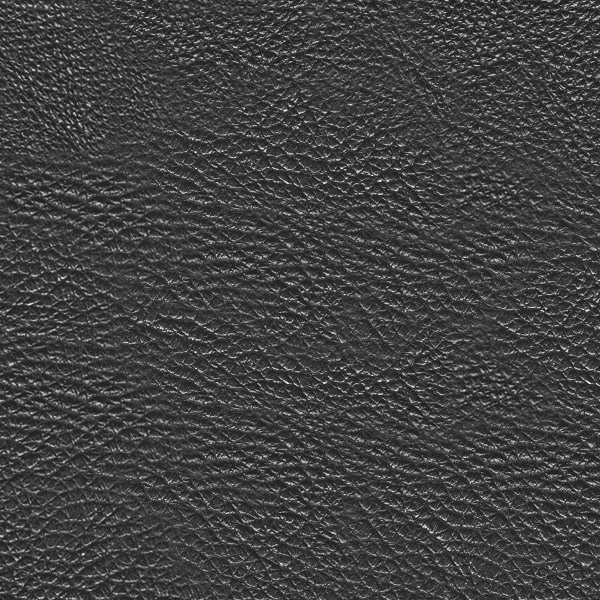
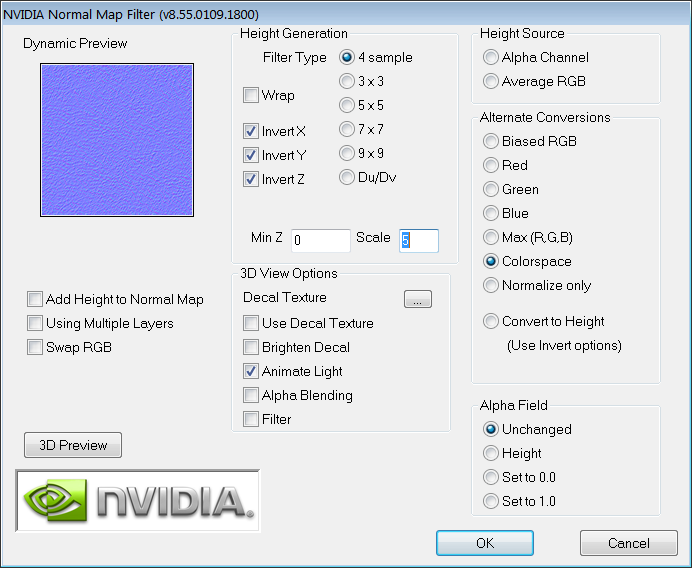
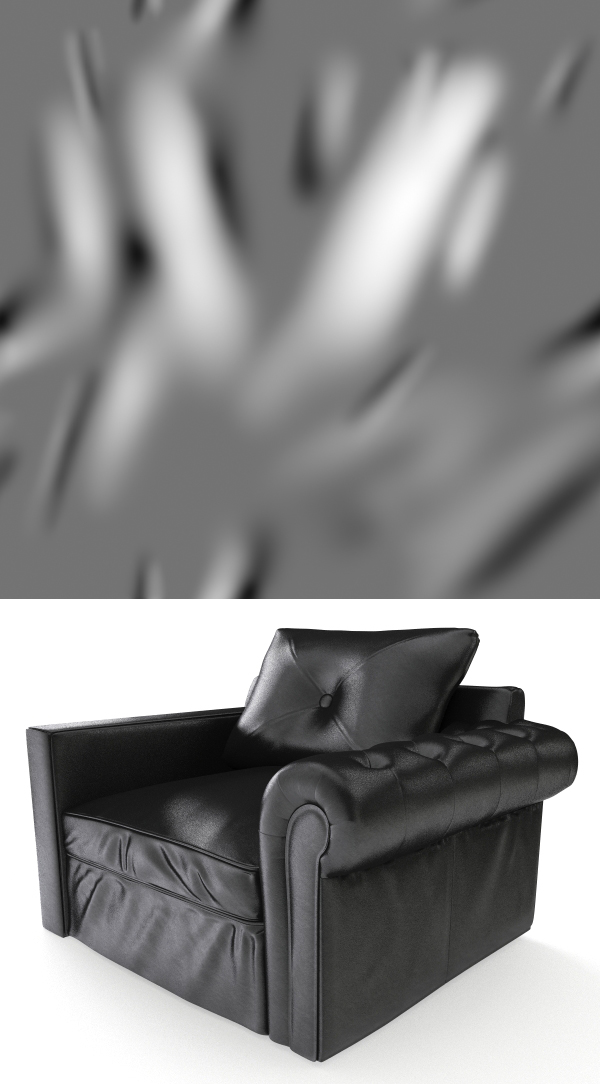
To make this look more realistic, start by focusing on the grain, added with Normal Bump. Using the Nvidia NormalMapFilter, convert a tileable leather photo to a normal map.
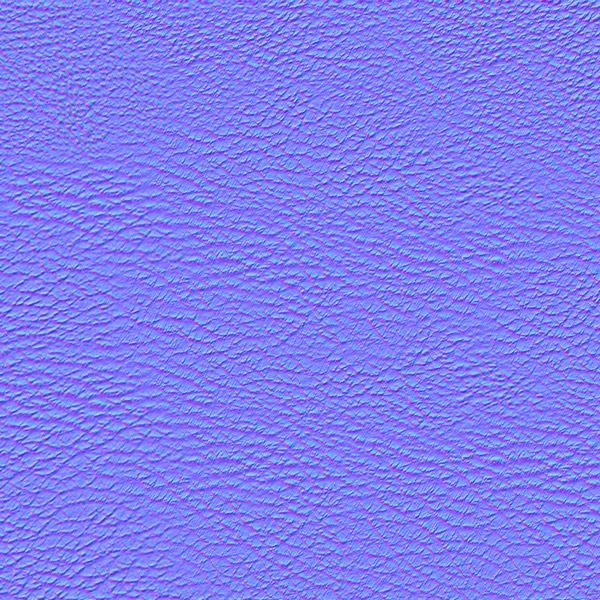
Assign a Normal Bump map to the Bump slot and use the created map. It should form a nice leather pattern.
You can experiment with different sources for your normal map to get different grains.
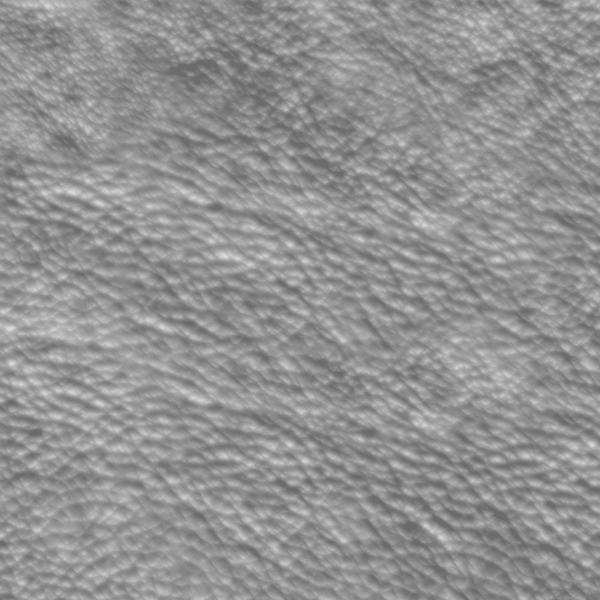
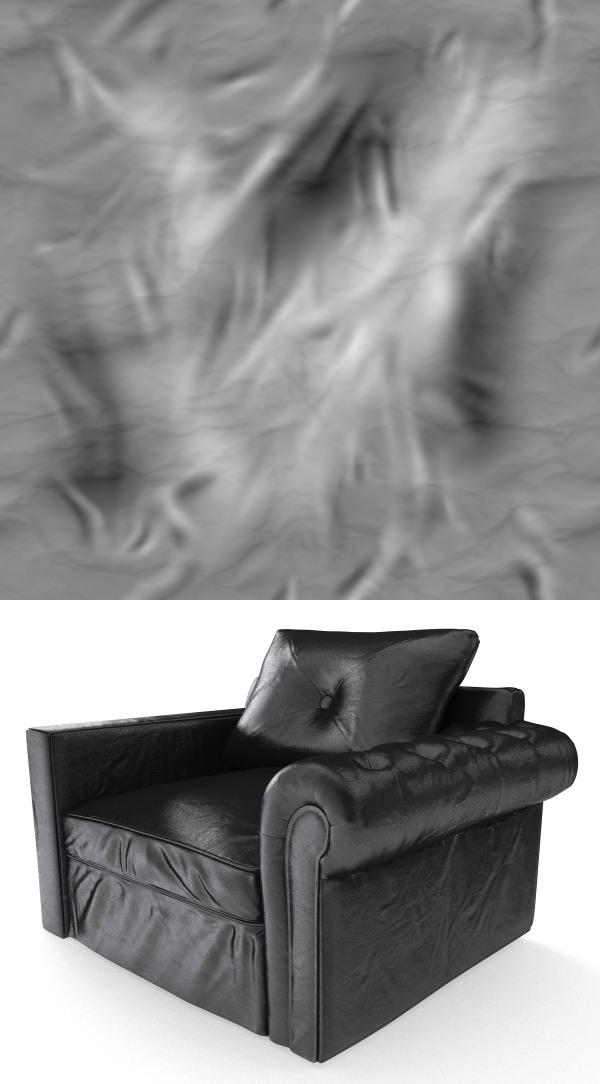
Let’s move one step further and create a reflection map, which should help bring out the leather pattern a bit more. Start by taking the same leather photo used for normal generation and run it through CrazyBump to generate a height map. The result looks like this:
Use a High Pass filter to even it out and adjust the contrast and lightness. The goal is to get a level of reflection similar to the gray color that’s currently in that slot. Try to match the brightness by eye; you don’t want too much contrast, so strive for something like this:
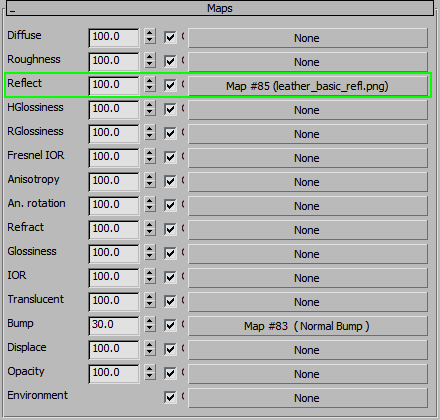
Assign this texture to the Reflect slot. Use the same options you set for the Normal map to set the tiling options.
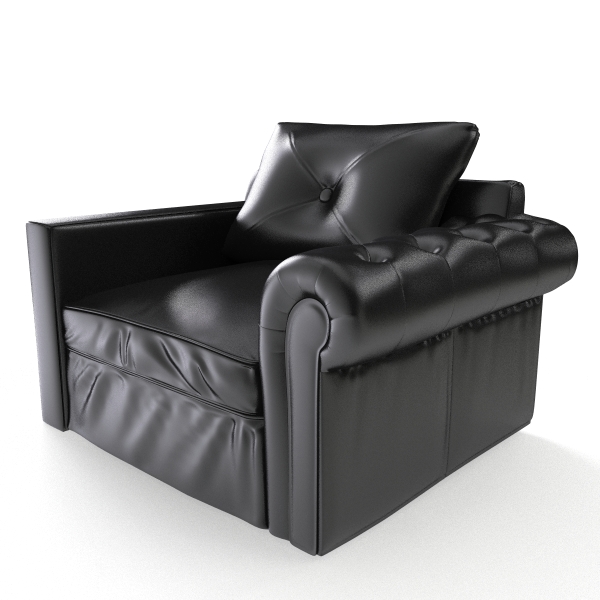
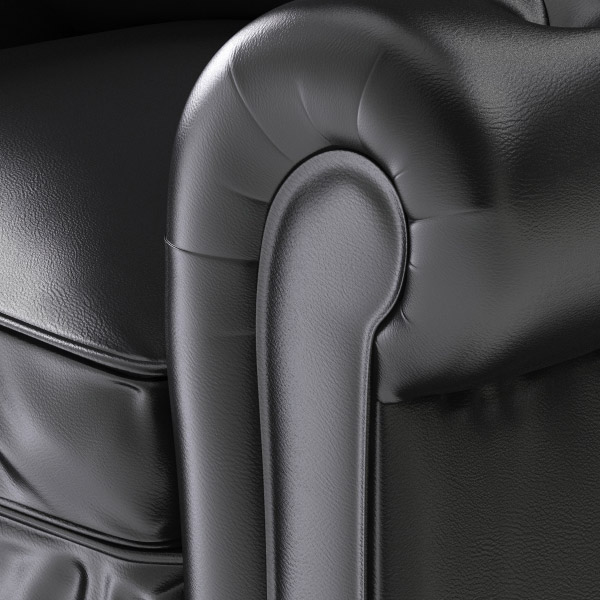
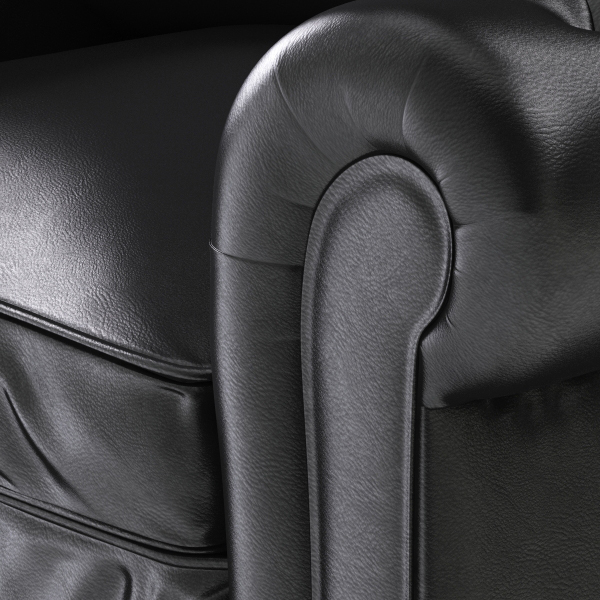
Here is the result:
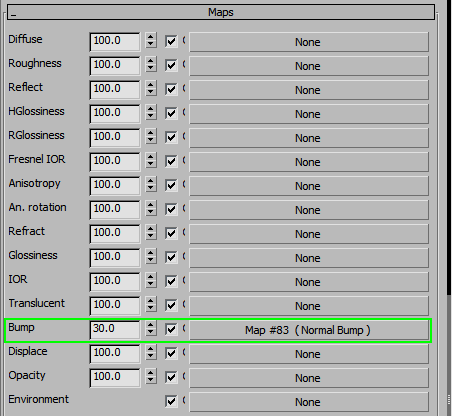
Add one more thing to the basic leather shader: a bump map.
This looks too perfect. Everything is smooth and tight. While it’s possible to find these types of leather objects, they certainly do not look as interesting as the ones with some wrinkles and creases. We’ll make a custom, tileable wrinkle map in ZBrush.
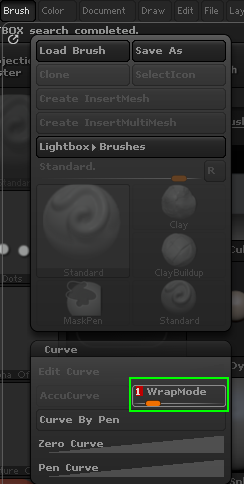
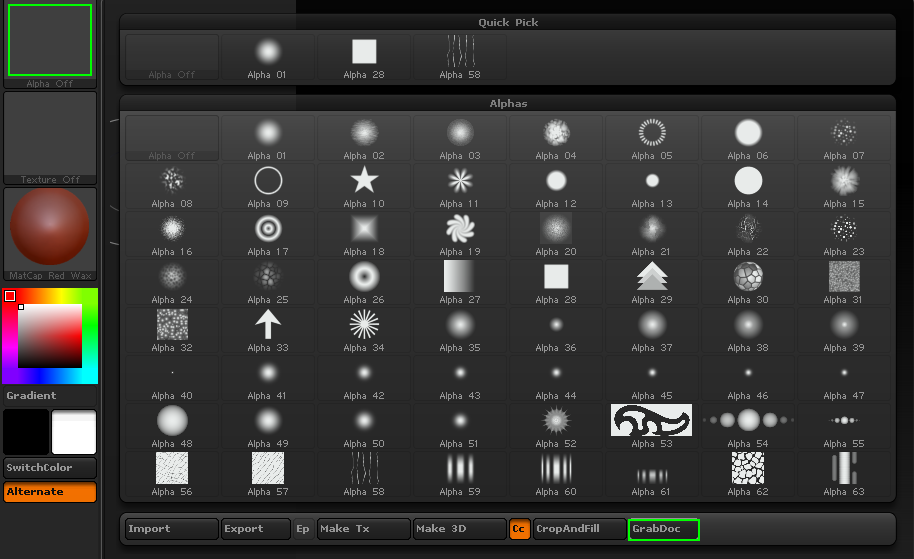
Start with a high res plane and sculpt in the details with the Brush->Curve->Wrap mode set to 1. This way, the sculpt is automatically made tileable as you sculpt and the brush strokes wrap around the object.
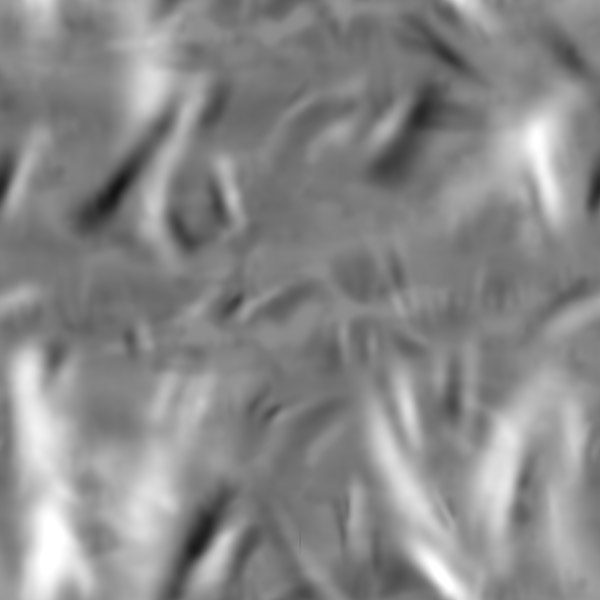
Use Alpha -> Grab Doc to export a height map. Check the mask in Photoshop for tiling and clone-stamp any areas that need to be fixed. The bump map is now ready:
When sculpting, try to include both large and small details for realism.
You can attempt to paint the map directly in Photoshop, but Zbrush creates a better preview of the final product.
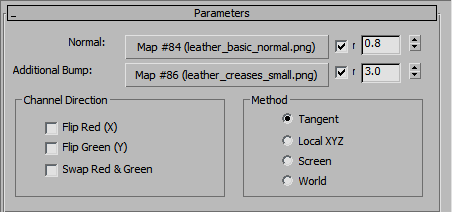
Assign it to the Additional Bump slot in Normal Bump map and see how it looks.
The look of the leather is largely defined by this bump map and displacement map (if the object has one). Thin leather has more wrinkles and sharper folds, while thick leather has larger and softer details.
Here is a bump map for thick leather:
And here is a bump map for thin leather: