
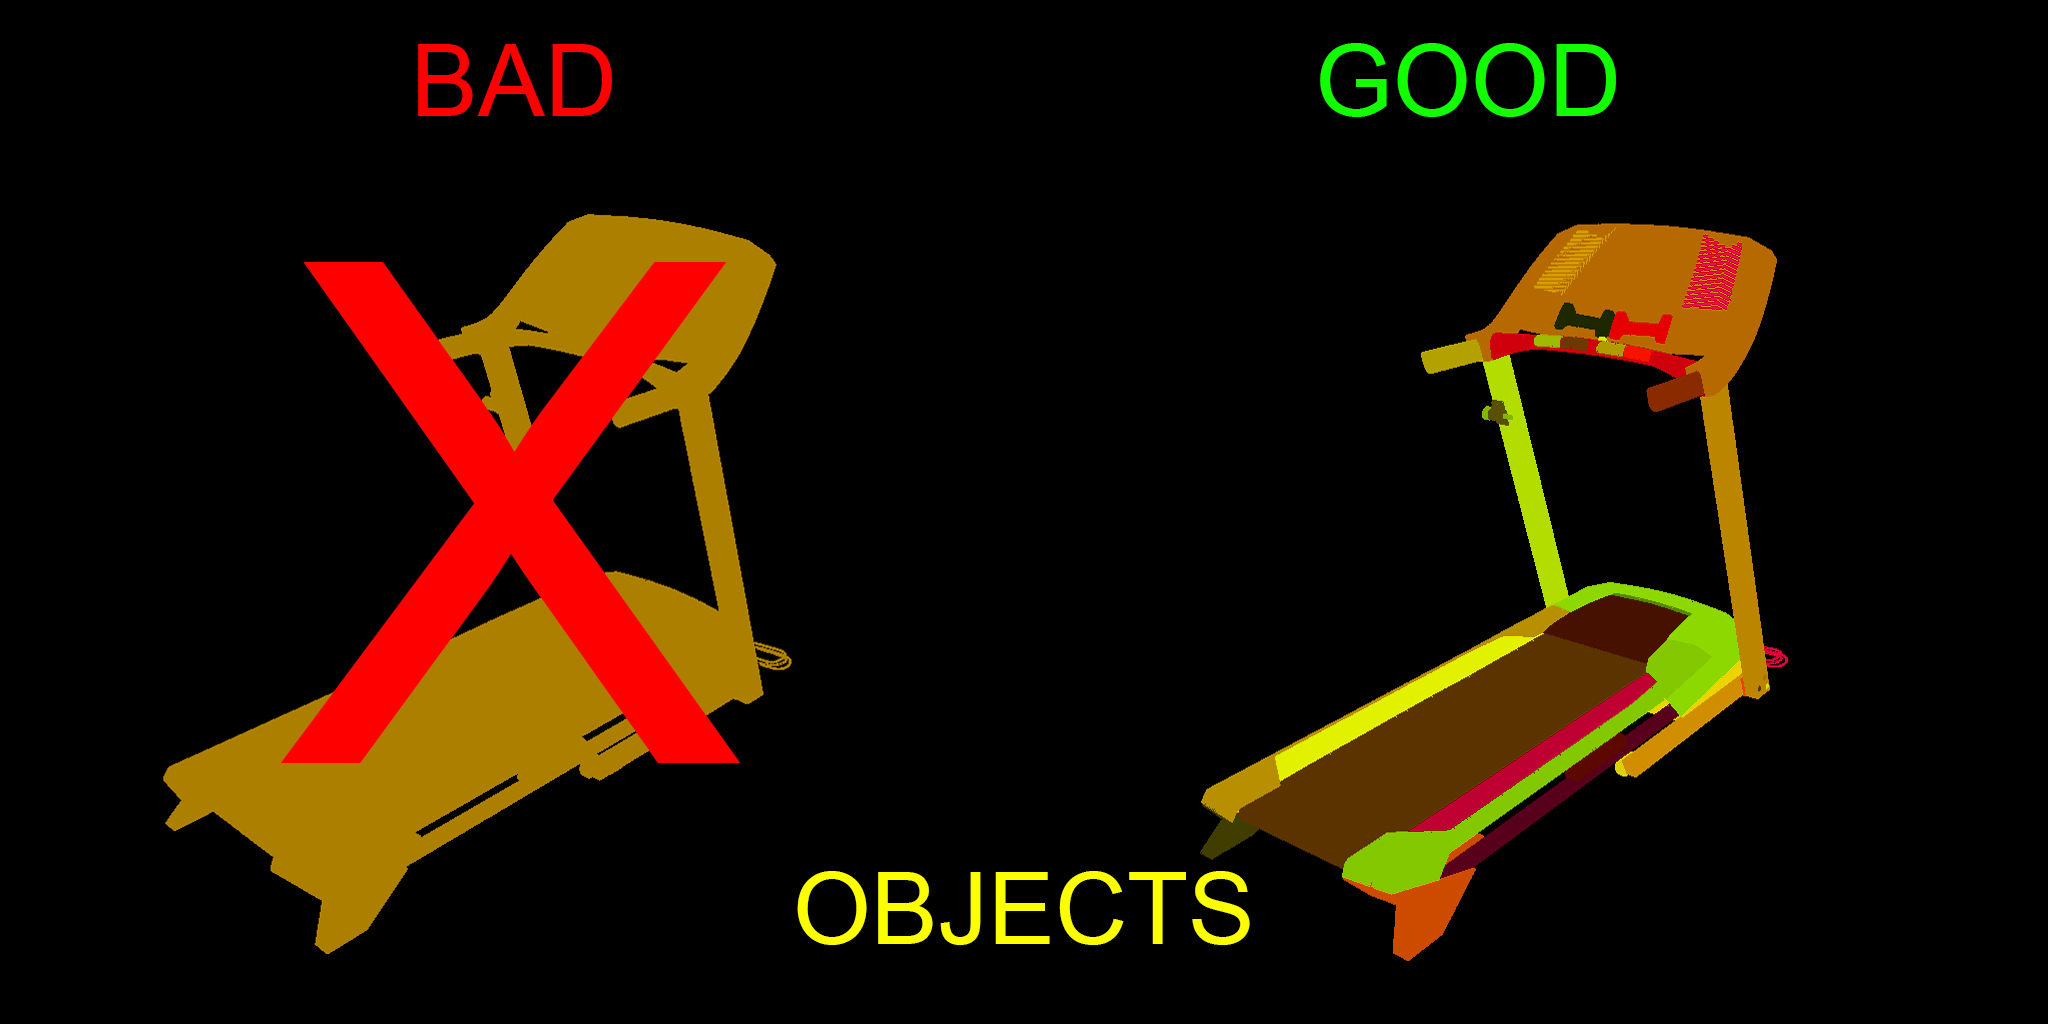
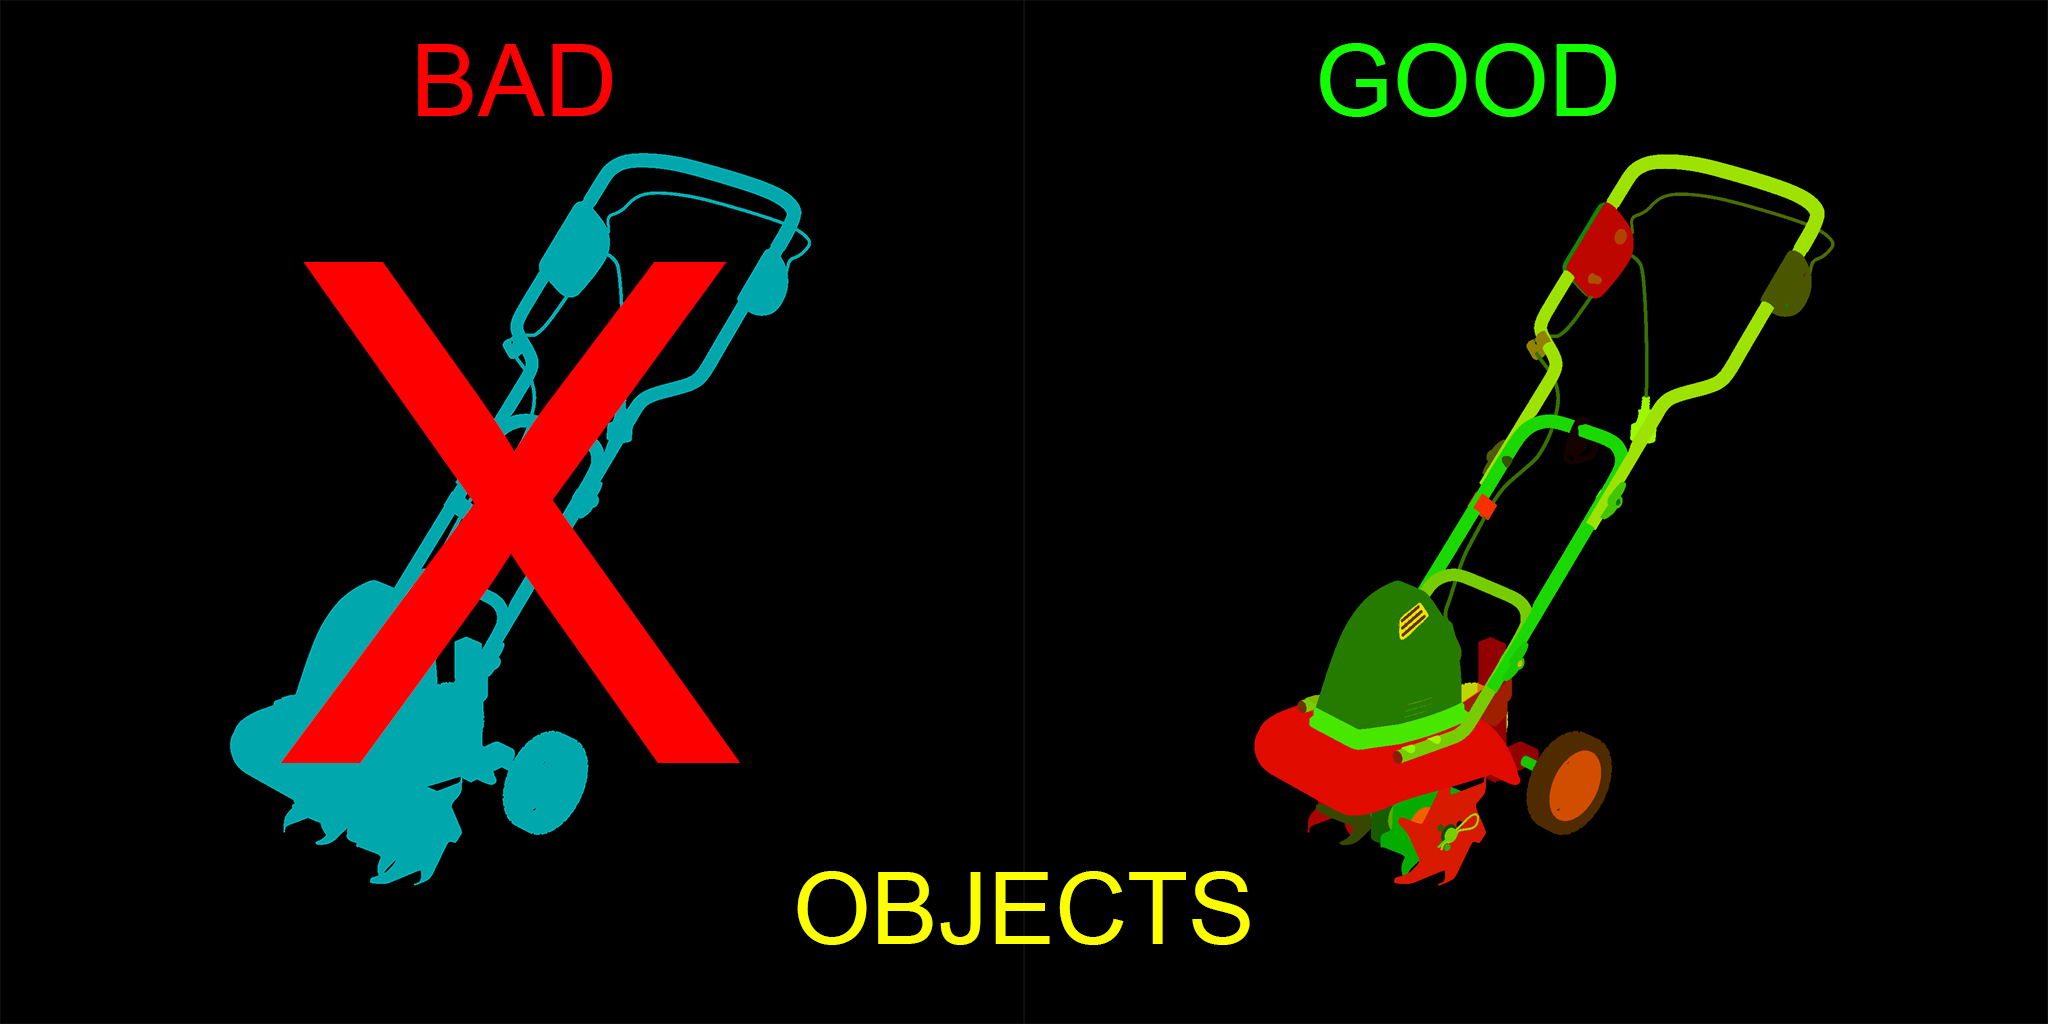
Examples of objects in Scene Management
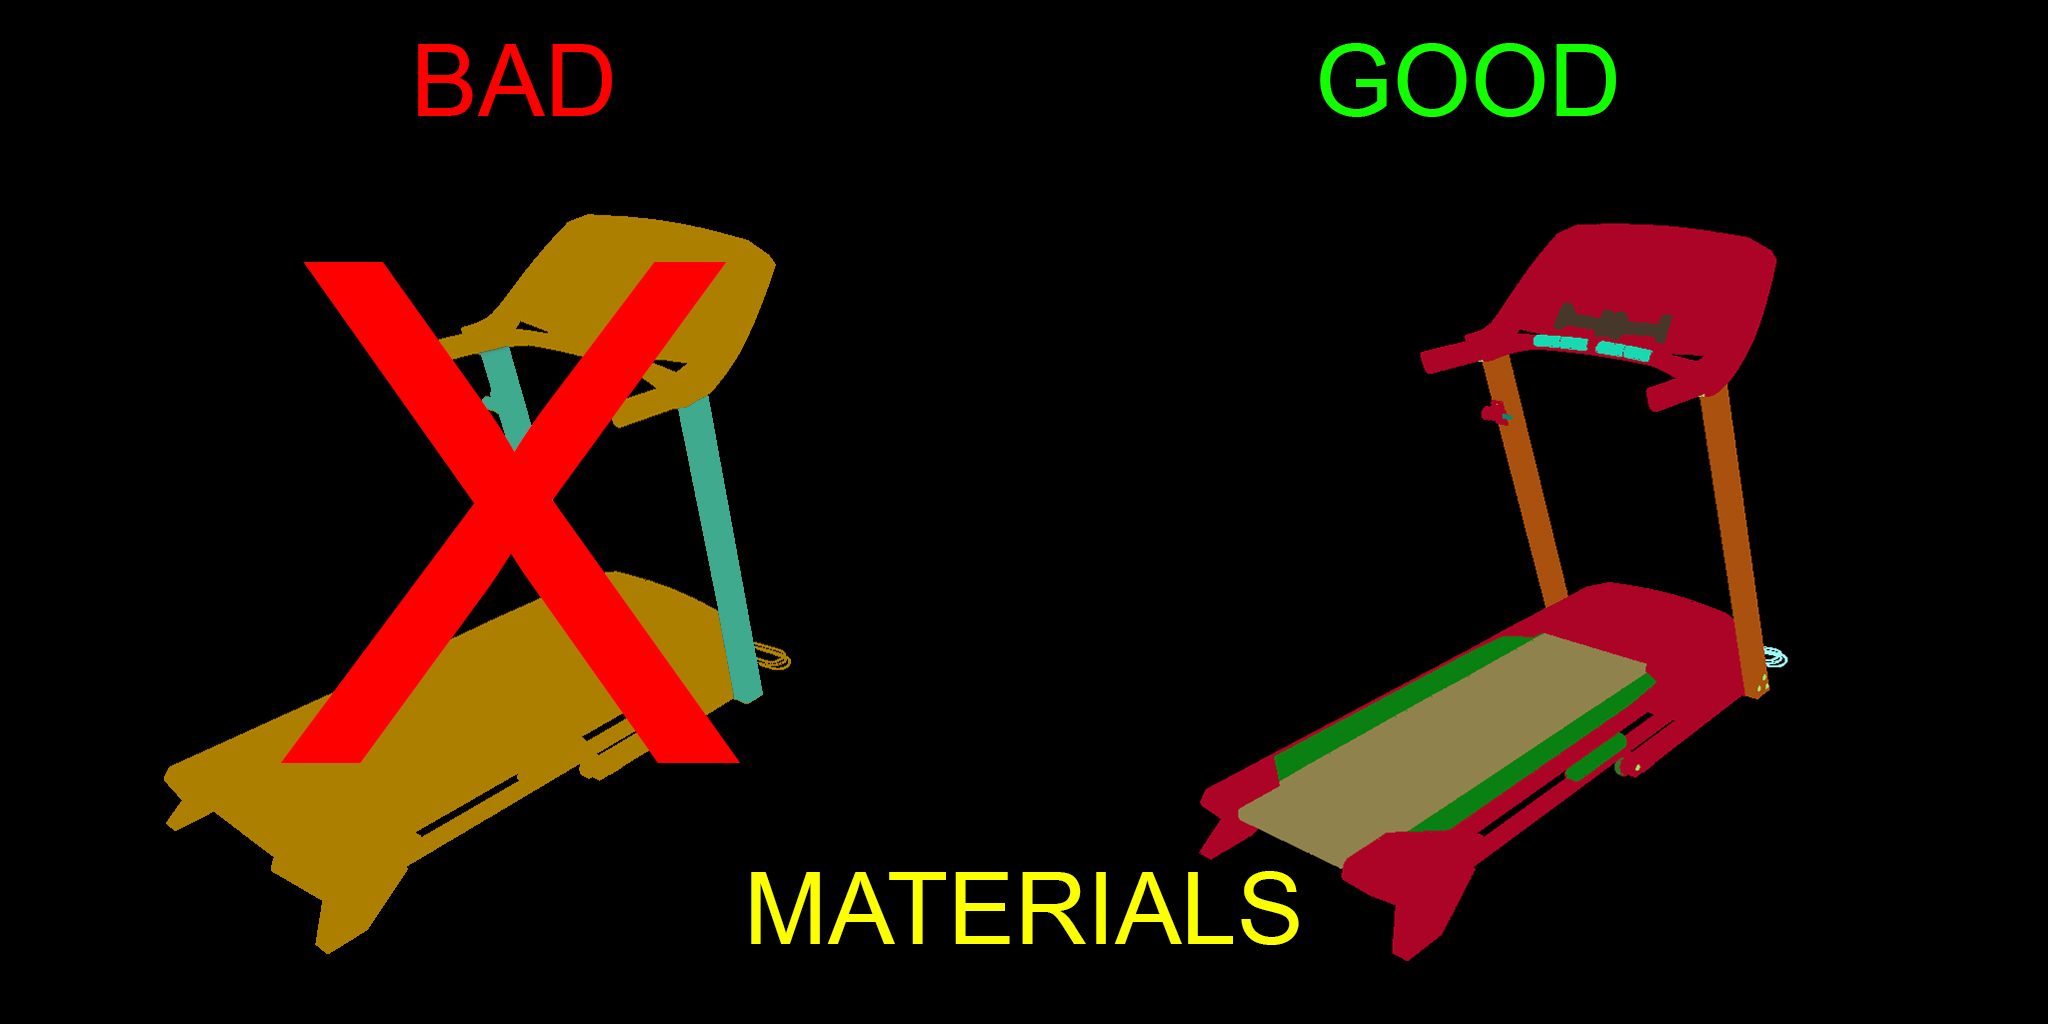
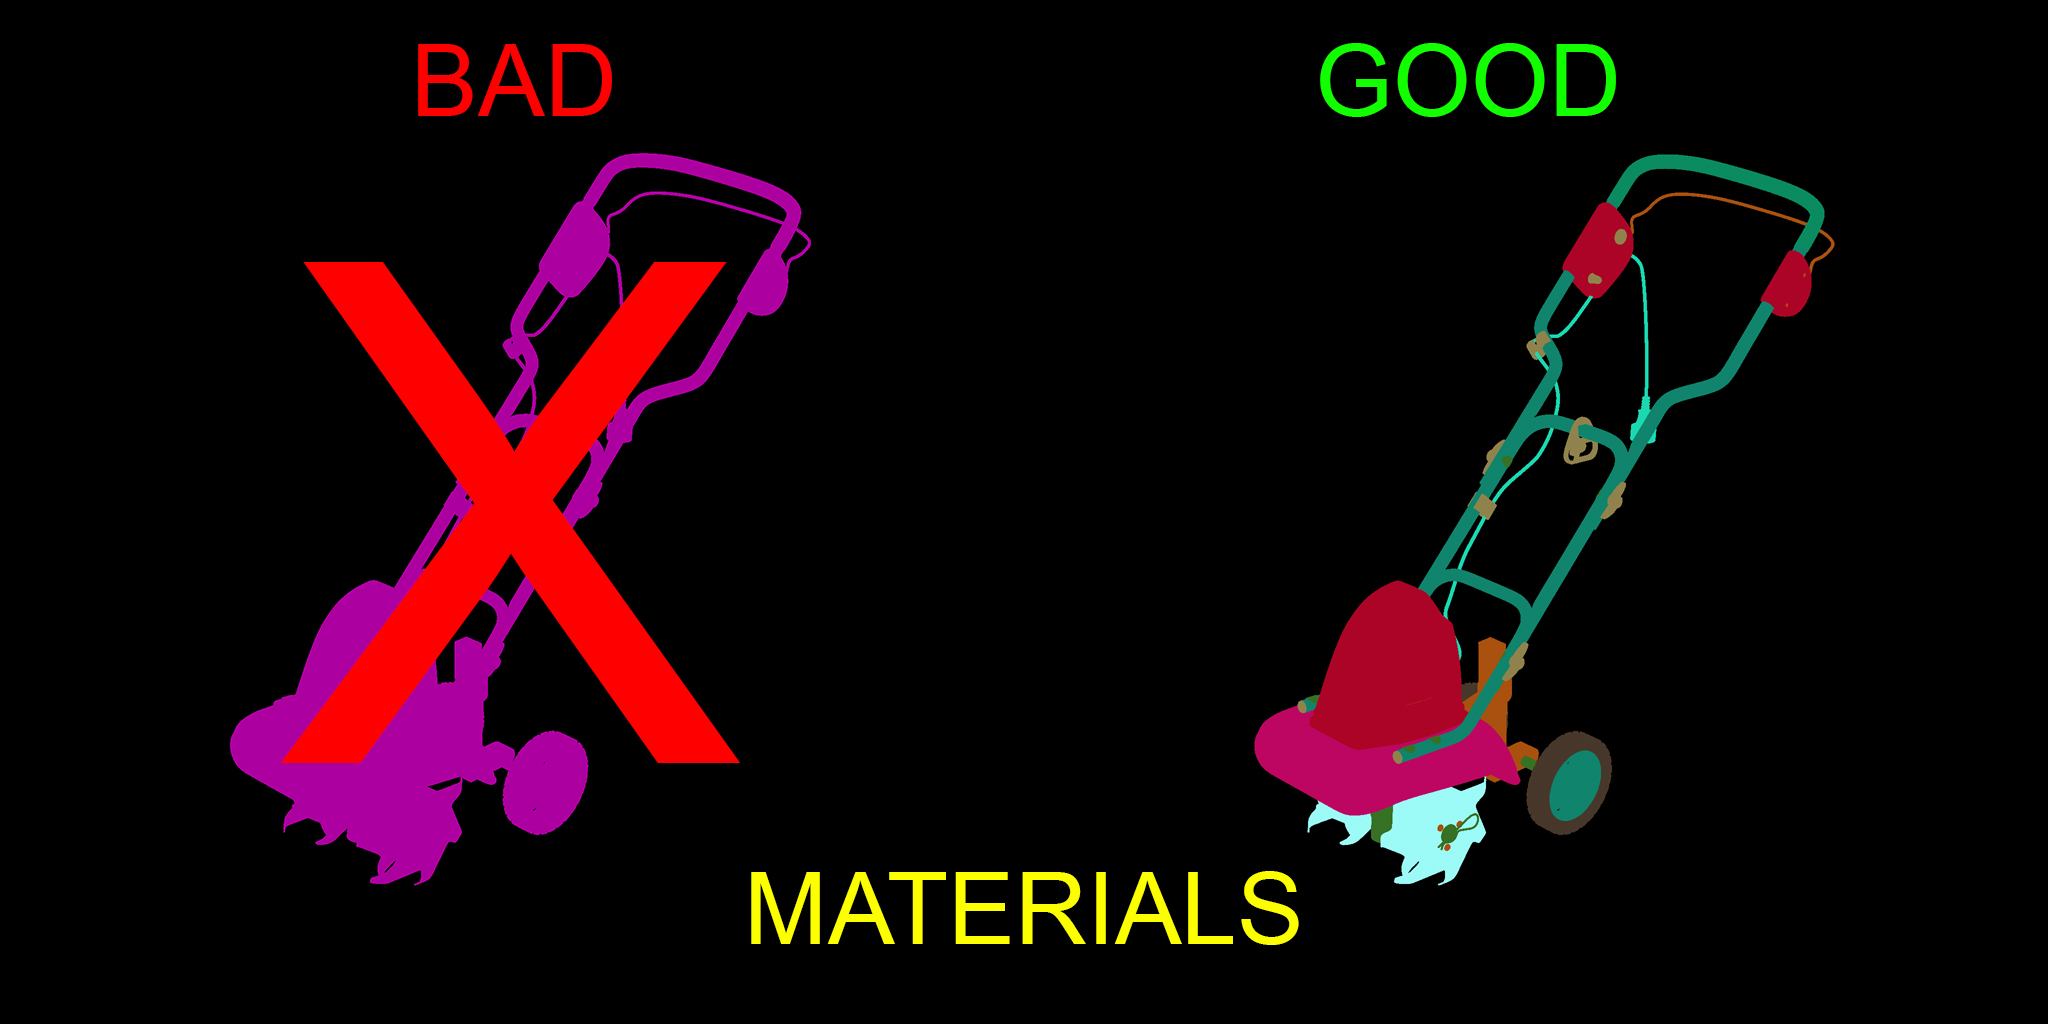
Example of materials in Scene Management
1.0 Organize Objects
If a 3D scene is difficult to navigate and/or modify, then editing a model within that scene can become extremely frustrating for the person attempting to use the model. This frustration is usually enough to make someone look elsewhere for a model that is easier to edit and use. Industry professionals want a model that is ready for production and quickly editable to fit their needs. No matter how great the model looks, poor scene organization can make it unusable.
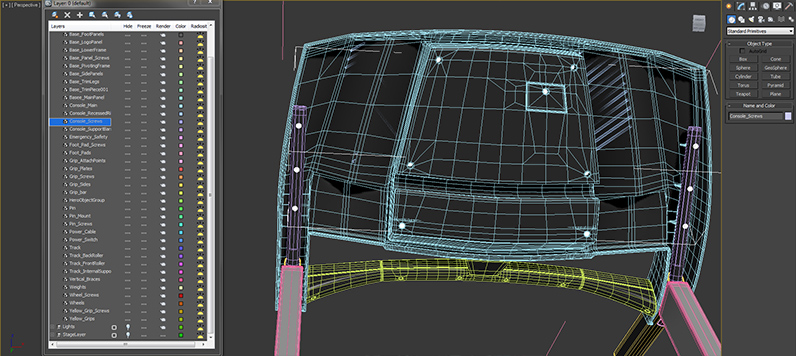
The treadmill model pictured above is a good example of an object that shouldn’t be combined or merged into one single object. Merging the model creates subobject elements that are very difficult to sort through and edit. Not only would it be difficult for you to later go back and adjust the model, but also for any customers who would be working with your model.
If an artist wants to edit any part of this model, they would need to go into element mode to sort through the different pieces looking for all the parts that make up what they want to edit. Then they would have to hide the unselected elements within the object or detach the elements into a new object to get a full view of the pieces they want. This makes it inconvenient and time consuming for the end user and you to make changes. Combining your model into a single object makes more work for everyone.

Scene Management examples
Scene Management examples
Scene Management examples


1.1 Naming
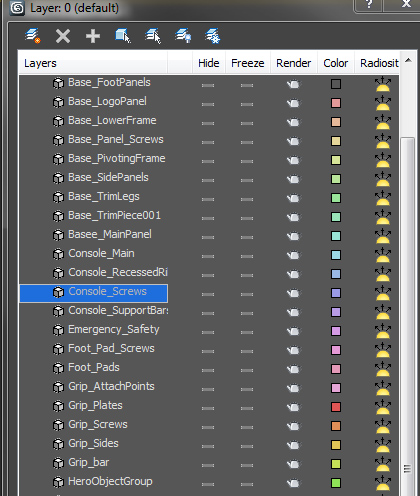
Name all objects and textures in the scene. The names should be descriptive enough that anyone could look at the layer editor and quickly select the desired object. Never leave anything with its default name such as Cylinder03, Object05, or Map #6(VrayMtl).
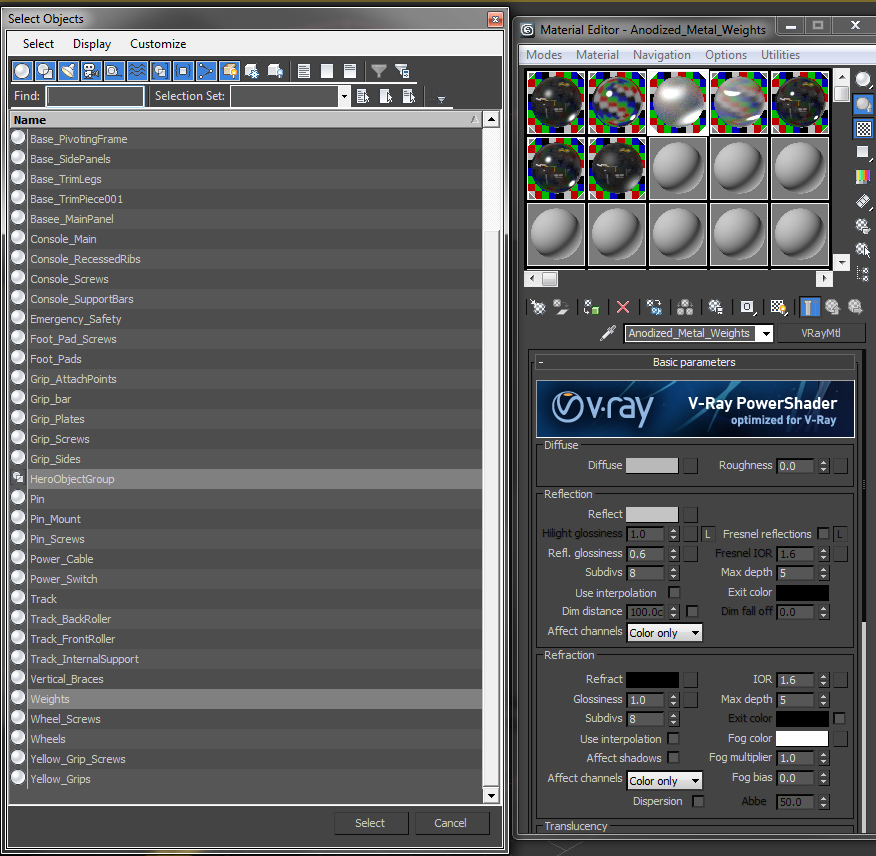
You can see in the zoomed image on the right that every object has been renamed descriptively after separating the model out from one single object. If you select any of the names like “Console_Screws”, the descriptive name gives you a good indication of where to look on the model for this object. The first word indicates on what larger part of the model to look: “Console”. The second word lets you know specifically which part of the model will be selected: “Screws”. You will also notice that naming this way makes selection very easy from the layer editor since all parts of the model will sort alphabetically.
Scene Management examples
Scene Management


1.2 Intelligent Combining and Merging
Merging multiple objects into one larger object should only be done when it logically makes sense. For example, the screws on the back of the console are combined into one object named Console_Screws instead of having 13 individual screw objects. NOTE: Small fasteners such as screws, bolts, nuts, and other similar mass produced fastening hardware are one of the few exceptions to UVs overlapping. Such small fasteners are cloned most of the time so combining them does break that rule. In order to make them appear to be different from each other they must have different orientations. Another example of an exception would be leaves or flower petals on plants and trees. These exceptions only apply if they are smaller parts of a much larger model.
Scene Management examples
2 Using Layers
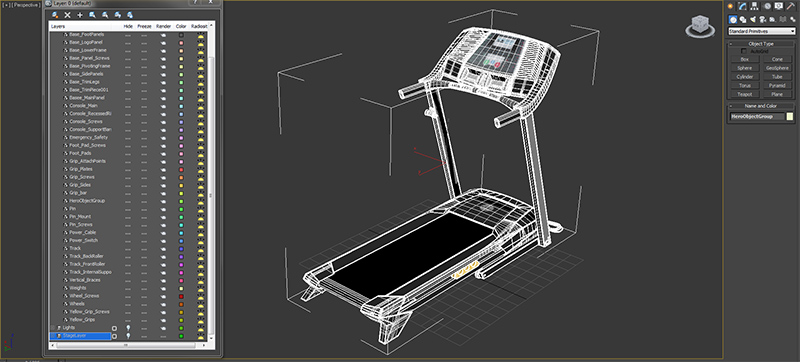
Compared to the layer editor on the left, it may seem that the layer editor on the right is less organized, but it’s only because there is more information. That’s a good thing, since objects can quickly be hidden, frozen, or selected from the layer editor. It’s also important to note that all the names are short yet descriptive enough for you to know which objects you are working with. This makes the scene very easy to navigate. The “Lights” layer contains all the light objects and lighting components in the scene. The “StageLayer” contains all the floor and camera objects that make the scene. To be consistent with required specifications, the “Gym_410” layer has the name of the model’s scene, and contains all the parts of the model.
Scene Management organization

2.1 More, or Less
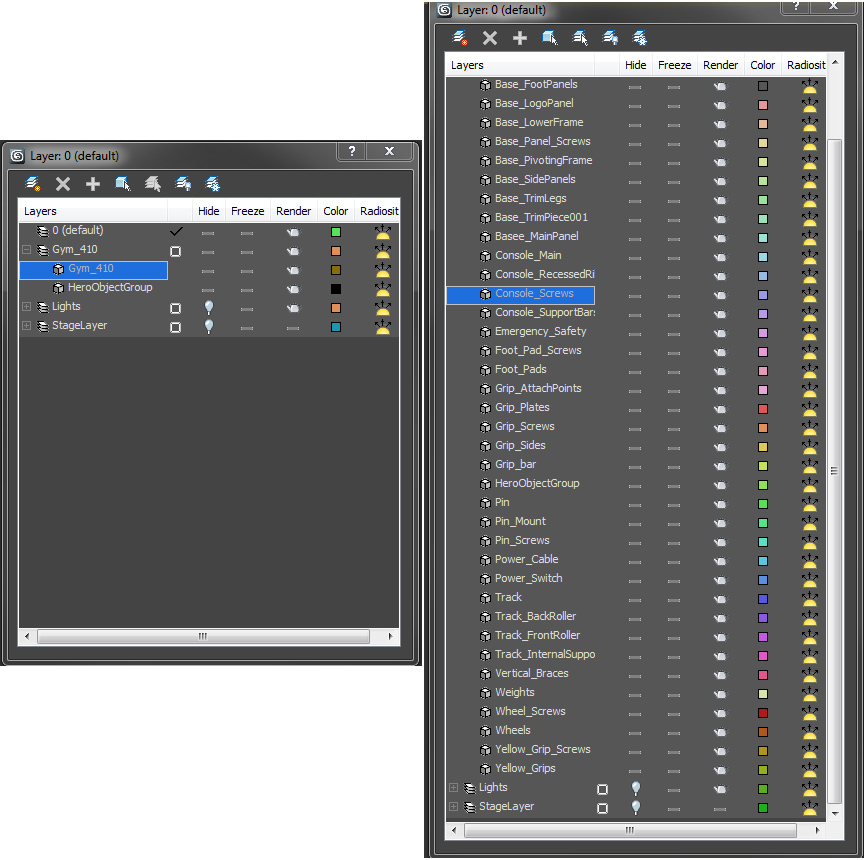
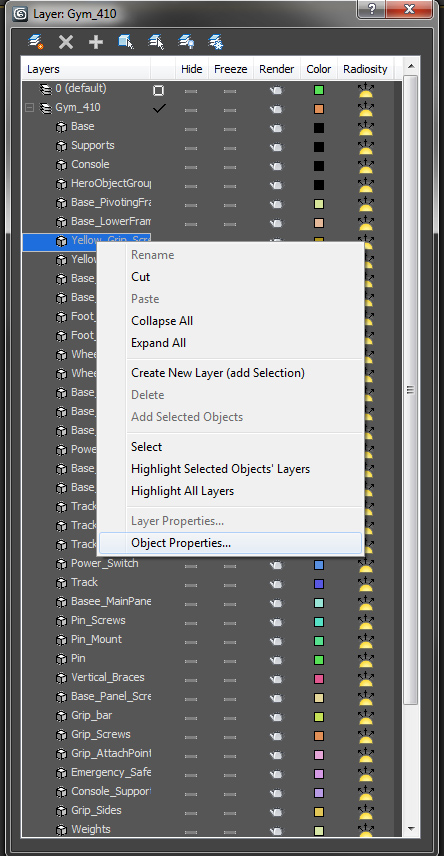
To make the layer editor less busy, a layer can always be collapsed when not in use. Right clicking on an object name brings up a variety of options including access to the Object Properties. Layers are extremely useful when working in a scene to isolate major components of the scene from each other. You can see in the left side image above that the 3 layers the file has been separated into are collapsed. When working on just the model you can easily hide the two other layers from visibility so you only see layer “Gym_410” contents in the viewport.
Adding new layers, editing layers, and organizing existing layers can be done by using the buttons at the top of the Layer Editor menu.
Scene Management organization
3 Working with Groups
Groups are also very useful for scene organization. Rather than combining objects into one big object, group all the objects together. Unlike attaching or merging the objects together, the group can be opened to allow you to work at the object level, or closed for easy selectability of the entire model.
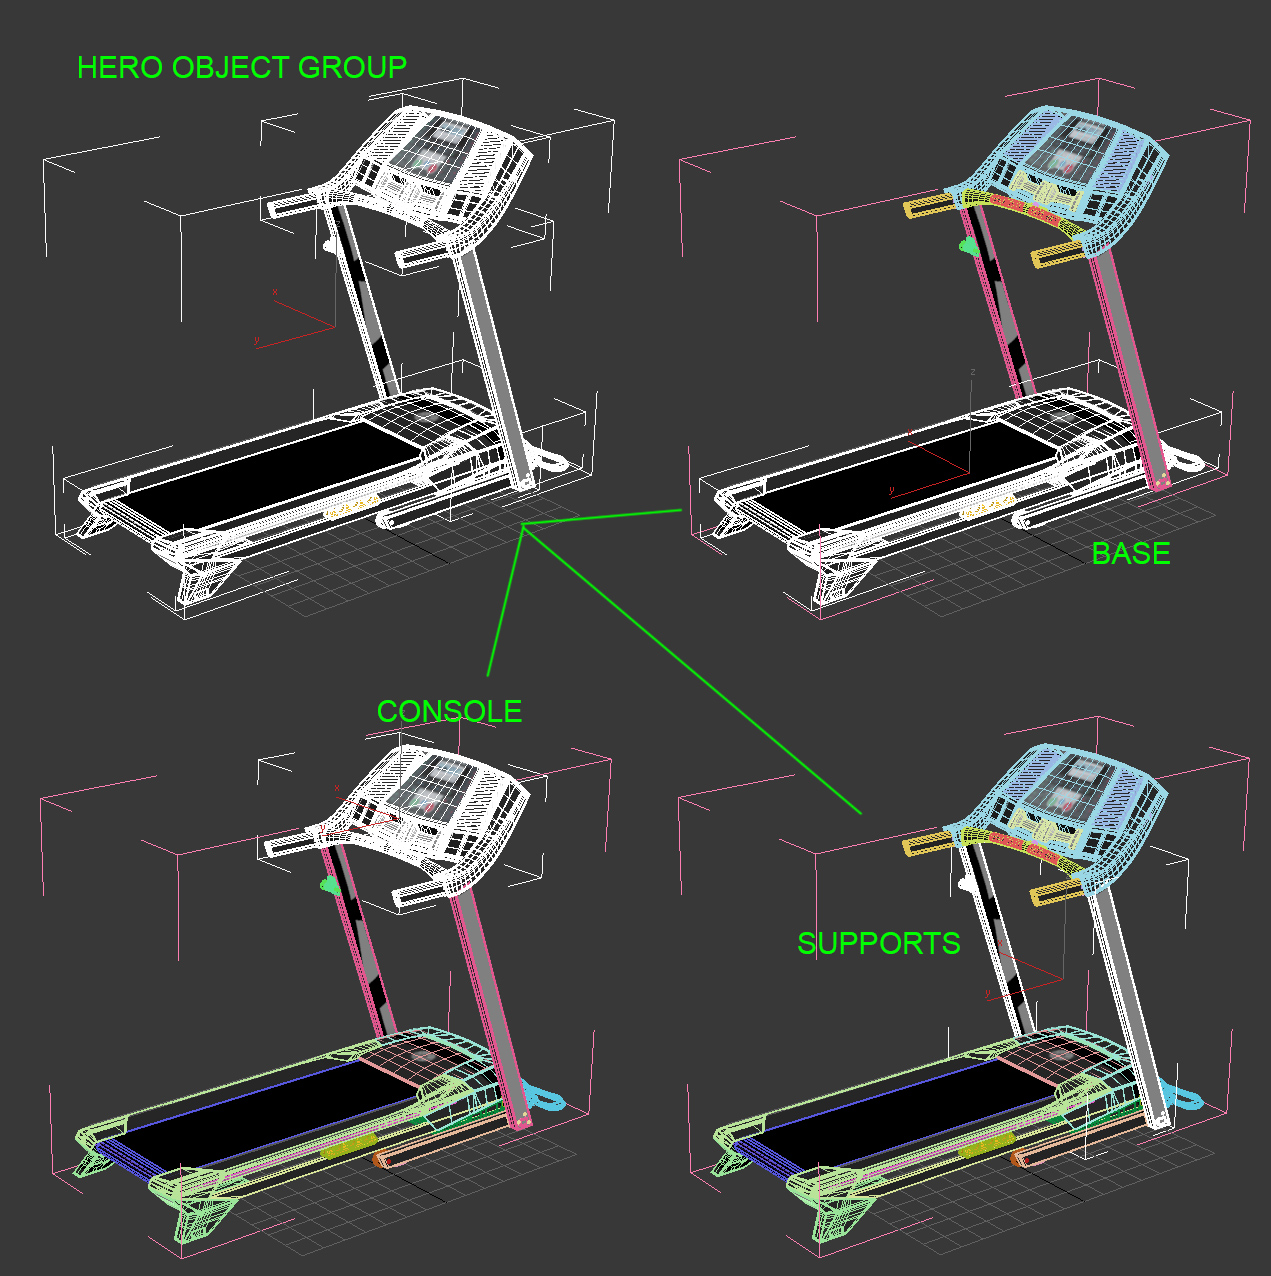
Groups can also be stacked inside each other to organize the object into larger more logical pieces. Above, you can see the object has been broken into 3 groups within the HeroObjectGroup. All individual objects are still editable by opening the groups. Having groups inside of groups is usually only necessary for models with many parts that need to be organized for easier navigation. NOTE: The whole model will be grouped when the Stage Setup Script is used so there is no need to group the entire model before hand. If groups are used for organization purposes be sure to close the groups before running the script.

Scene Management examples
Scene Management object layering
4 Selection Sets
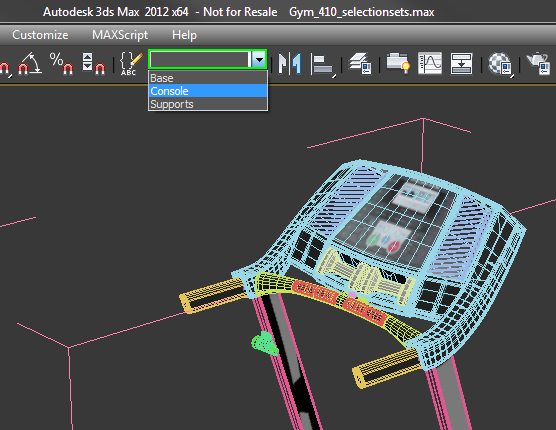
Selection sets are another useful option for simplifying scene navigation. With selection sets, you can select everything you want the same way you would a group. If you have a set of objects that you need to select often and for some reason you don’t want them grouped, simply type the name of the set into the Selection Set space. That selection will be stored in the drop down for easy reselection without grouping the objects or merging them into a single object.
Scene Management object layering
4.1 Managing Selection Sets
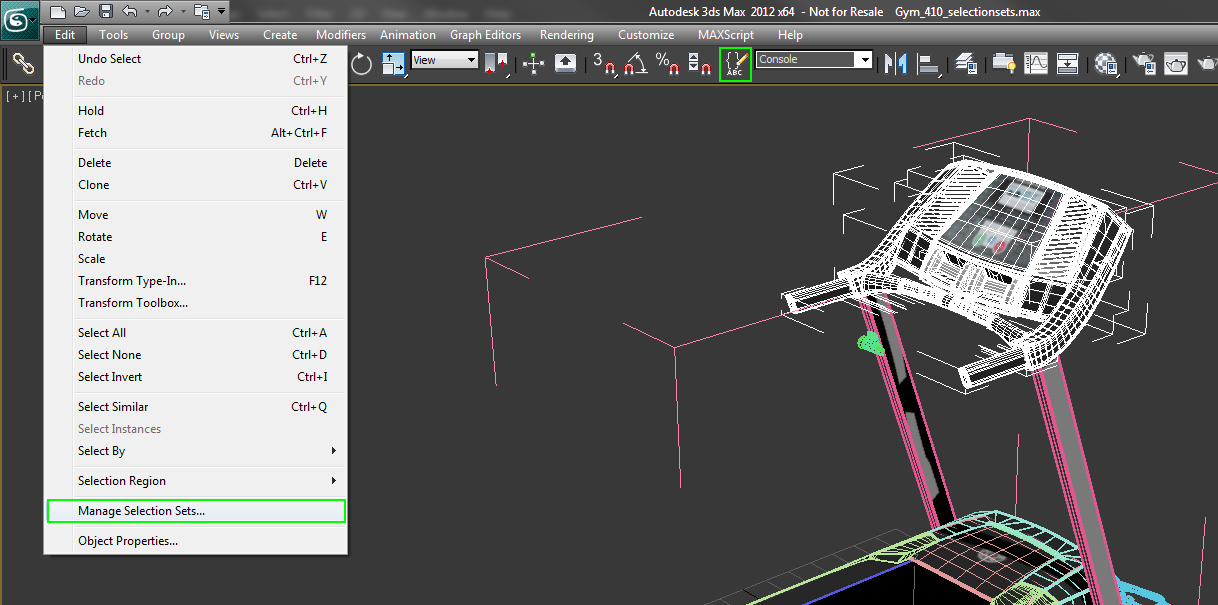
You can edit selection sets from the Manage Selection Sets menu which can be accessed from the Edit menu, or simply by using the icon next to the selection set creation box. You can view all objects within each selection set, add objects, or remove objects from this menu. Other options are also available by right clicking on the object names in the window.
Scene Management

Scene Management
5 Materials
5.1 Descriptive Naming
When creating materials it is very important that they should be given obvious descriptive names. Obvious names make it easier to identify the objects which have the material applied. This is especially important when materials look very similar to each other.
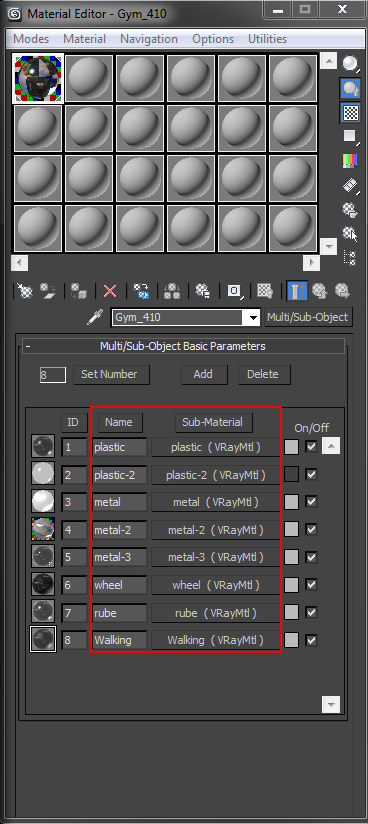
In the example on the right you can see the names are numbered material types or single words that do not indicate much. When working in Max, the viewport does not show the reflective properties that make these materials different from each other. This makes it difficult to know which material to edit if changes are needed while rendering or when first creating shaders. Going back to make changes to these materials becomes unnecessarily difficult. Improper naming creates more work for everyone using the file.
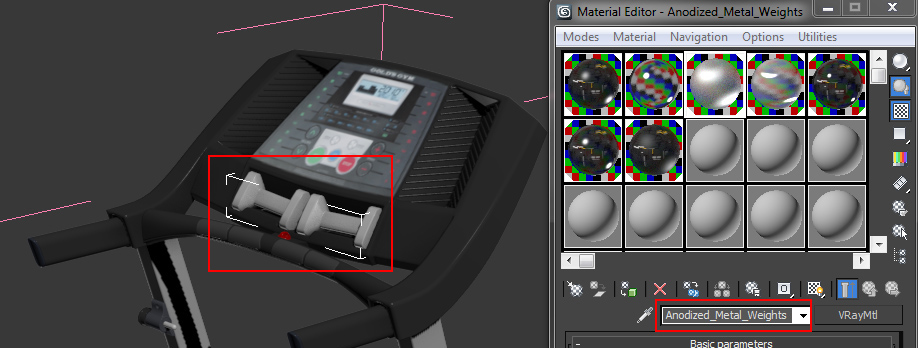
Add descriptive words as an identifier of what you would see visually in a render. If you look at a render of the model after finishing the shader and think “Yes that is anodized metal on the weights.”, then name the material to match: Anodized_Metal_Weights. This way anyone using the model in the future can look at the render and hopefully say the same thing, helping them easily find the correct node in the Material Editor. NOTE: The materials were separated as indicated in 5.2. Tip: Try to keep the full name of the materials short enough to be completely viewable in the box.
Scene Management materials
examples of objects in Scene Management
examples of materials in Scene Management

Scene Management materials
Scene Management materials

5.2 Keep Materials Separated
When able, materials should be left as separate nodes named descriptively. When the materials are left separate, selecting objects by material is once again possible. This makes another quick and easy method of navigating the scene to find specific objects or relationships. Remember that the deeper the materials are the more difficult it is to navigate. There is no need to add another layer of difficulty by seeding the individual materials into a Sub-Object material.
Materials should be separated based on properties that distinguish each material from the others. Separating factors could be color, finish (matte, glossy, tarnished, etc.), reflectivity (dull to chrome), or surface texture (smooth to rough vinyl). With glass or transparent surfaces materials should be separated by clarity (clear to frosted) and/or different Index of Refraction (IOR).
Here is a quick comparison of a model using Multi-Sub Materials versus separate materials.
When working with Sub-Object materials you no longer have the ability to select by material. Objects are now all classified as the same material. To check what materials are actually applied to objects you have to check the material ID at the Face or Element level of an object, then reference that ID number to the Sub-Object material slot with that number. To change the materials at this level you also have to edit the material ID number on the Sub-Object level. This can be very time consuming on a model with many parts making more work for anyone handling the scene.

What should I do next?
There are a lot of different object types, many of which require different object organization, selection sets and layering. We have created a page with other object grouping examples that will show you a few more complex model examples.


