Taking Product and Editor Shots in Unreal

When it comes to showing off your model with in-engine shots, Unreal is a great option to put your work in its best light. The Unreal editor can appear overwhelming at first, but like all tools with a lot of power, all it takes is a little practice and some initial guidance.

Taking screengrabs of the editor itself can convey a great deal of information to trained eyes and prove without doubt that the models work in the engine. The model window, the material window, and the main editor are all valid– having one of these is fine, and having more is better.

This guide will walk you through you the process of creating images within the editor. If you need a guide on how to import your models and set up/place them in a scene, please refer to the links in our Introduction to Unreal & Unity for 3D Artists.

Editor and Model View in Unreal

The only thing to change for the main editor image is to expand out the tree view within the file explorer (as shown on the right), so customers will know where the model is going to be within their project at a glance. All you have to do to see that is to click on the tree view icon to the left of the Content Browser. As you navigate to subfolders in either view, the file tree will expand out as needed.

Now you’re ready to capture your first image of the main Unreal interface with your model in place.

Posing a 3D model in Unreal

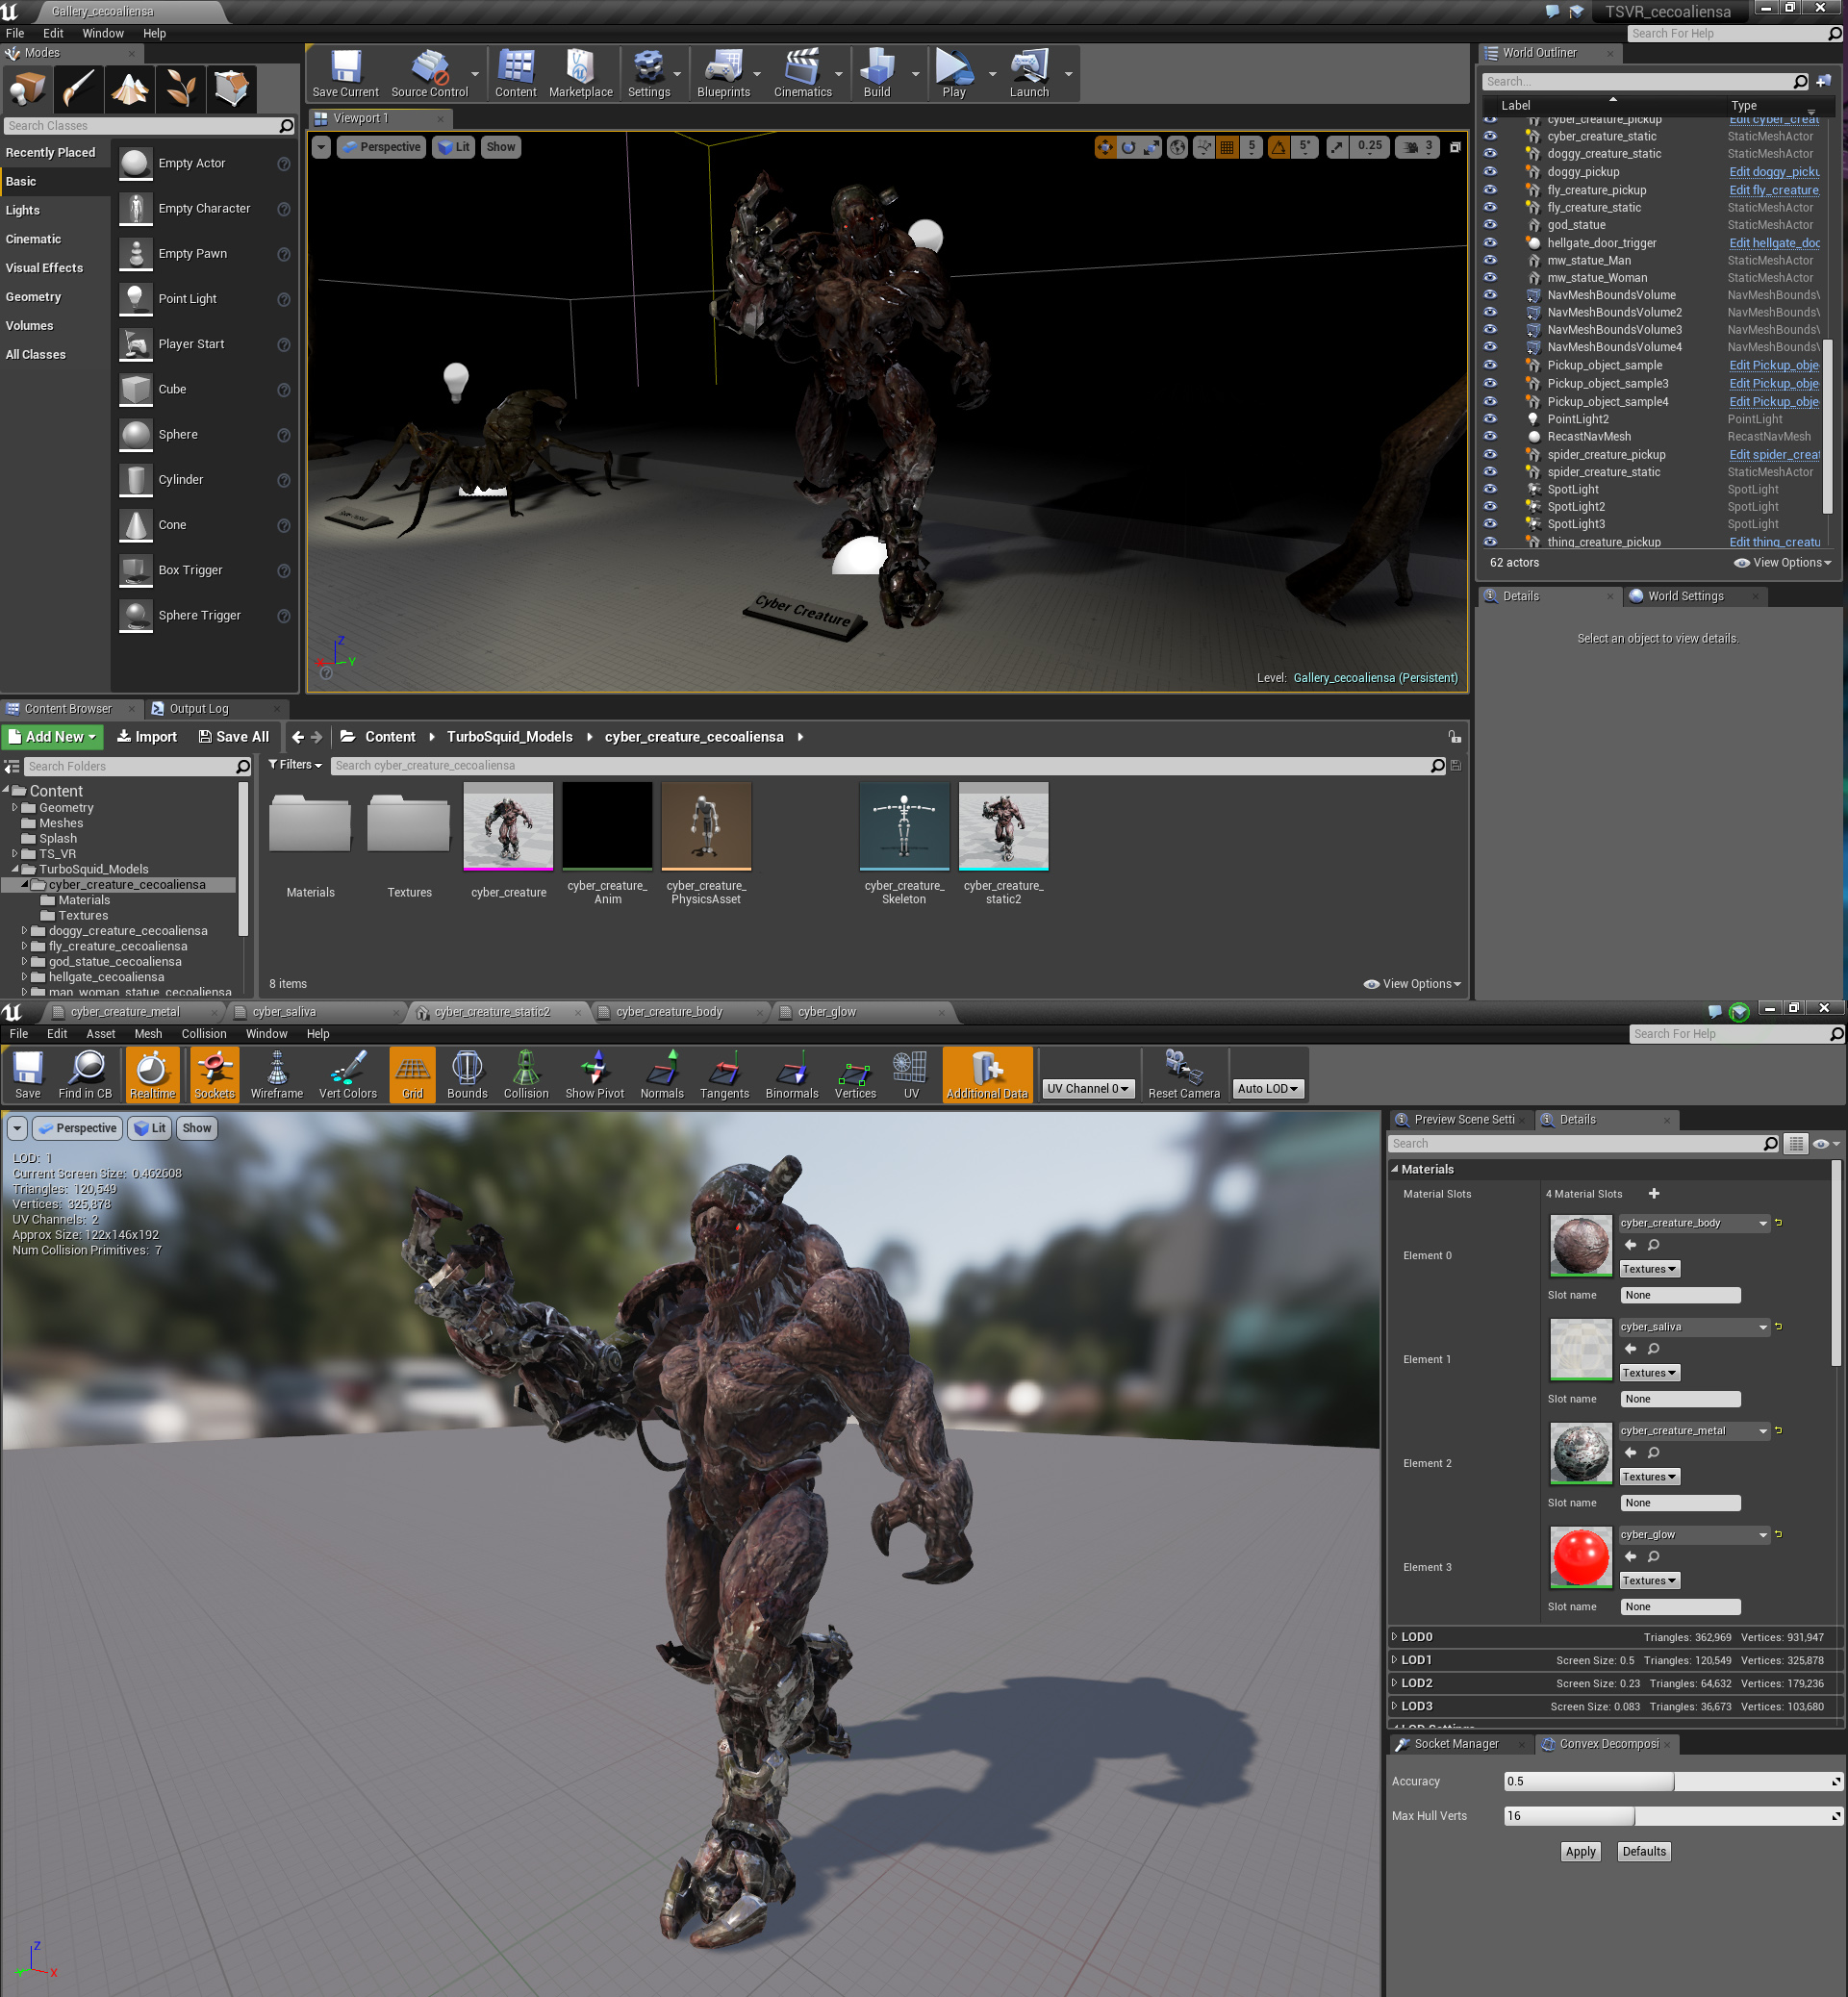
Next is the model view:

  1. Click on the imported model file.
  2. A new window will pop-up. Expand the window to fullscreen if it isn’t already.
  3. Use the mouse and WSAD keys to move around the viewport until you have a desired angle of the model.
  4. The right-hand side should have a list of all materials the model uses. If you imported LODs or used UE4’s auto LOD system, you’ll have triangle and vertex counts of each step, so minimize each group to make them all visible.
  5. Take a screenshot of your screen and crop it as needed in your image editor.
Model view in Unreal Editor

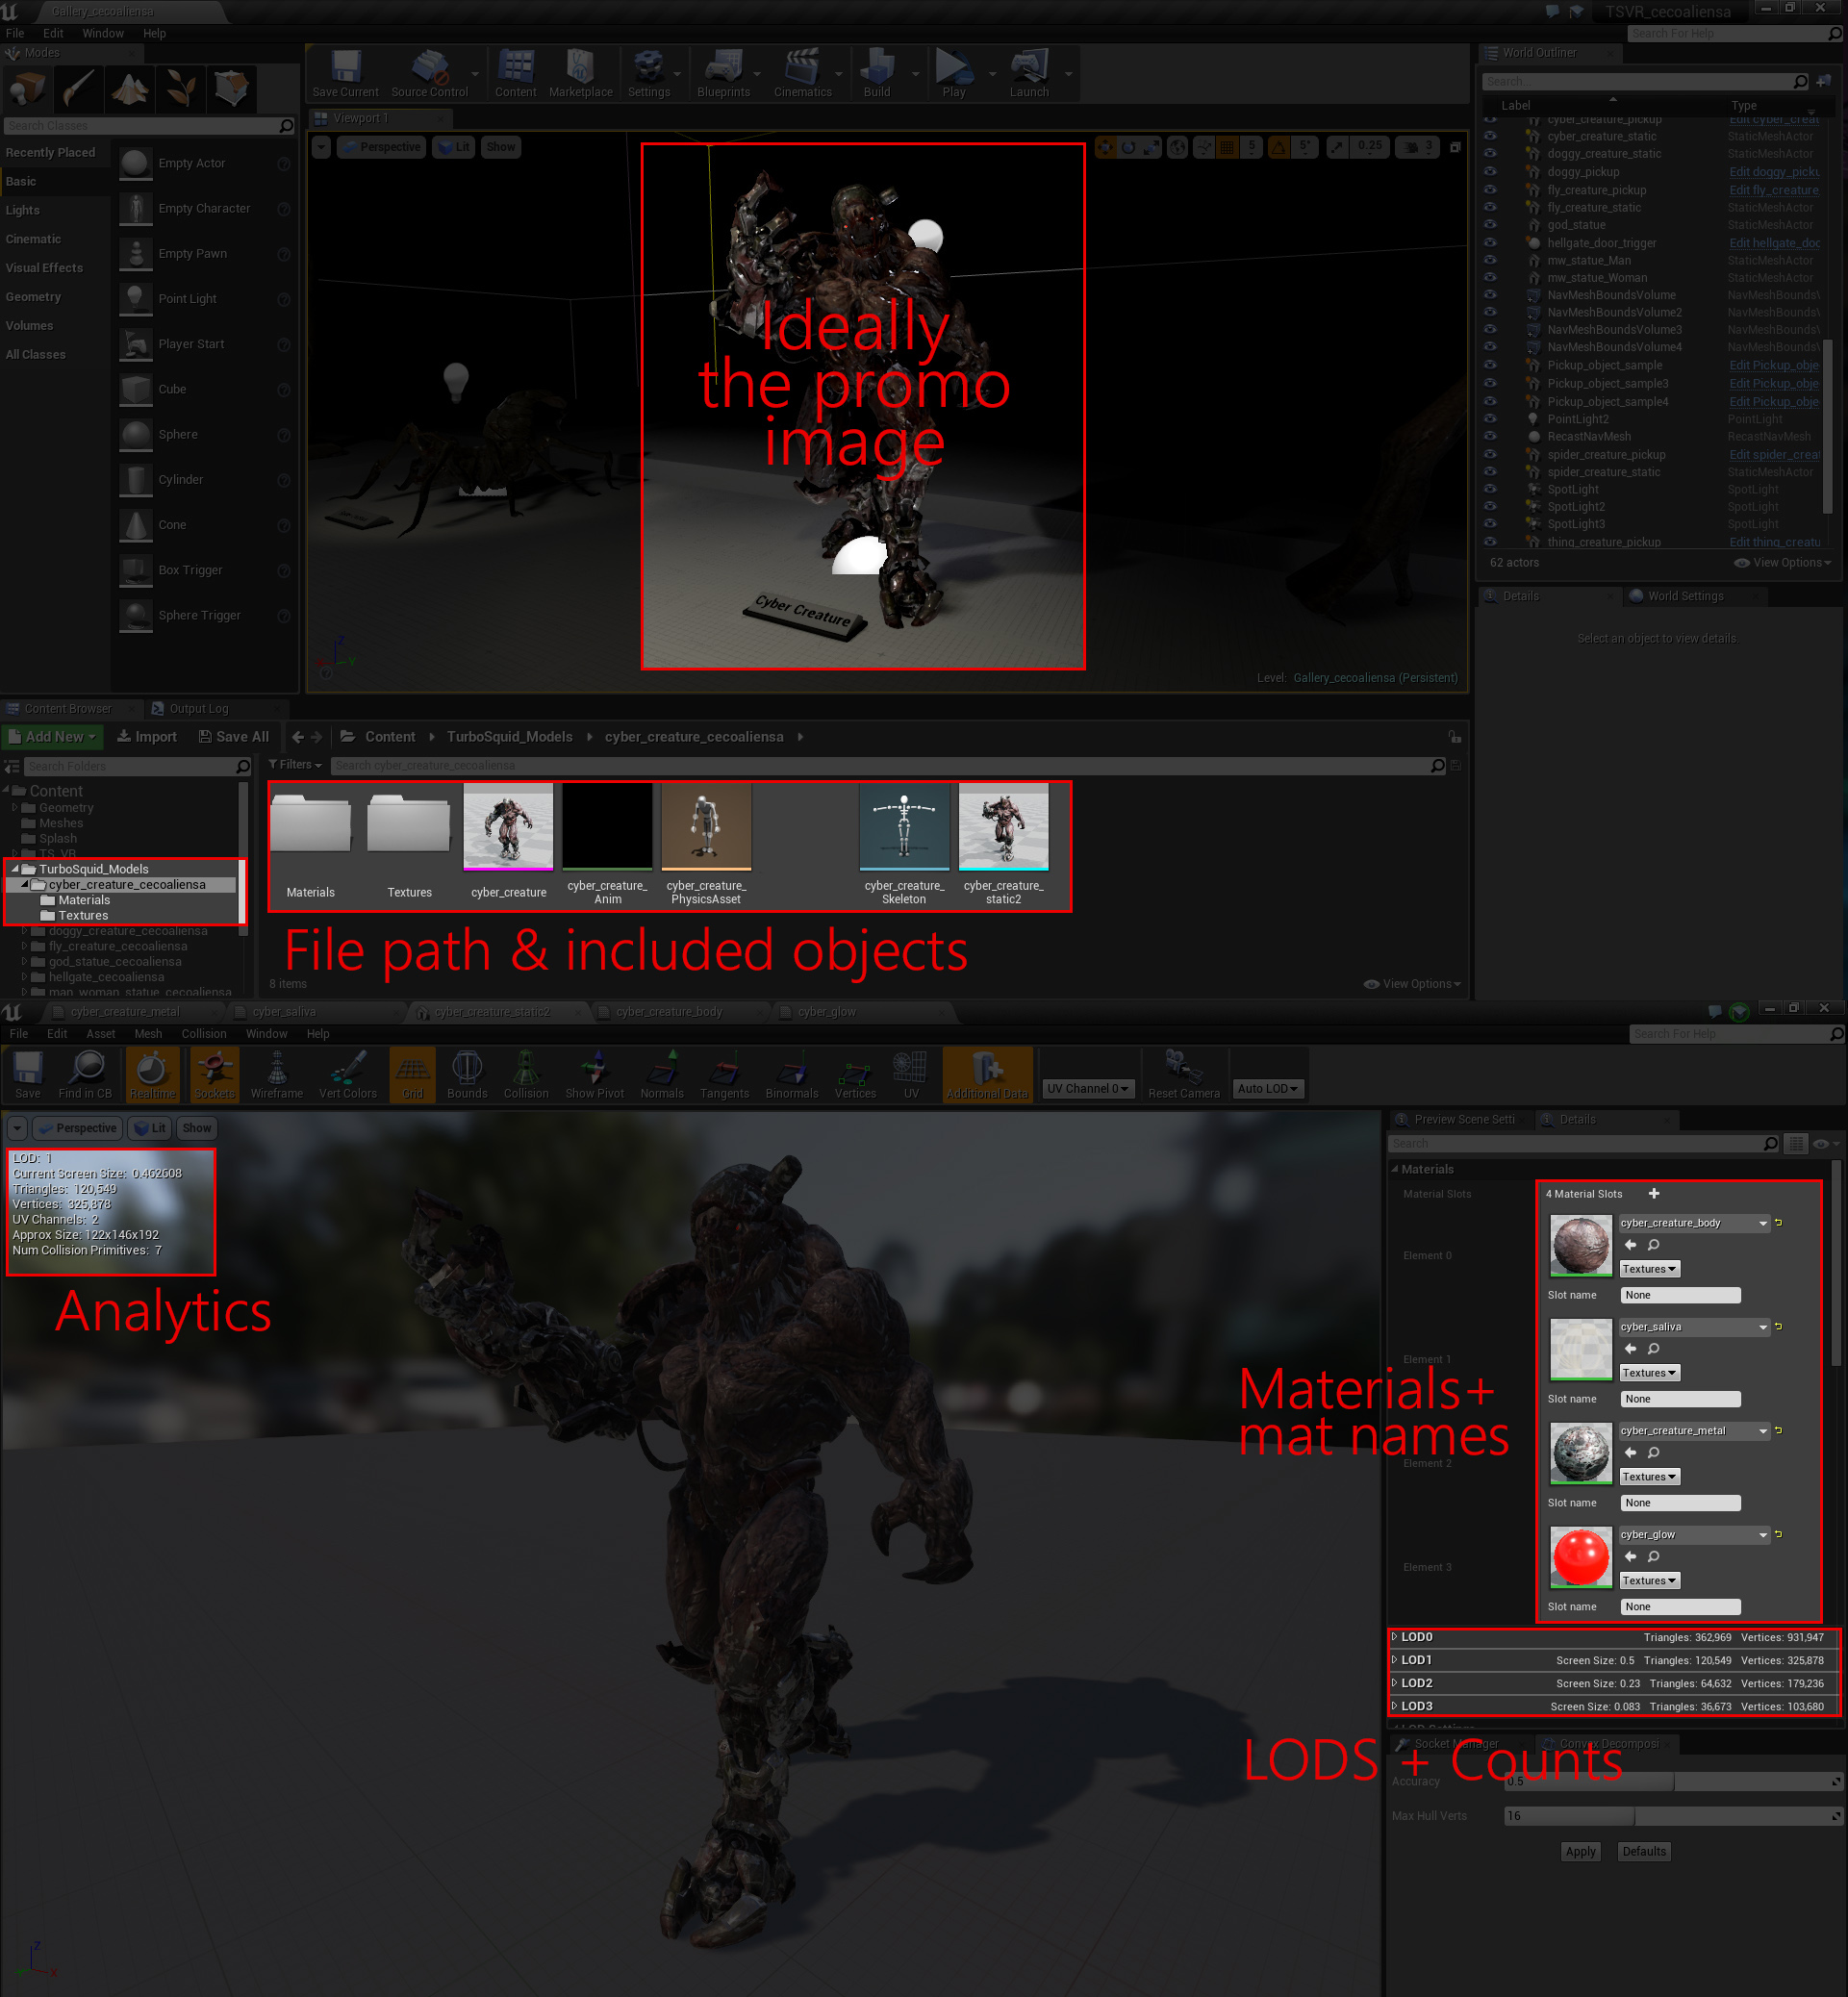
Below is another example model and an overlay of useful information that can be derived from both screengrabs:

Creating 3d model preview in Unreal
Buying 3d models for Unreal

Material View

Material images are useful for Unreal releases since the structure of the material is dependent on the artist. Getting an image of the material is straightforward as well.

  1. Double click on the material to open the material viewer window.
  2. Maximize the window if it is not already.
  3. Zoom in and out as needed, using the mouse to get an image of the entire material. Try to make the map names visible, if possible.
  4. Take a screen capture of your current screen and open it in any image editor. You can crop the image, so long as the graph and preview mesh are visible, as seen in the examples below.
Material editor in Unreal
Material preview shots for Unreal
Buying 3d models for Unreal

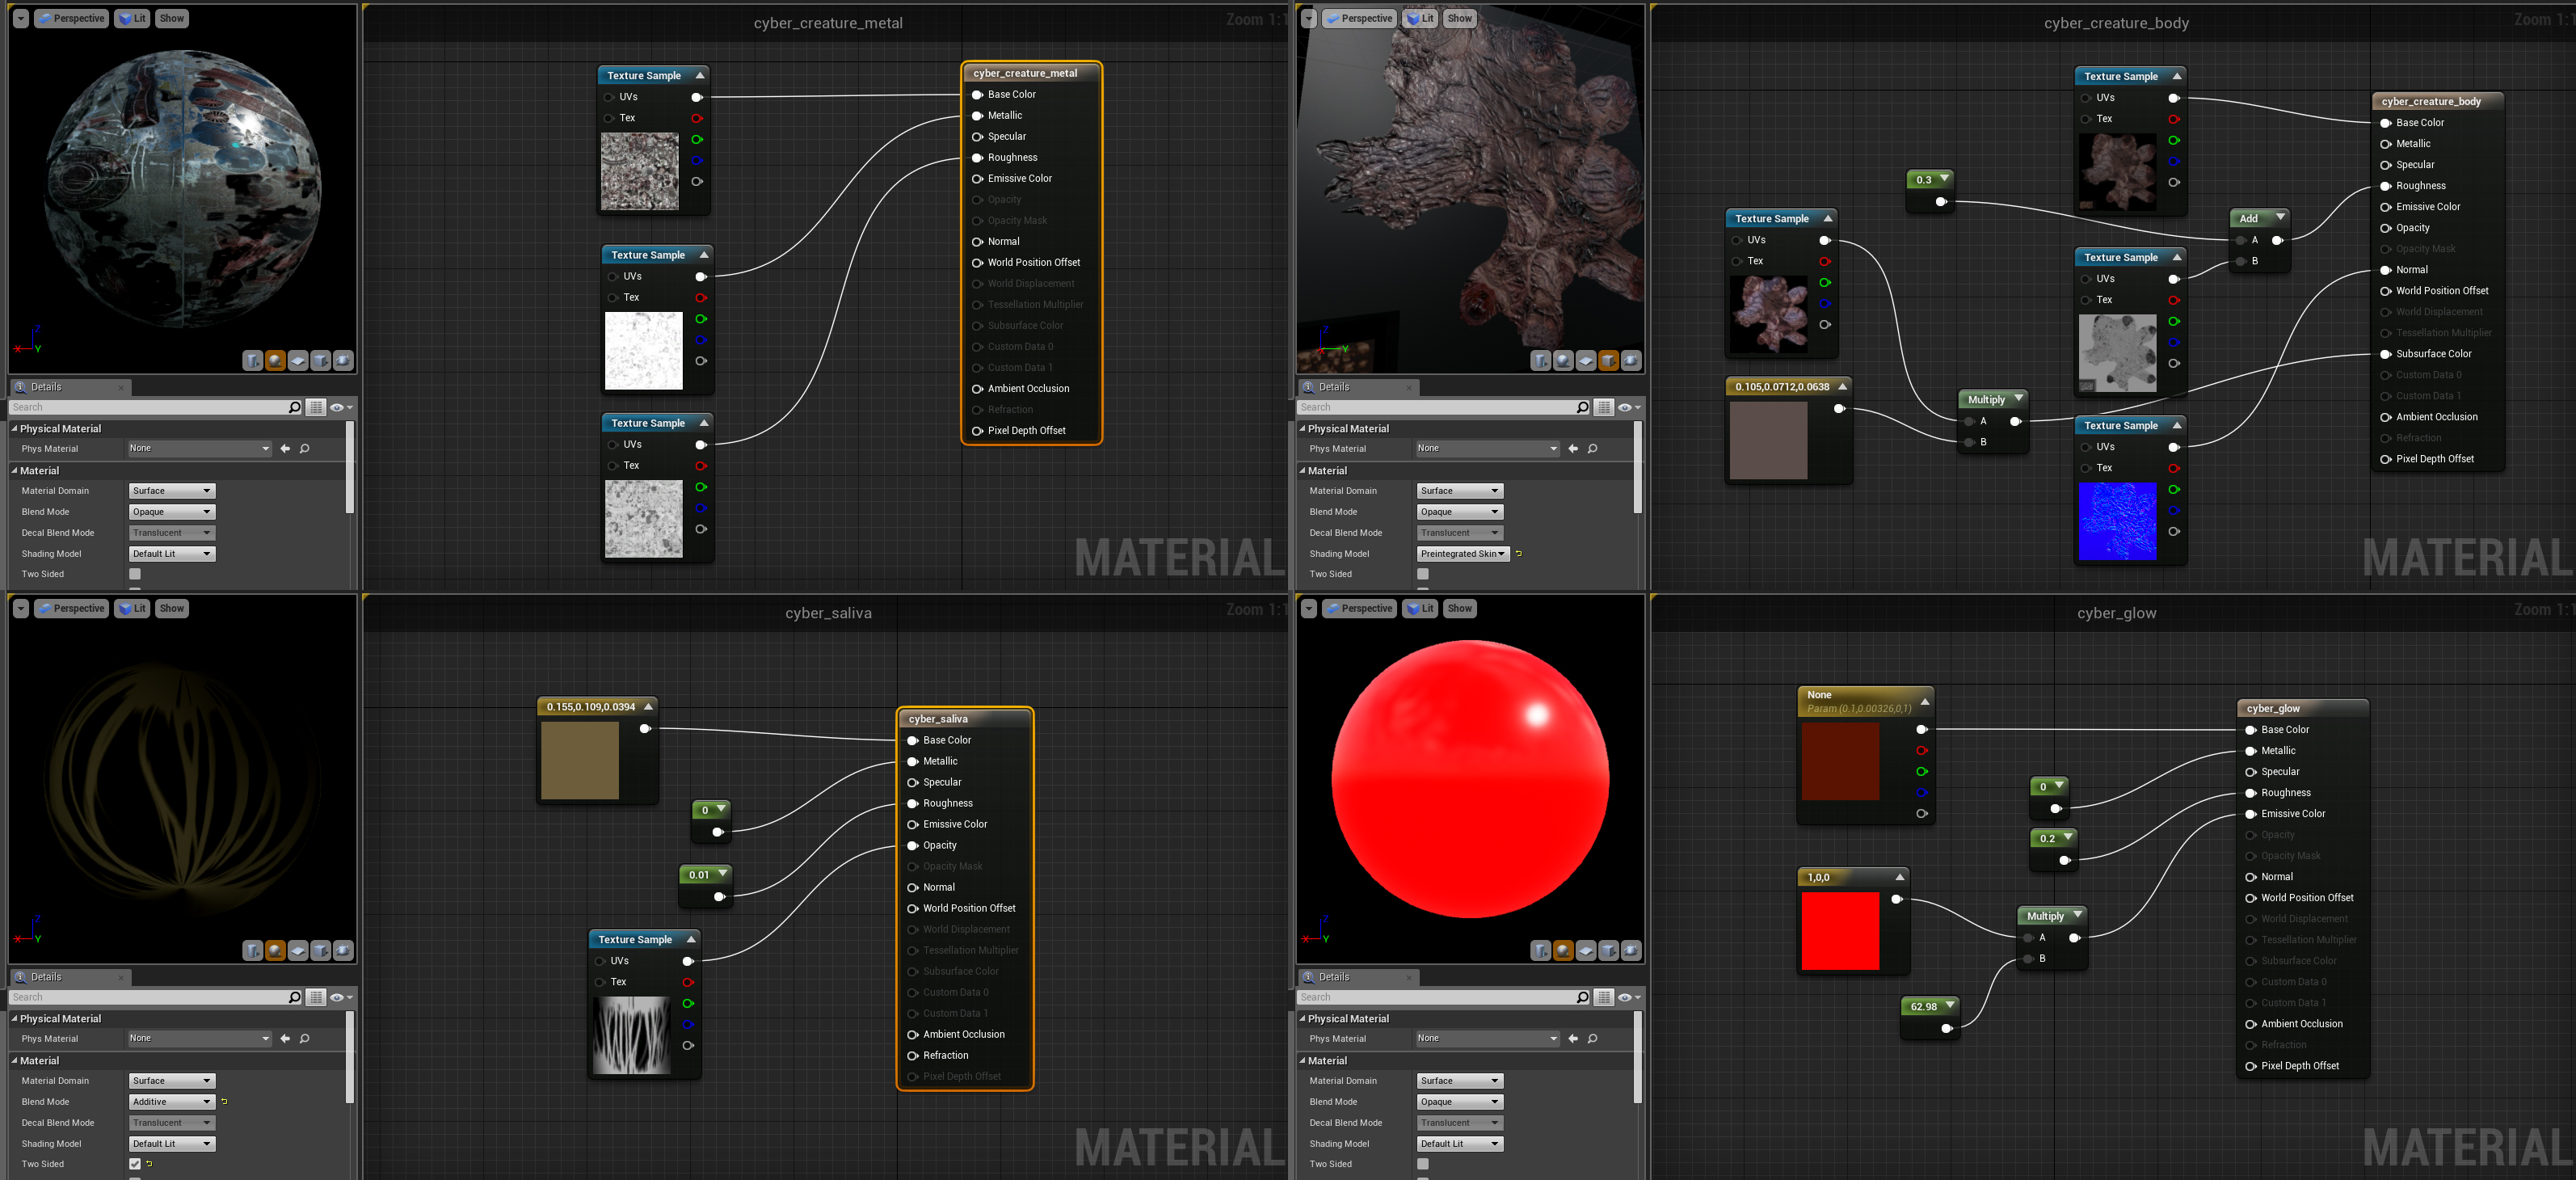
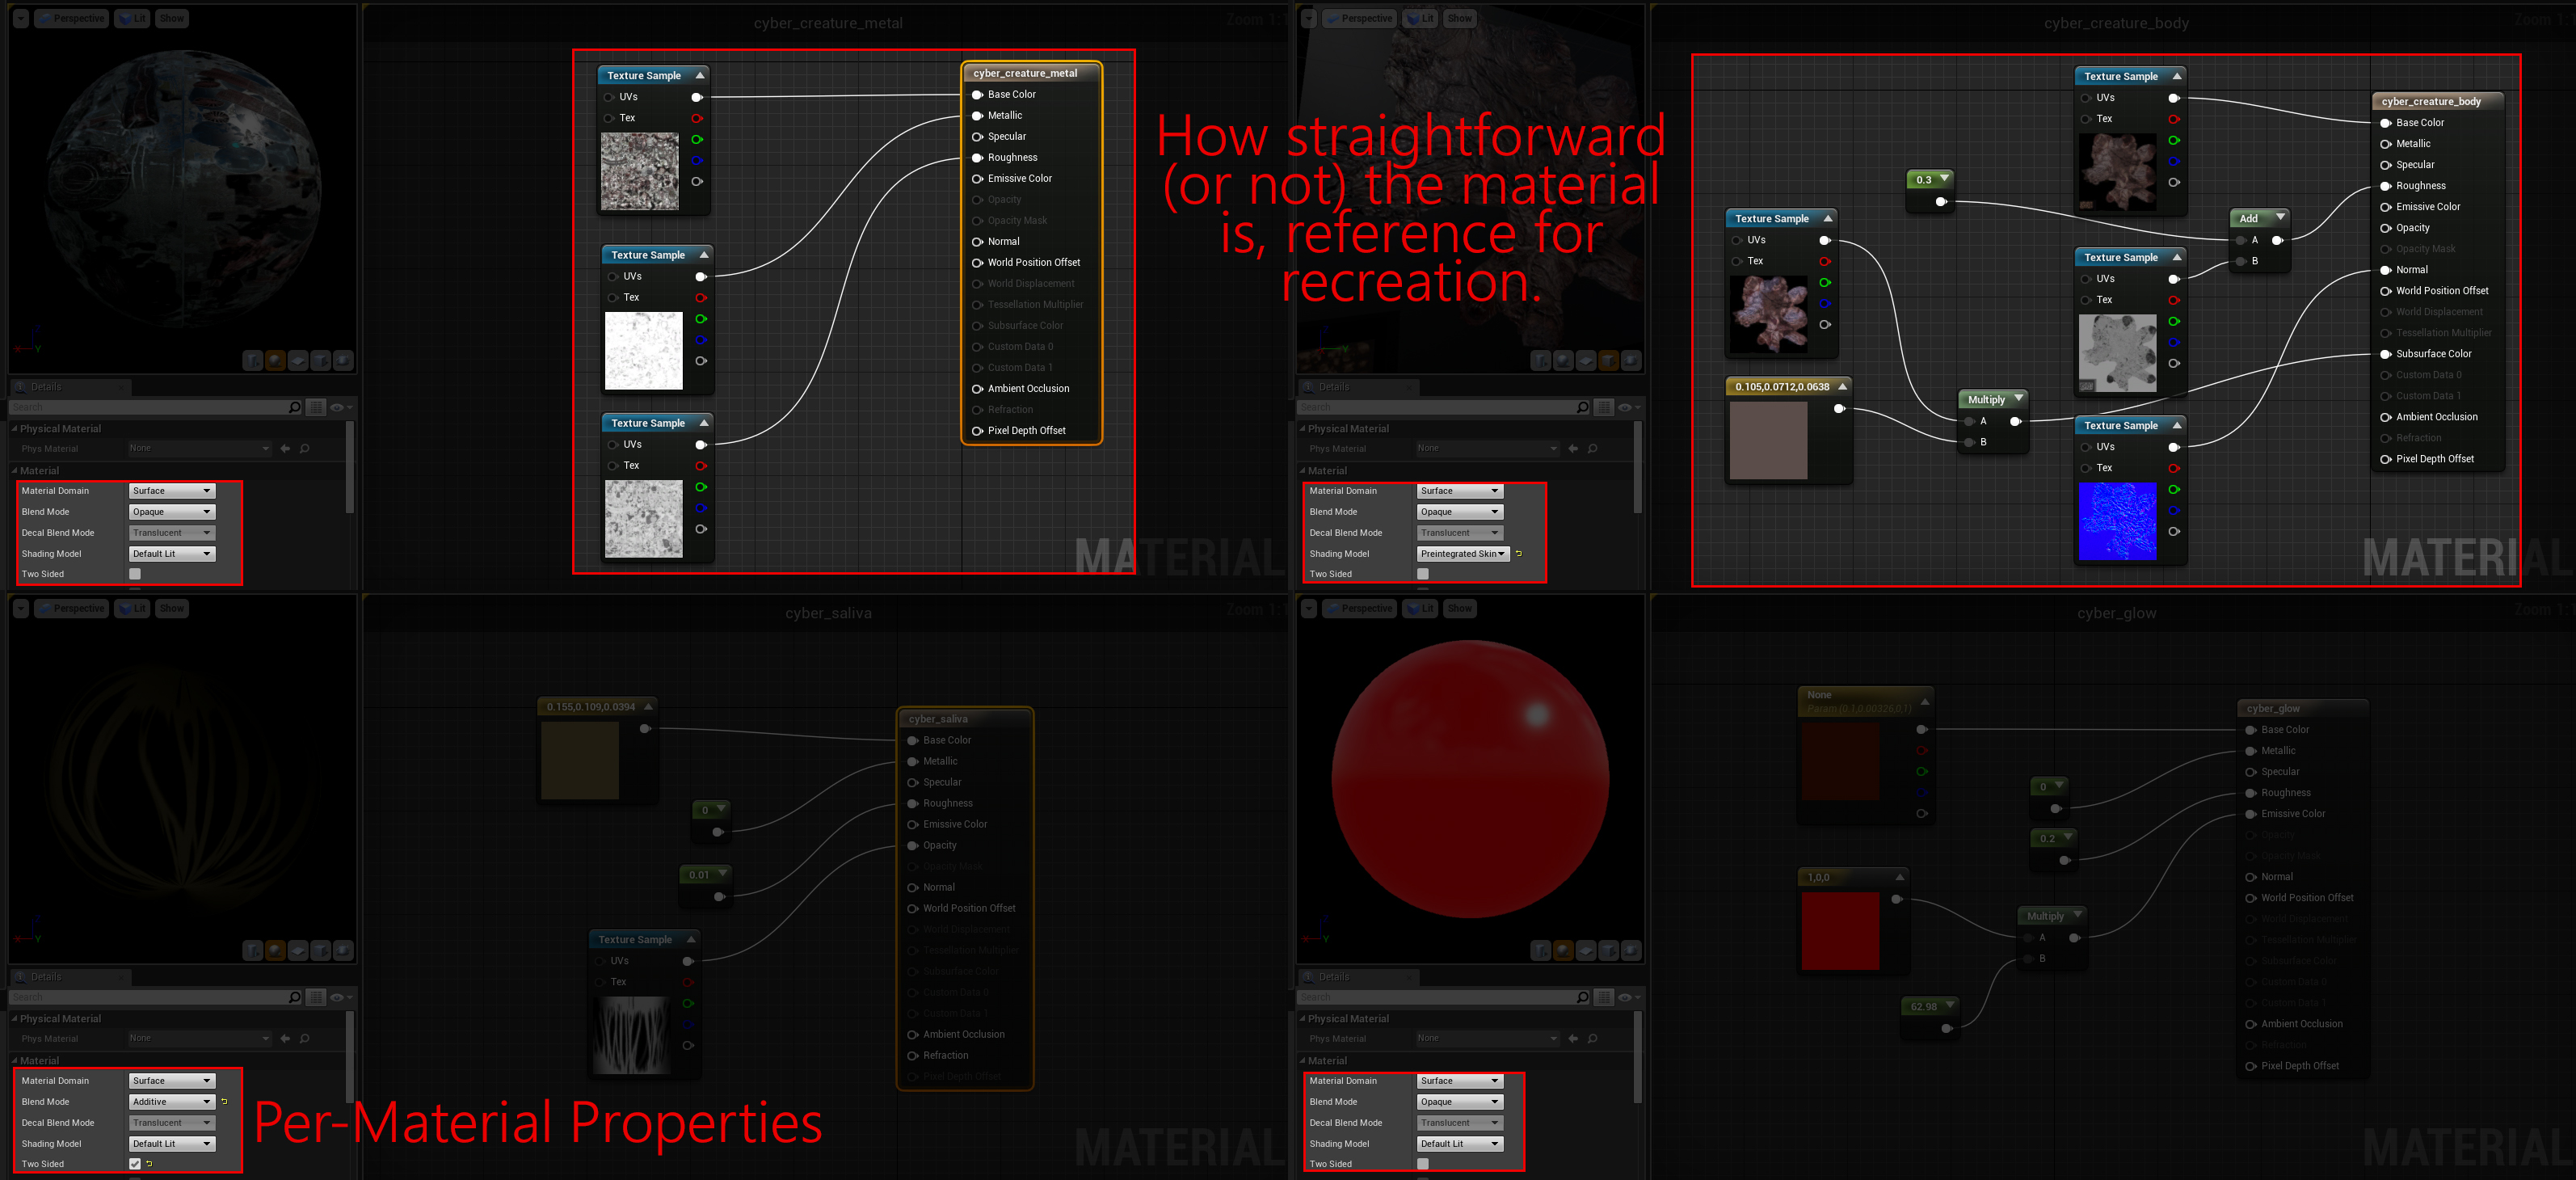
Other Examples of Shots from the Unreal Editor:

Unreal material using Unity 5 texture

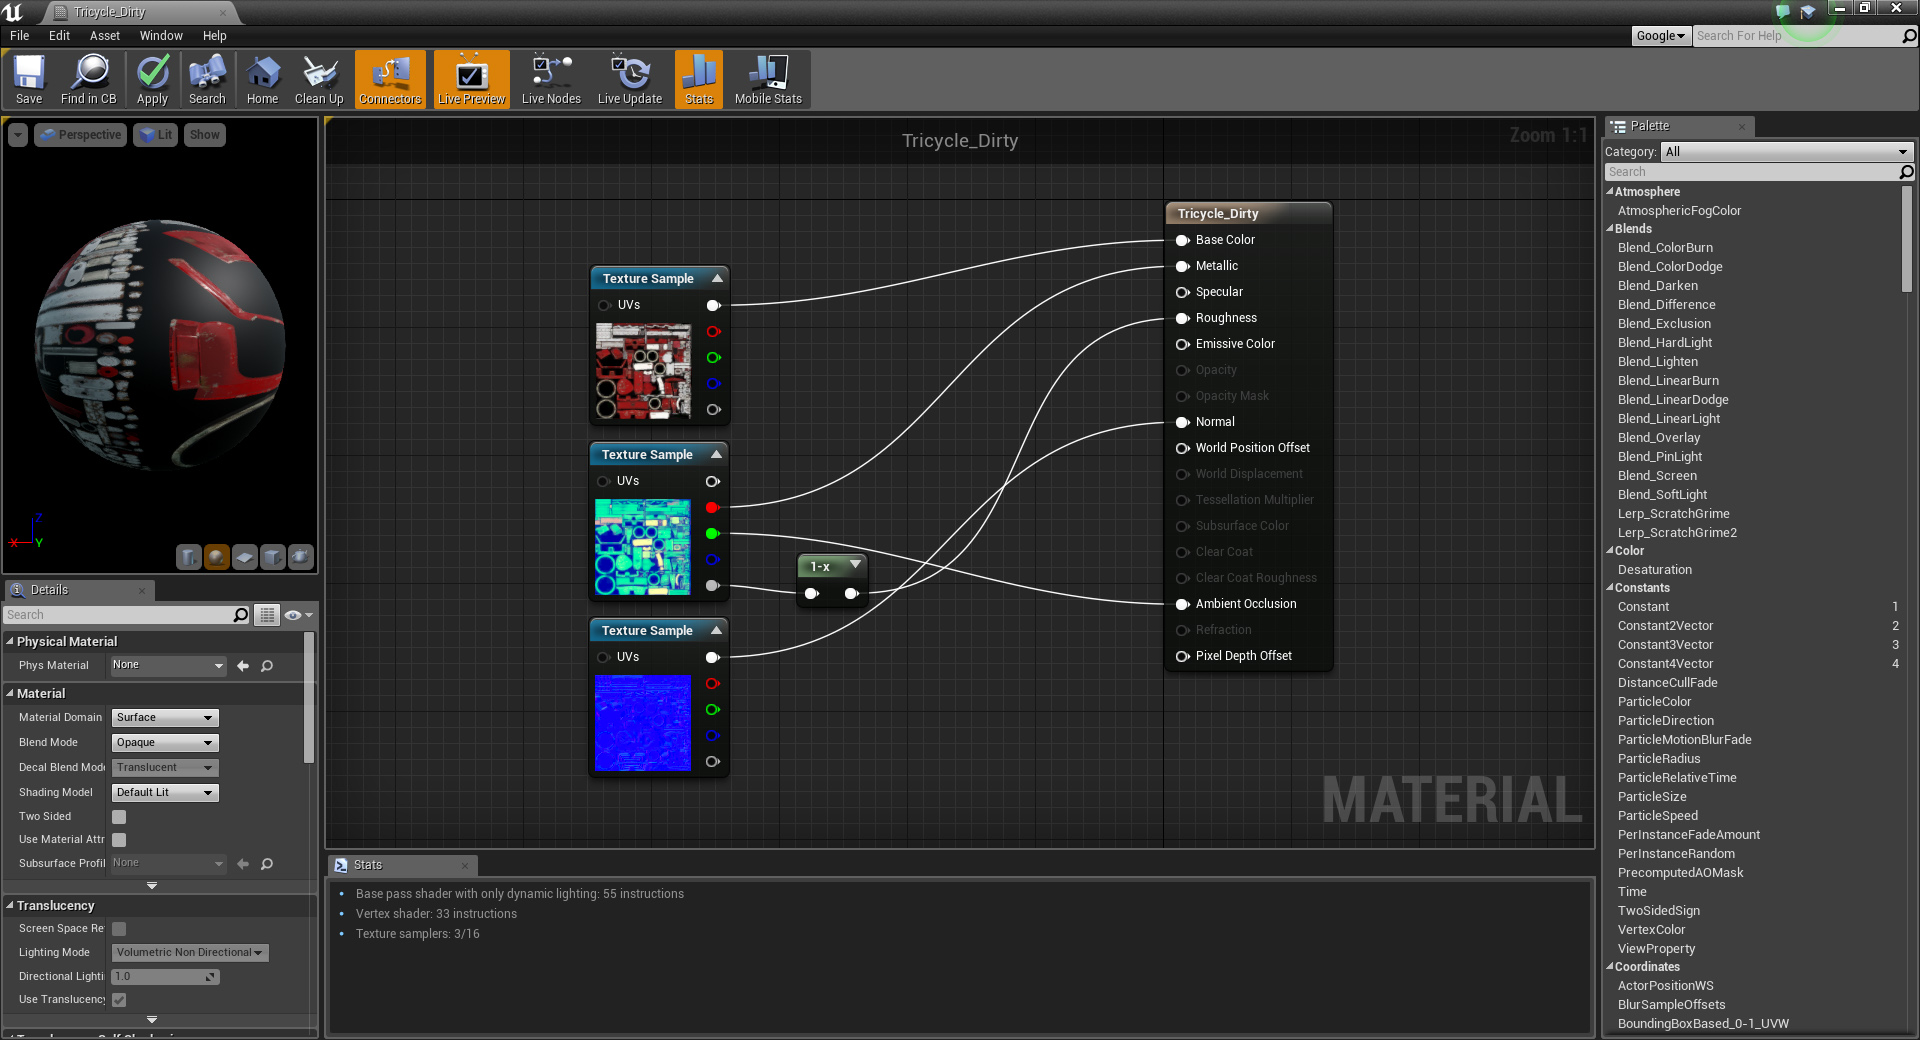
An Unreal material using a Unity 5 standard shader texture packing.

Semi-procedural material in Unity

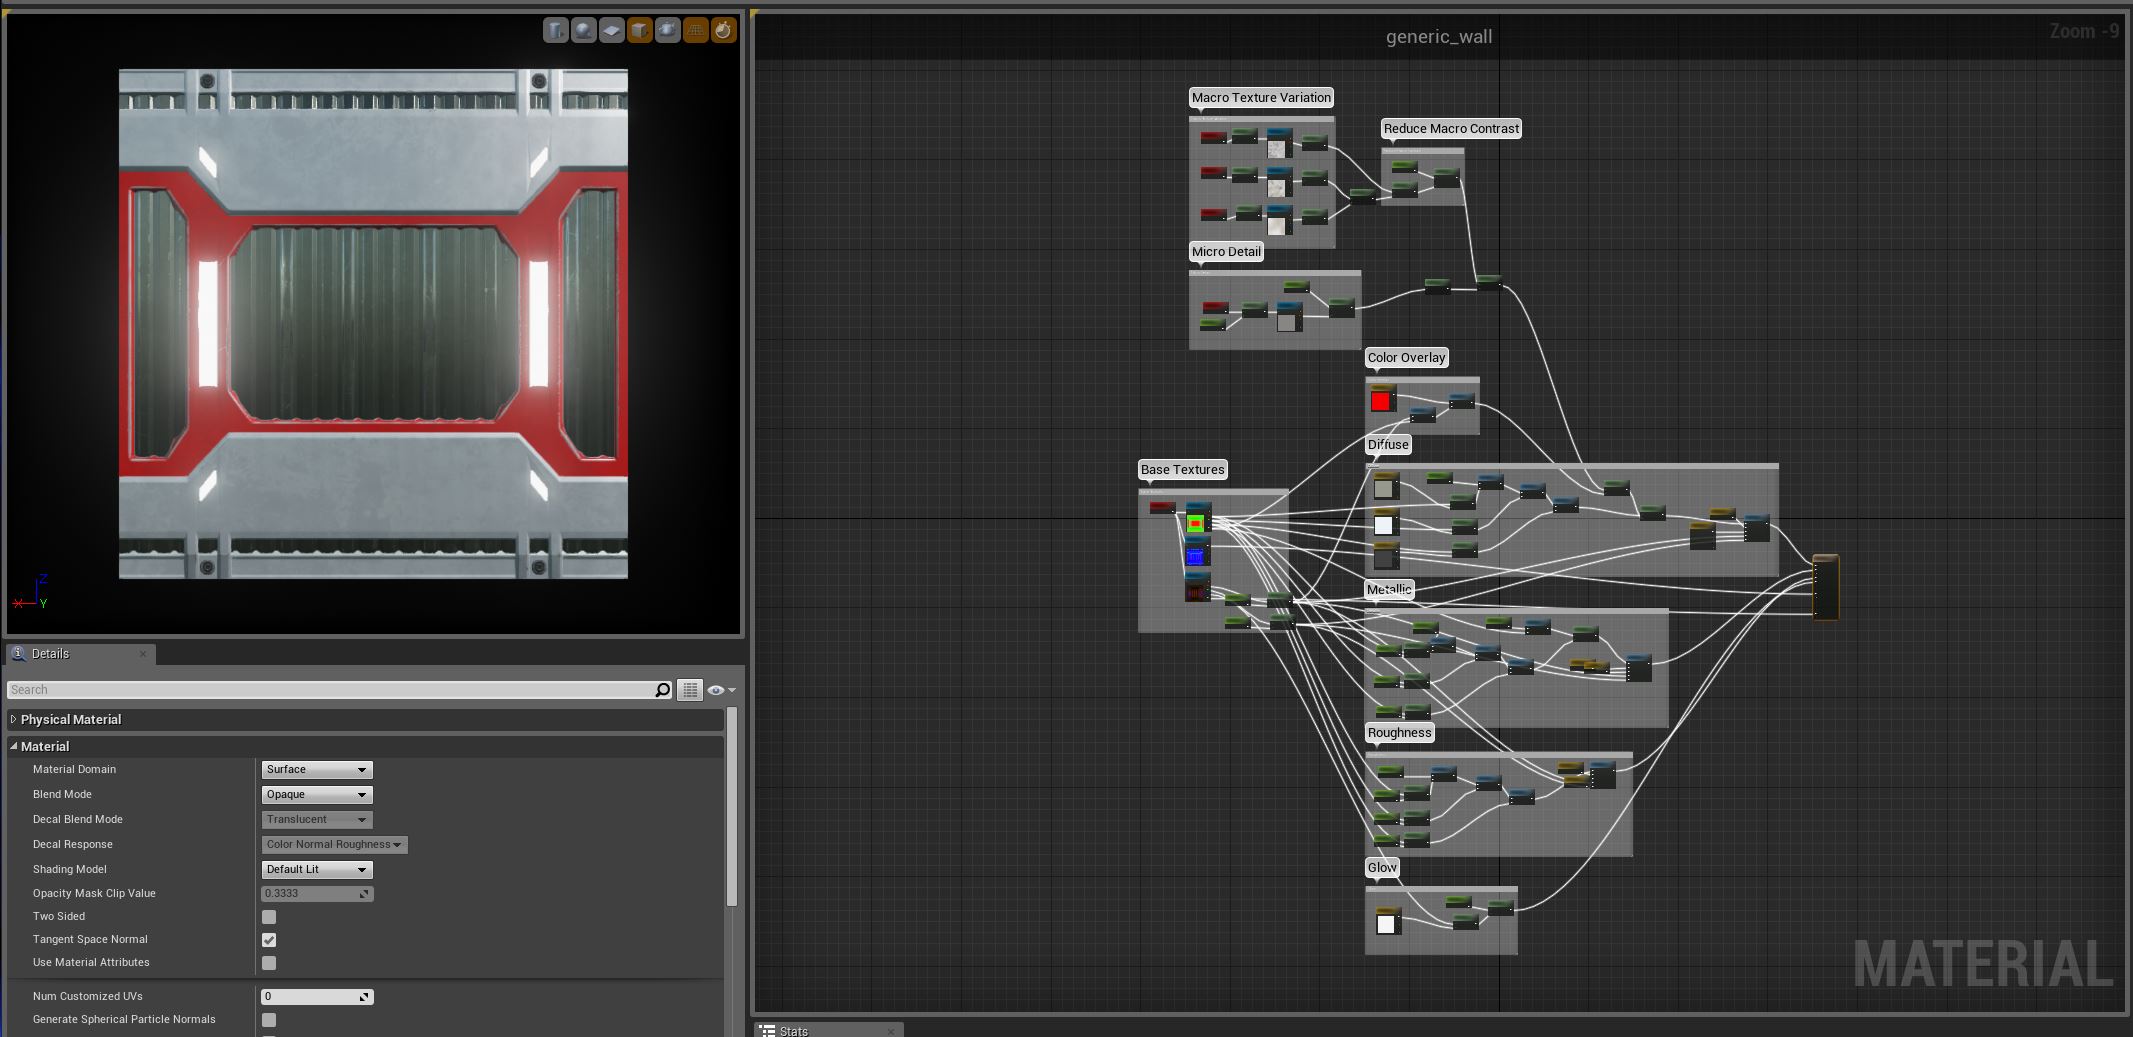
A semi-procedural material using masks to generate a texture based off of a series of slider inputs.

Tips for Context Images

You can quickly get a super high resolution image of your viewport using the built in High-Rez Screenshot tool.

Once you have the framing, pose, and lighting of your model to your liking, you just need to follow these steps:

    1. Remove in-editor overlays and icons by going to the top left of the viewport and clicking on the down arrow.
    2. Check Game View (this will hide all editor elements).
    3. Go back to the down arrow and click High Resolution Screenshot.
    4. A new window will pop up. The slider is a multiplier of the current editor window resolution.
      1. It’s important to note that this will scale at the pixel amount and aspect ratio of the viewport, not your desktop resolution. You may need to do additional cropping if you’re not currently piloting a fixed aspect ratio camera.
      2. Choosing a value above 4 will generate a massive image, and may cause the editor to crash or your computer to freeze– use with care!
    5. Hit the camera button (the editor may be unresponsive for a few seconds).
    6. A message box will pop up at the bottom right of your monitor; click on the link provided and it will open a file explorer window to the output file.
    7. At this point, you can open and edit/downscale/crop the image in your image editor of choice.
Posing a 3D model in Unreal

This article is part of a series on presentation images for Game-Ready Customers, which can be found here.