Table of Contents
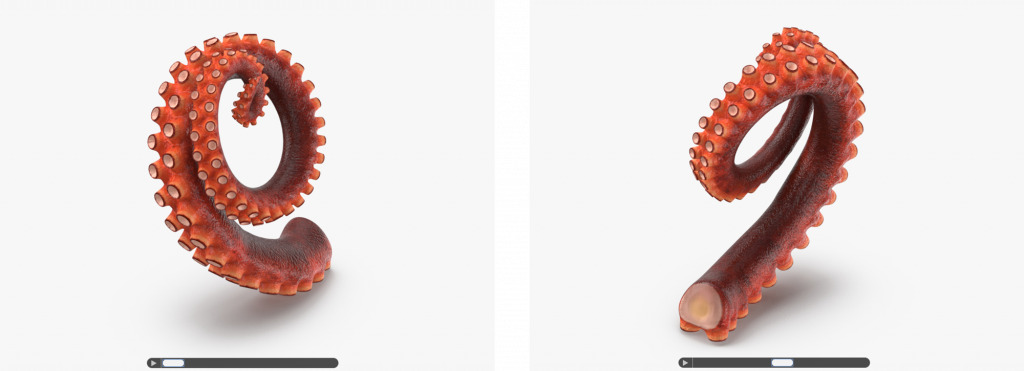
You must use a minimum of 12 images (up to a max of 36) for your turntable at a minimum 1920 x 1080 resolution. All of your turntable images must be at that same resolution in one of these formats: jpg, png, and gif.
Please note that Turntables are not required for interior or exterior models, and you may substitute a Marmoset .mview file for your turntable. If you are publishing a collection, you are not required to create a turntable for each item (though you are free to do so if you wish). Acceptable collection turntables include featuring one model that best illustrates the quality of all of the models you are including in the collection or featuring several models in a single grouping.
You must sequentially number your turntable images starting with 00 or 01 (a leading 0 is required), and use a dash or underscore before the number. Here are examples of supported naming conventions:
- [filename][hyphen][number starting at 00].[extension]
- ImageName-00.jpg
- ImageName-01.jpg
- ImageName-02.jpg
- [filename][underscore][number starting at 01].[extension]
- ImageName_01.jpg
- ImageName_02.jpg
- ImageName_03.jpg
Best practices:
- While not required, we suggest centering your model at the origin (0,0,0).
- When you create your turntable, we suggest that you include one extra keyframe. For Example: A 24 keyframe turntable should contain 25 keyframes. The first and last keyframe will be the same image. By removing the last rendered keyframe, this allows for a seamless turntable with even rotations throughout each frame.
- To ensure that your animations maintains the same velocity between frames, set your key interpolation type to Linear so that the animation keeps the same velocity between frames.
- Your turntables should be at a minimum resolution of 1920 x 1080 or higher.
- So that the model rotates smoothly, you should center the pivot of your model along the XY axes.
- When creating a turntable, you should use an even number of frames to ensure that there is a consistent rotation while the model makes its full 360-degree turn. You should use no fewer than 12 frames; in this example, we’ve used 24.
- When you select the model, be sure to use the Toggle Set Key Mode tab. When you do this, your timeline will show as red. Select the model and set the timeline to Frame 0 and select the Set Keys tab. This will apply the first keyframe of your animation on Frame 0.
- Next, scroll through the timeline until you’ve reached the final frame you’ve selected. Once on that frame, right click the Select and Rotate tab. Within the Select and Rotate tab, set the value for Offset: World Z to 360. Once you have completed this, then select the Set Keys tab again to place a keyframe on your final frame.
- Select the Toggle Set Key Mode tab to turn off the setting. When you scroll through your timeline, your model should now rotate 360 degrees.
- To make sure that the model rotates with a consistent velocity, you will need to make a minor adjustment before rendering. Navigate to Graph Editors > Track View: Curve Editor. Within the Curve Editor, select Z Rotation. Once you select this, navigate to the editor until you find the beginning and end point of the animation cycle. Then, select both points. Once you select both points, choose the “Set Tangents to Linear” tab. You will see that the curve straightens. If you play through the timeline again, you will see that the model rotates at 360 degrees without speeding up or slowing down.
- Now that you have an acceptable turntable, it’s time to render. To render out your turntable, navigate to Render Setup and set your Time Output to Range. The range should start where you placed the first keyframe in the timeline and should end at the frame immediately preceding the last keyframe you placed. In the example shown here, the first keyframe is at 0 and last frame is at 24. Since the last keyframe is set to frame 24, you’ll need to render out until frame 23. This way, 0-23 gives you an even amount of frames to cycle through. In addition, since frame 0 and 24 technically depict the same pose, not having frame 24 in the turntable allows it to rotate seamlessly.
- Finally, under Render Output, set the file path to where you would like to save your turntable images. You should name your images sequentially, starting at 0 or 1. Examples:
- [filename][hyphen][number].[extension]
- Image-00.jpg
- Image-01.jpg
- Image-02.jpg
- [filename][underscore][number].[extension]
- Image_01.jpg
- Image_02.jpg
- Image_03.jpg
- Your turntables should be at a minimum resolution of 1920 x 1080 or higher.
- So that the model rotates smoothly, you should center the pivot of your model along the XY axes.
- When creating a turntable, you should use an even number of frames to ensure that there is a consistent rotation while the model makes its full 360 turn.You should use no fewer than 12 frames, but for this example, we’ve used 24.
- While on Frame 0, select the model and press the S key on your keyboard. This will set the first keyframe of your animation. Next, drag the slider on the timeline so that it is on your final frame. Select the box for Rotate Y and type in the value “360”. Once you have done this, press the S key again to add another keyframe to your animation. If you were to drag the slider across the timeline, you should now see that the model rotates 360 degrees.
- To make sure that the model rotates with a consistent velocity, you will need to make a minor adjustment before rendering. Navigate to Windows > Animation Editors > Graph Editor. Within the Graph Editor, select Rotate Y. Then, select the first and last point of the curve. Once you do this, select Linear Tangents to straighten the curve. Check the animation and it should start to render smoothly.
- To set up your render, first make sure that your project is set under File > Set Project. Next, navigate to Render Settings > Animation. Set Animation to “Specific Frames” and set the frames at 0 through the frame number that immediately precedes your last frame (in this example, 23). Since the last keyframe in this example is set to frame 24, you’ll need to render out until frame 23. This way, 0-23 gives you an even amount of frames to cycle through. In addition, since frame 0 and 24 technically depict the same pose, not having frame 24 in the turntable allows it to rotate seamlessly.
- Once done, navigate to Rendering > Render > Render Sequence. Select the camera or perspective you wish to render from and select “Render Sequence.”
- You should name your images sequentially, starting at 0 or 1. Examples:
- [filename][hyphen][number].[extension]
- Image-00.jpg
- Image-01.jpg
- Image-02.jpg
- [filename][underscore][number].[extension]
- Image_01.jpg
- Image_02.jpg
- Image_03.jpg
- Your turntables should be at a minimum resolution of 1920 x 1080 or higher.
- So that the model rotates smoothly, you should center the pivot of your model along the XY axes.
- When creating a turntable, you should use an even number of frames to ensure that there is a consistent rotation while the model makes its full 360 turn.You should use no fewer than 12 frames, but for this example, we’ve used 24.
- While on Frame 0, select the model and then select the circle for H Rotation. This will set the first keyframe of your animation. Next, drag the slider on the timeline so that it is on your final frame. Set a value of “360” in H Rotation and then click the circle for H Rotation so that it turns red. This will set the final keyframe in your animation. After doing this, if you drag the slider across the timeline, you should see that your model rotates 360 degrees.
- To make sure that the model rotates with a consistent velocity, you will need to make a minor adjustment before rendering. Navigate to Windows > Timeline (F-Curve). Within the Timeline window, select Rotate H and select the first and last point of the curve. Once you do, select the Linear tab to straighten the curve. Once done, check the animation and it should begin to render smoothly.
- To set up your render, navigate to Render Settings > Output and set the frames at 0 through the frame number that immediately precedes your last frame (in this example, 23). Since the last keyframe is set to frame 24, you’ll need to render out until frame 23. This way, 0-23 gives you an even amount of frames to cycle through. In addition, since frame 0 and 24 technically depict the same pose, not having frame 24 in the turntable allows it to rotate seamlessly.
- You should name your images sequentially, starting at 0 or 1. Examples:
- [filename][hyphen][number].[extension]
- Image-00.jpg
- Image-01.jpg
- Image-02.jpg
- [filename][underscore][number].[extension]
- Image_01.jpg
- Image_02.jpg
- Image_03.jpg
If you get an error message when uploading the turntable images, check to make sure you have 12 correctly-named files that are sequentially numbered and are all the same resolution. If you continue to have difficulty, contact Support.
If your turntable halts or jerks when going from the last frame to the first, be sure to set your animation keys to linear interpolation. If you are unsure about how to do this, see your software’s Help docs or find other online resources for instructions.

