
The Unity editor, like any tool with a great deal of power, can look daunting at first, but with practice can allow you to rapidly create and manipulate assets and scenes. When taking pictures of it for a product page, you can get a lot across with a single image. Texture inputs are standardized, so there’s usually no need to take pictures of your material setup, and there’s a lot of important model data you can see in the main editor window at the same time.
This guide will walk you through you the process of taking editor images. If you need a guide on how to import your models and set up/place them in a scene, please refer to the links in our Introduction to Unreal & Unity for 3D Artists.
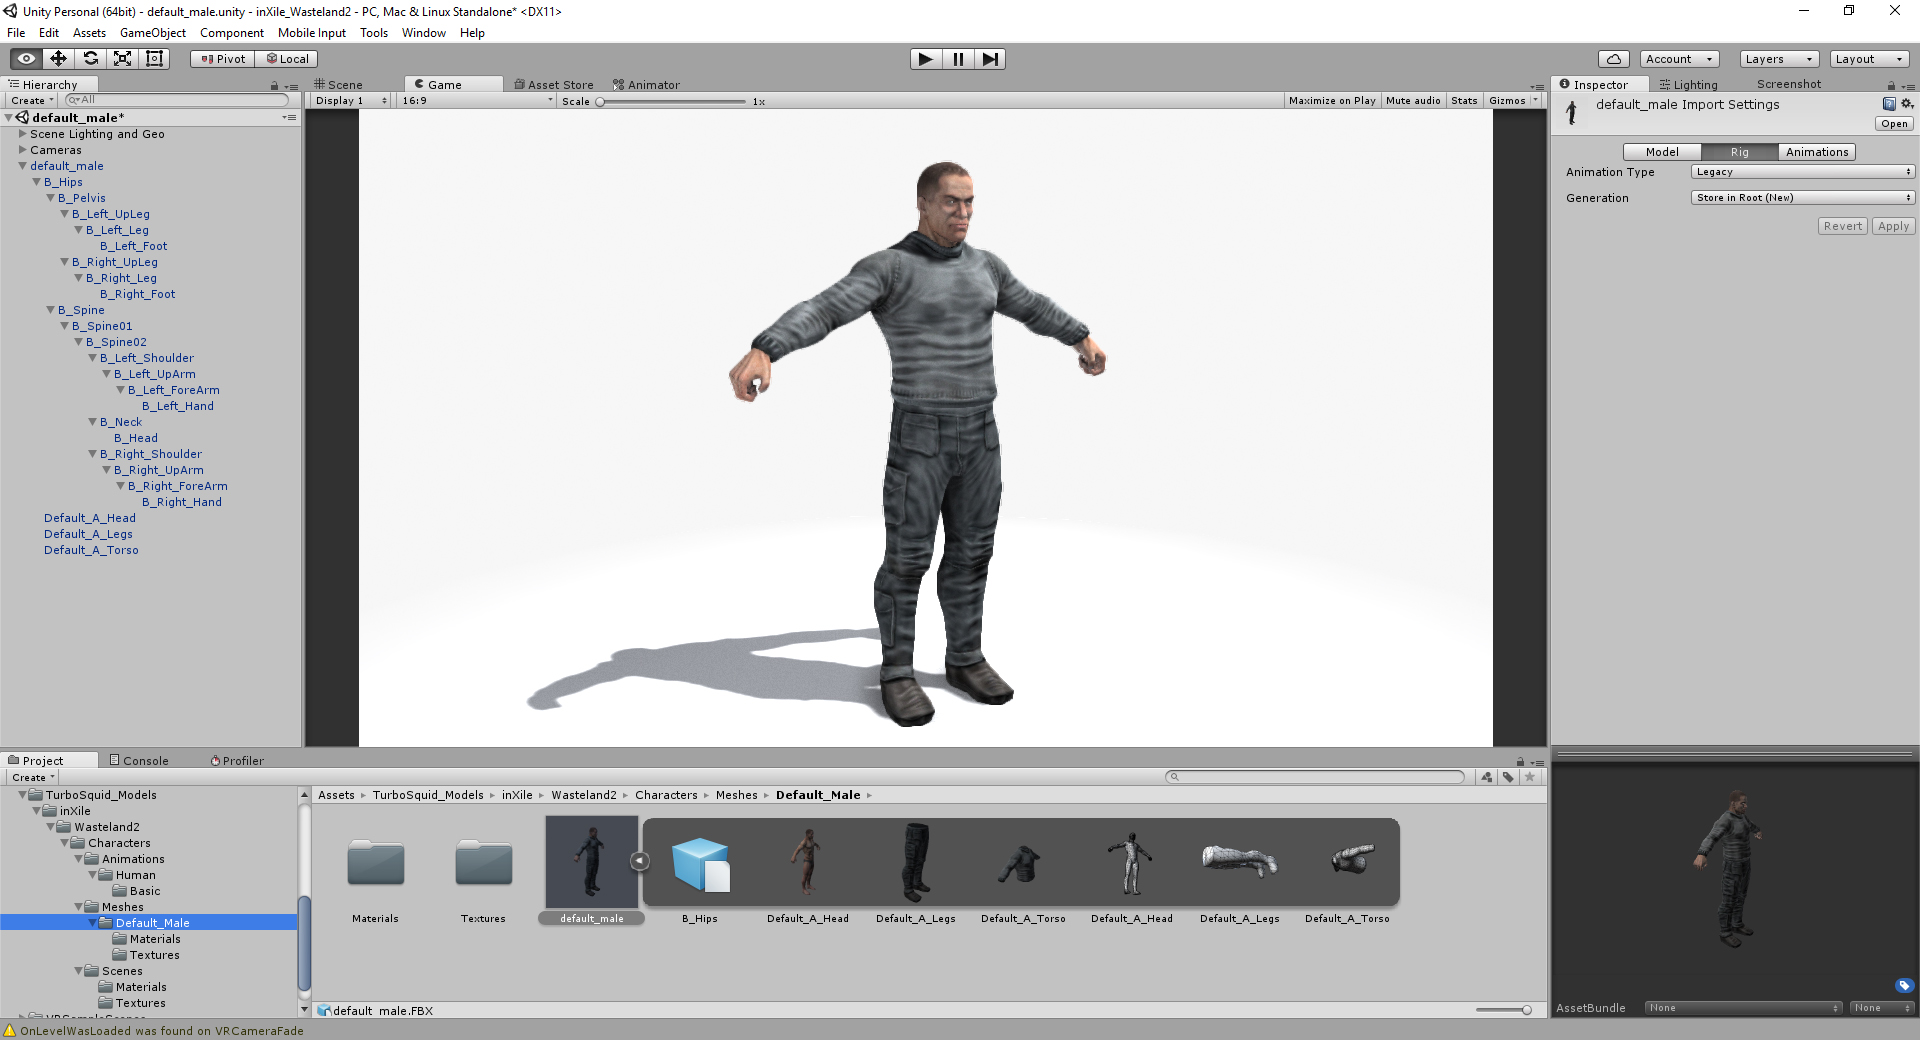
Unity’s standard editor window has everything you need by default.
Feel free to experiment with camera positions and composition, but this guide will get you to a TurboSquid-friendly starting point.
The camera can be moved in the editor window with standard transform (W) and rotation (E) gizmos. It will show a small preview window if you have the camera selected.
You can also tweak the values in Game view using the transform type-in at the top of the Inspector panel (on the right side of the UI). Clicking and dragging over the X, Y, and Z text before the input box will work like a slider. The perspective (zoom) can also be edited in the camera properties in the Inspector. You can always key in position and rotation values up to three decimal places for granular control.
Finally, if desired, you can replace the default sky with a gradient or solid color (the TurboSquid standard is RGB 247, 247, 247). The first option in the camera settings in the Inspector is a Clear Flags dropdown. Change Skybox to Solid color and select the color swatch directly underneath it. This will cause a color picker window to pop up. At this point, you can either key in or drag to your color of choice.
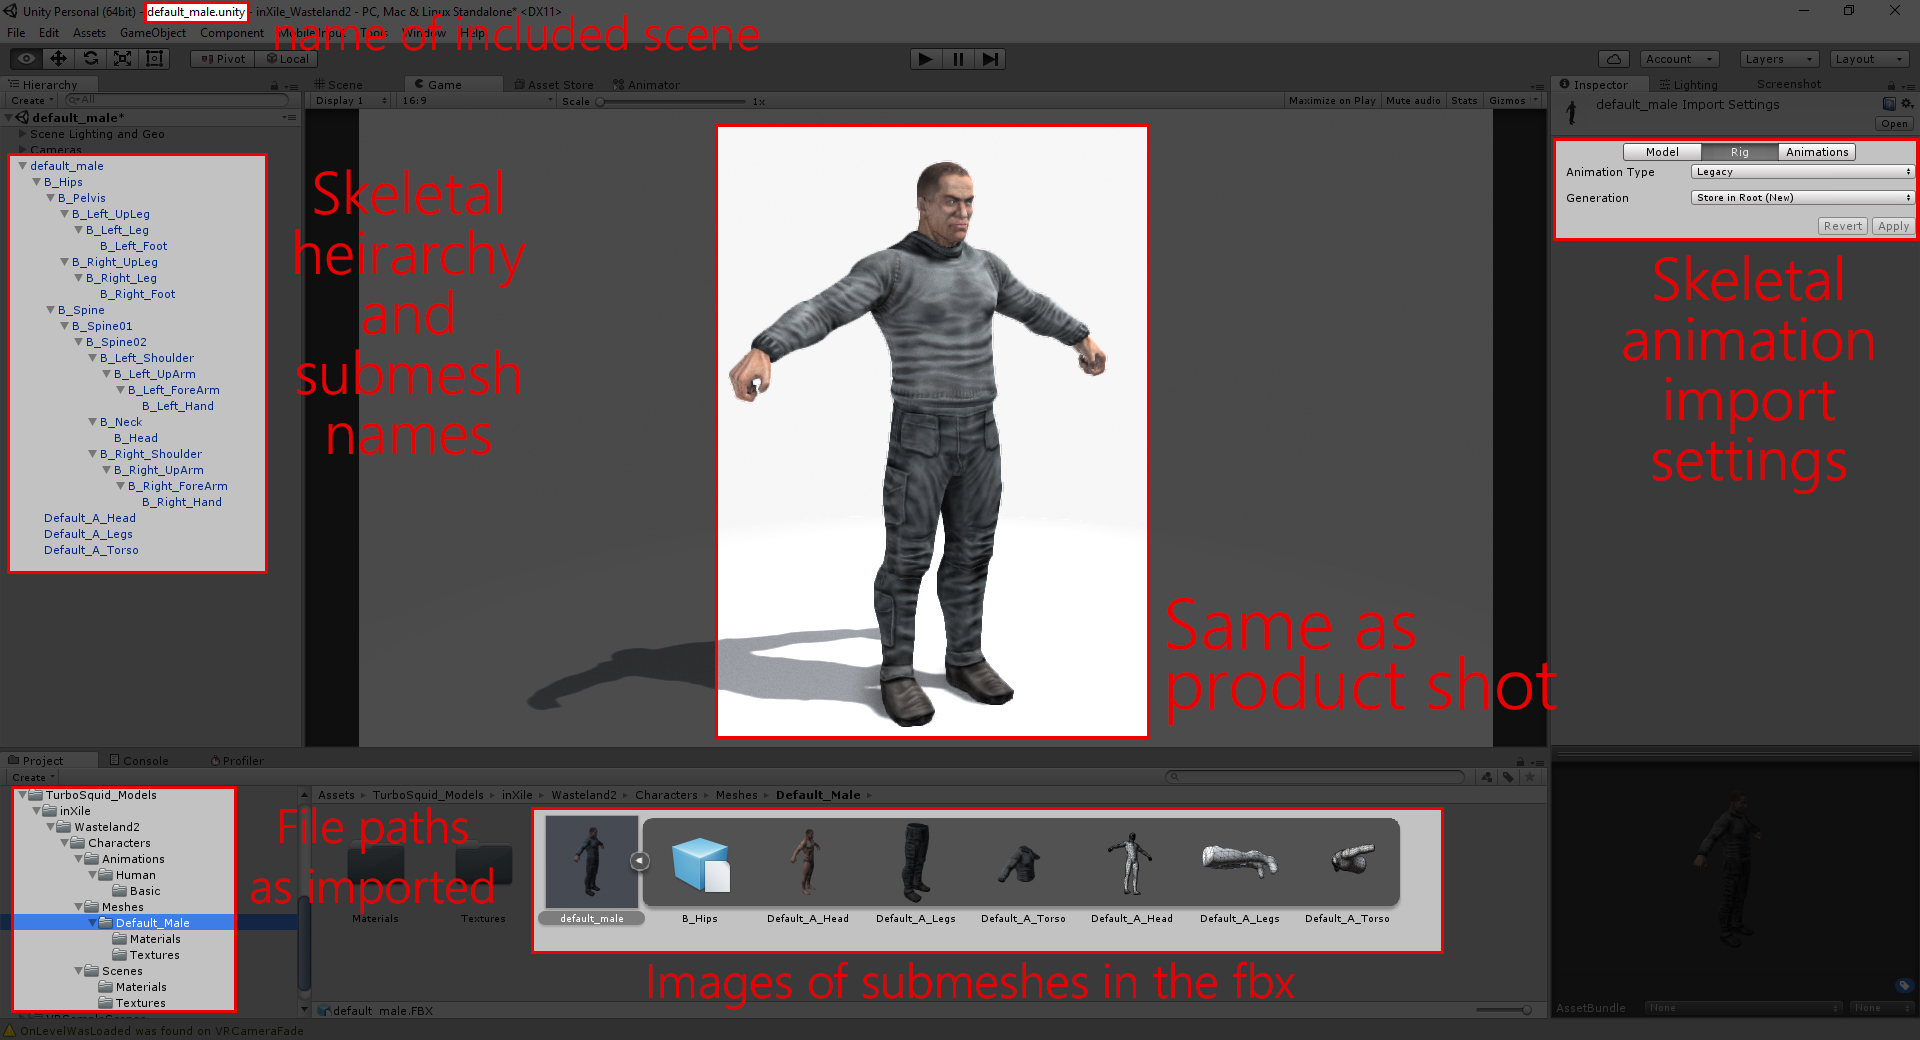
Finally, expand out the mesh as imported in the Hierarchy panel, select your model from the project view, and expand it out to see all the subobject data encapsulated in your FBX. You can also rotate the preview mesh in the inspector panel.
Take a screen capture of your work and you’re ready to go. Here’s an overview of what’s being displayed to the trained eye:
Tips for Context Images from the Unity Editor
Unity doesn’t have a dedicated screenshot tool by default, but there are free tools on its asset store that are free and easy to use. Instant Screenshot is a good option that works with all versions of Unity 5. This is more sophisticated than a screengrab or snip; it allows you to superscale and save a render and downsize in a photo editor. A good tool from Unity is the Post Processing Stack (Unity 5.5+), which gives you great post-processing effects to take your images to the next level.
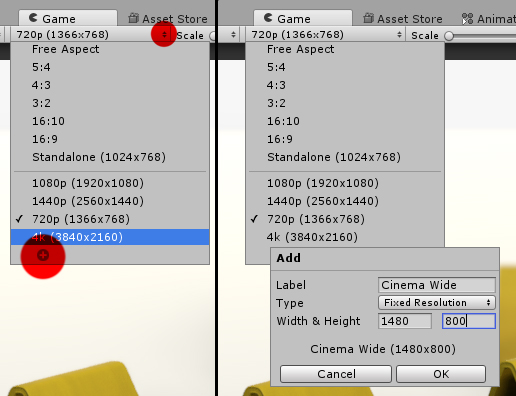
On top of that, you can lock in aspect ratios and get a final render from the Game view tab.
An ideal resolution is 1480×800 because it is a multiple of 1.85:1 and can still be mostly encapsulated in the editor on a 1080p screen with minimal downscaling. As pictured, you can also key in other common resolutions.
Working in the Right Color Space
Most developers that are working in art heavy projects will be working in the Linear color space (not Gamma) and Deferred rendering (not Forward).
As of 5.3, deferred rendering is the default. Unfortunately, Unity projects still default to Gamma space. In order to switch to Linear, go to Edit > Project Settings > Player, and under the Other tab, switch Gamma to Linear. Unity will take a few minutes reprocess all project assets and will match expected results coming from Marmoset Toolbag, Substance, and Quixel.
This article is part of a series on presentation images for Game-Ready Customers, which can be found here.


