
Submitting Your Model for StemCell
Submitting Your StemCell 3D Model for Conversion
The conversion of your model will be started and managed from your Squid.io Dashboard. Once the StemCell job is started and submitted, there is a little more information that you will need to provide for a successful conversion. Once everything is converted and rendered, you can review the conversions to make sure everything looks good, then move on to publishing the model.
Creating a StemCell Job
When you are ready to submit a model, you will need to create a new StemCell job from your StemCell Products page in Squid.io by clicking the “Create New Product” button. Once the job is created you will need to upload your archive and select the software format you are submitting as. The name of your archive will be used for the output files created, so the archive should have a simple descriptive name.
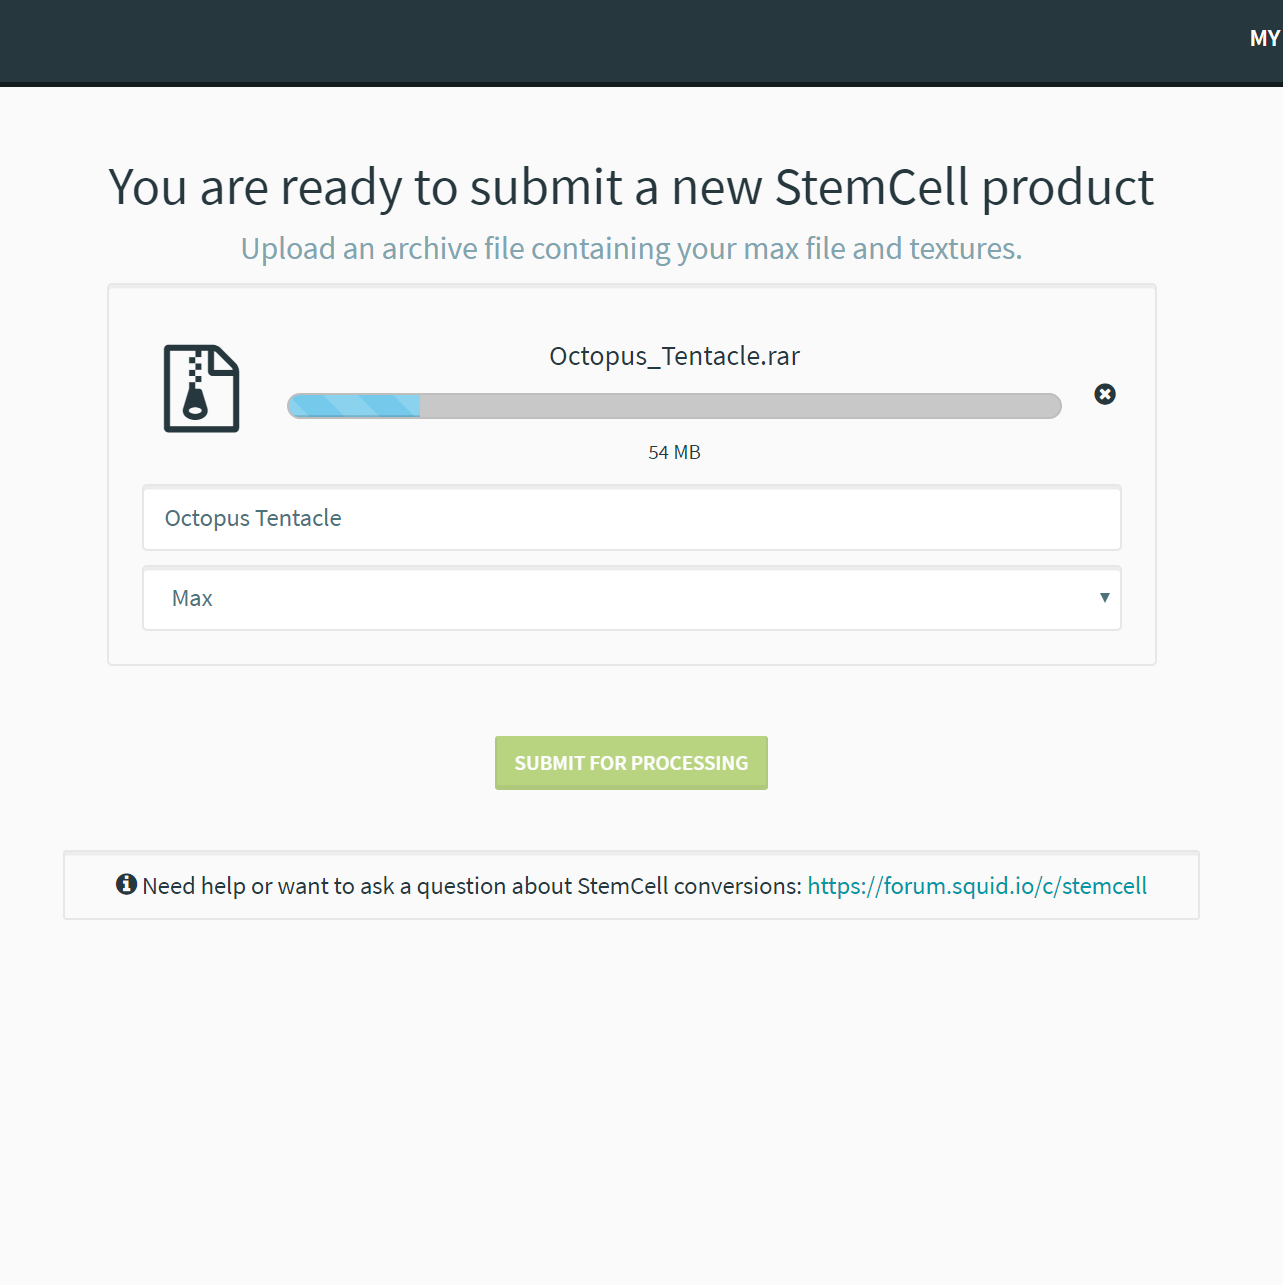
Uploading files to a new job
StemCell Pre-check Script
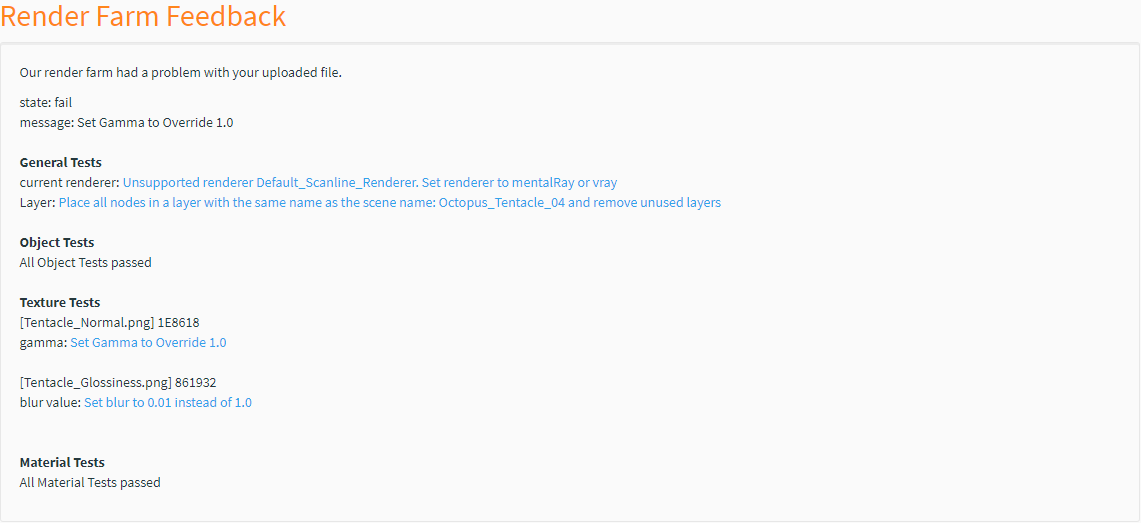
When your model is submitted to StemCell our pre-check script will run to verify that the model is following StemCell specifications. If the script finds anything that is not, it will fail the model back to the artist with notes for correcting the issue/issues.
StemCell Products Page
The StemCell Products page on Squid.io tracks all of your StemCell jobs and gives a status for each job. A new job may take 1-2 minutes after creation to appear on the page. There are seven statuses your job may have:
- Exporting – the servers are processing your model and gathering some information about the materials. This step should take 5-10 minutes.
- Layers– The geometry should be on a single layer that has the same exact name as the scene.
- Preparing Import – The servers are processing the model for import. This step should take 2-3 minutes.
- Importing – The original model is being converted to the output formats and renders are being created. This step usually takes 30 minutes – 2 hours depending on model complexity and server load.
- Validating – You can review the output files and renders. You can either approve the conversions or submit new model files.
- Approval – A Technical Artist will do a final inspection to ensure the model is working correctly and follows StemCell specifications.
- Complete – The job is finished.
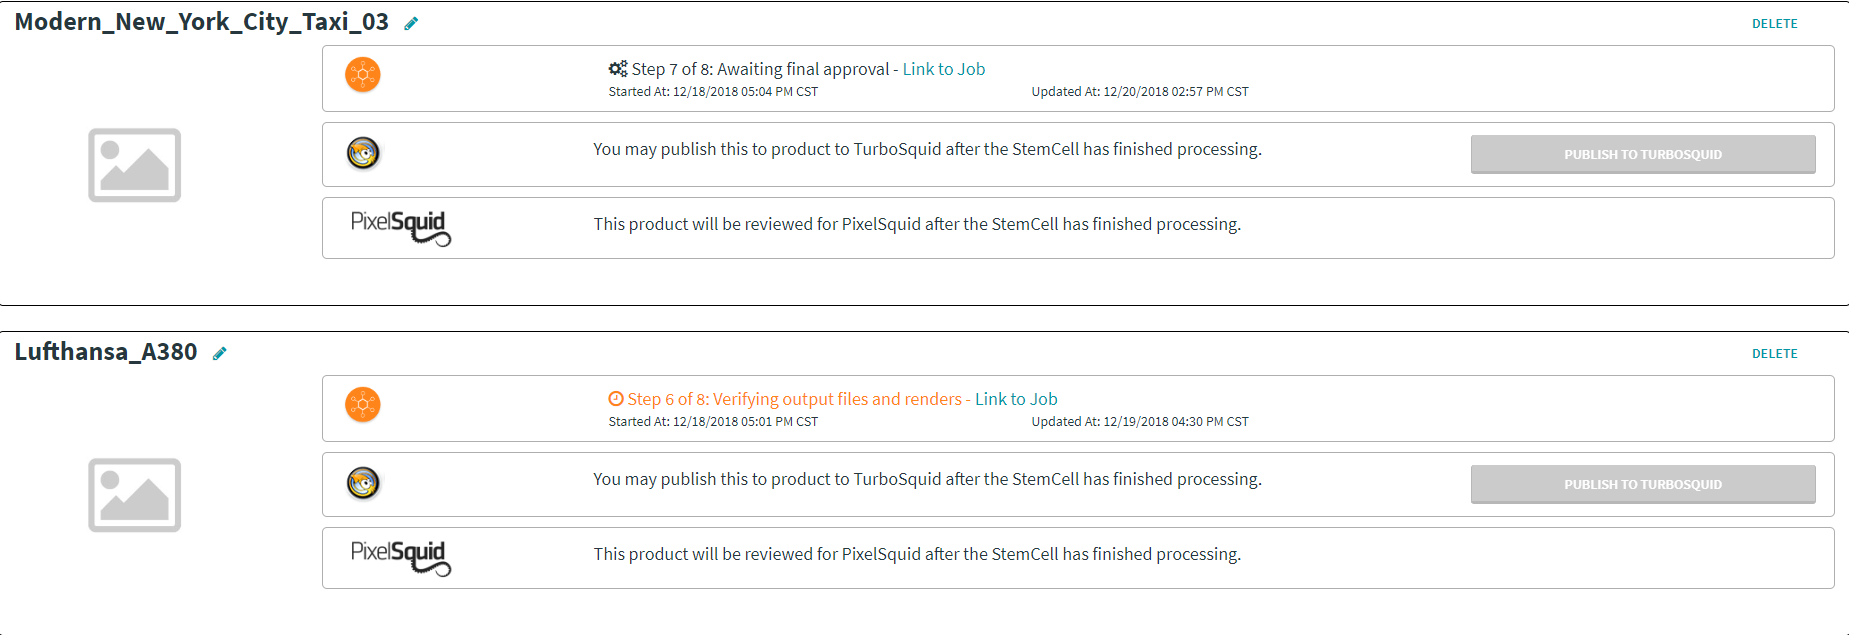
Stemcell Products page with active jobs
Material Configuration
To convert the model correctly the servers need a little additional information about the materials used in the model. You will need to review texture assignments and link any assignments which are missing. If the textures follow the naming conventions most of the information should be auto-assigned.
If you created PBR Metallic version of the textures for RT conversions, these textures will need to be assigned to their correct map channels. You can enable the metallic textures by clicking the slider marked “Metallic Workflow.”
Read More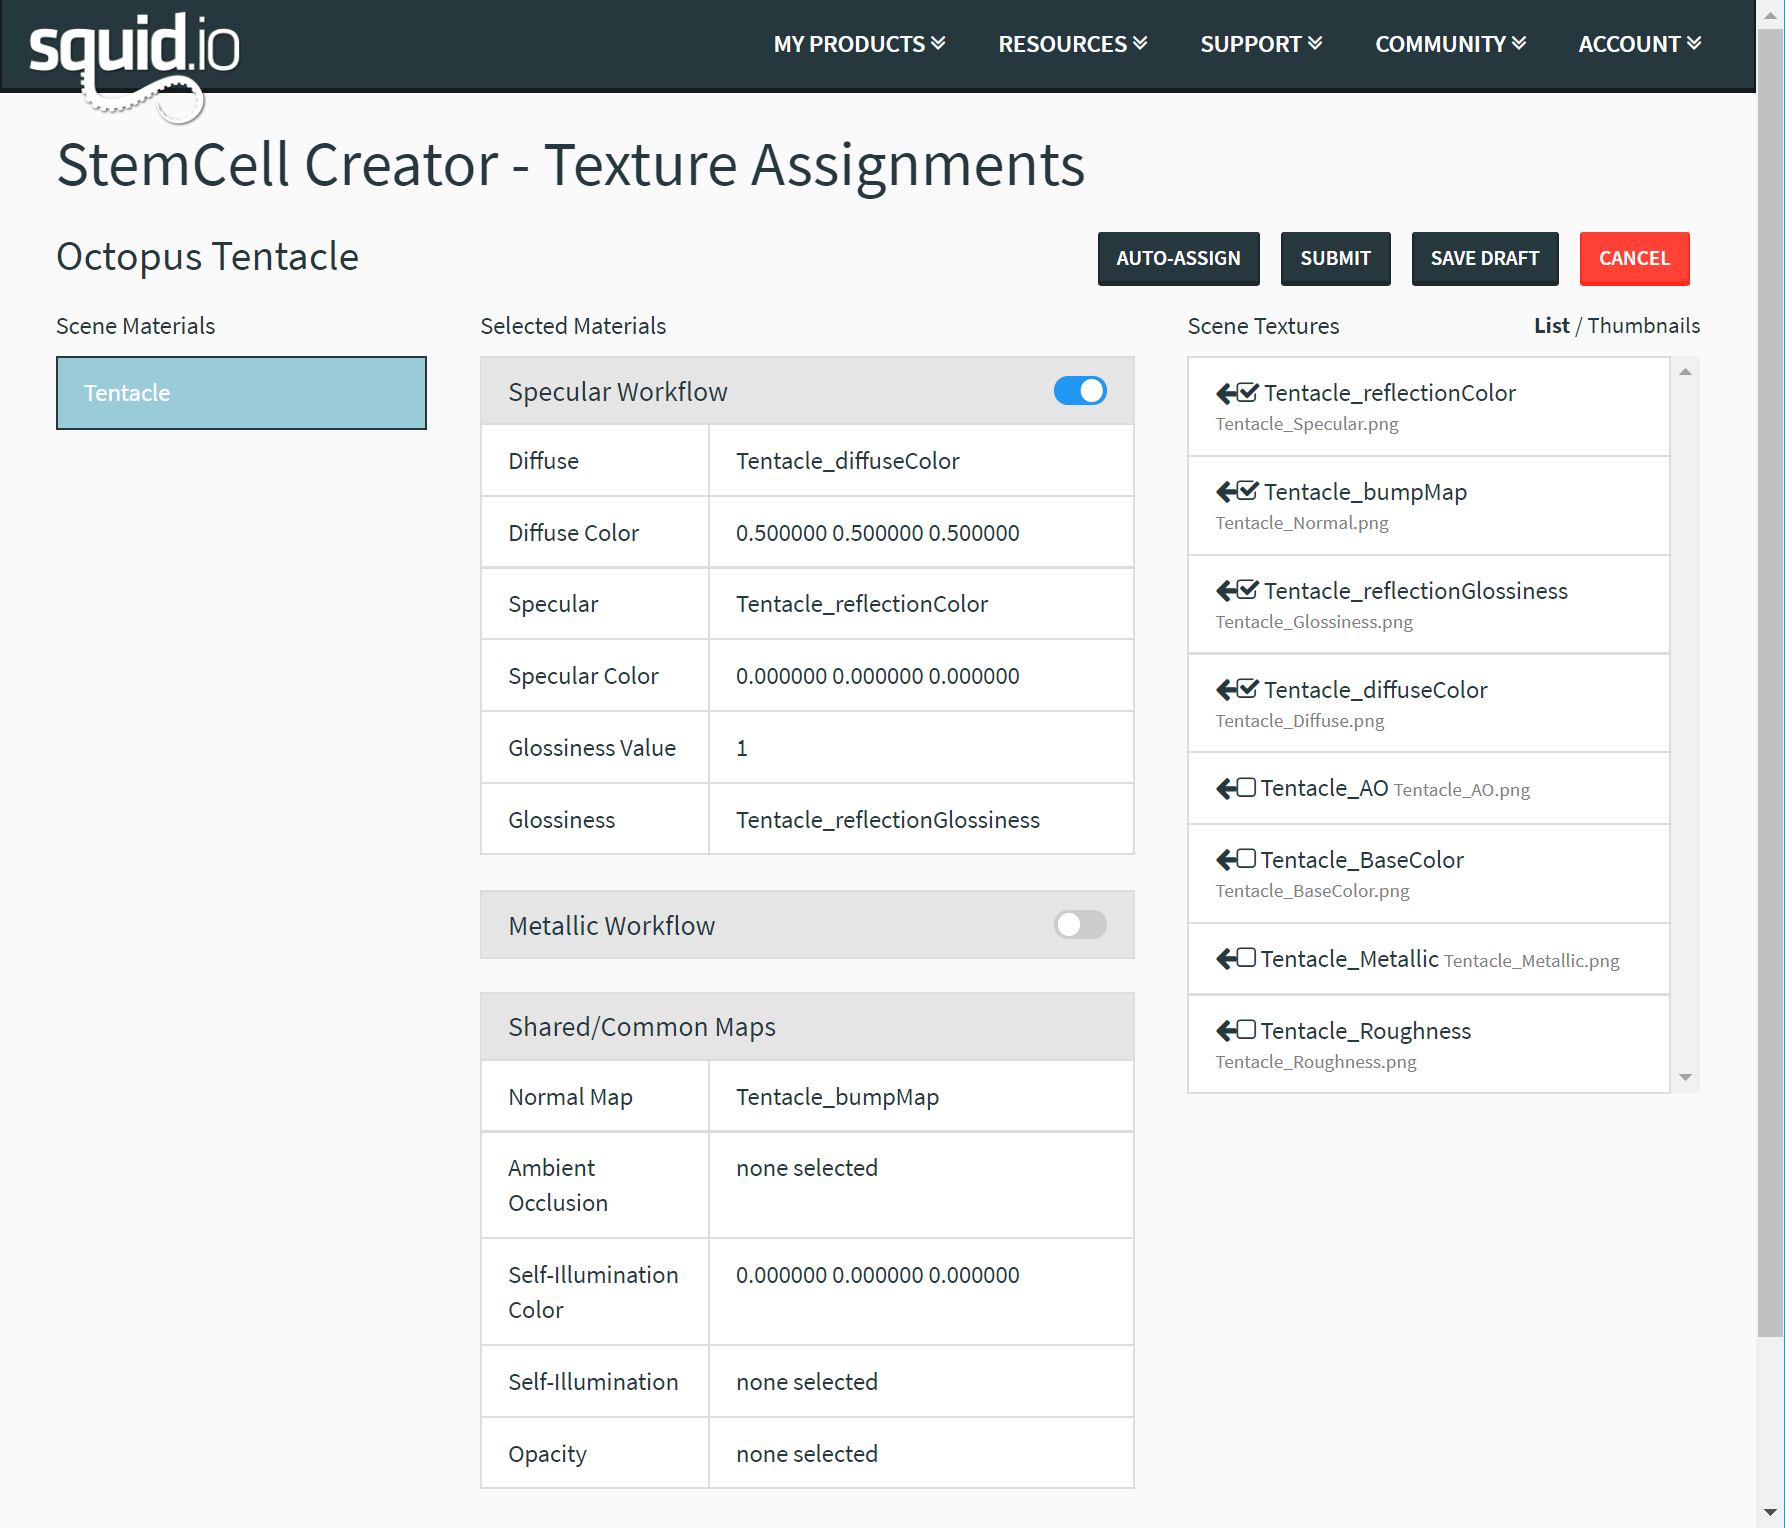
Material Configuration page
Validating the Conversions
Once the server has finished the conversion and has rendered the model, you will need to review the renders to see if the conversion was successful. If the textures were created correctly, the renders from the different software packages should appear very similar. There will always be differences because of the different rendering methods used in each package, but the look and feel of the materials should be consistent.
If you are satisfied with the conversions, you can click on the “Validate” button to move on to the next step and publish the model.
If there are obvious errors or a noticeable difference in how the different renders appear, there may be something wrong with the texture values or how the file was prepared. A guide on diagnosing conversion problems can be found here. Once you have diagnosed the problem and updated the model, you can resubmit by selecting the “Re-submit” button and uploading new model files.

The validation page


