
To get the most out of your StemCell product you’ll want to be able to convert your models to Unity and Unreal. In order to do this, the model should be provided with texture maps for both a Specular and Metallic workflow. The Metallic workflow needs to have an accurate Metallic map.
Diffuse and Specular to BaseColor Map
The BaseColor and Diffuse are very similar in appearance but the values may vary depending on Metalness. The Specular workflow color values for the Specular map must be added to the Diffuse map to create the BaseColor. The Specular map is masked with the Metallic map. That is layered over the Diffuse map. The resulting combined image is the BaseColor map. The values in the BaseColor map should appear brighter than the Diffuse map normally since it now includes Specular values.
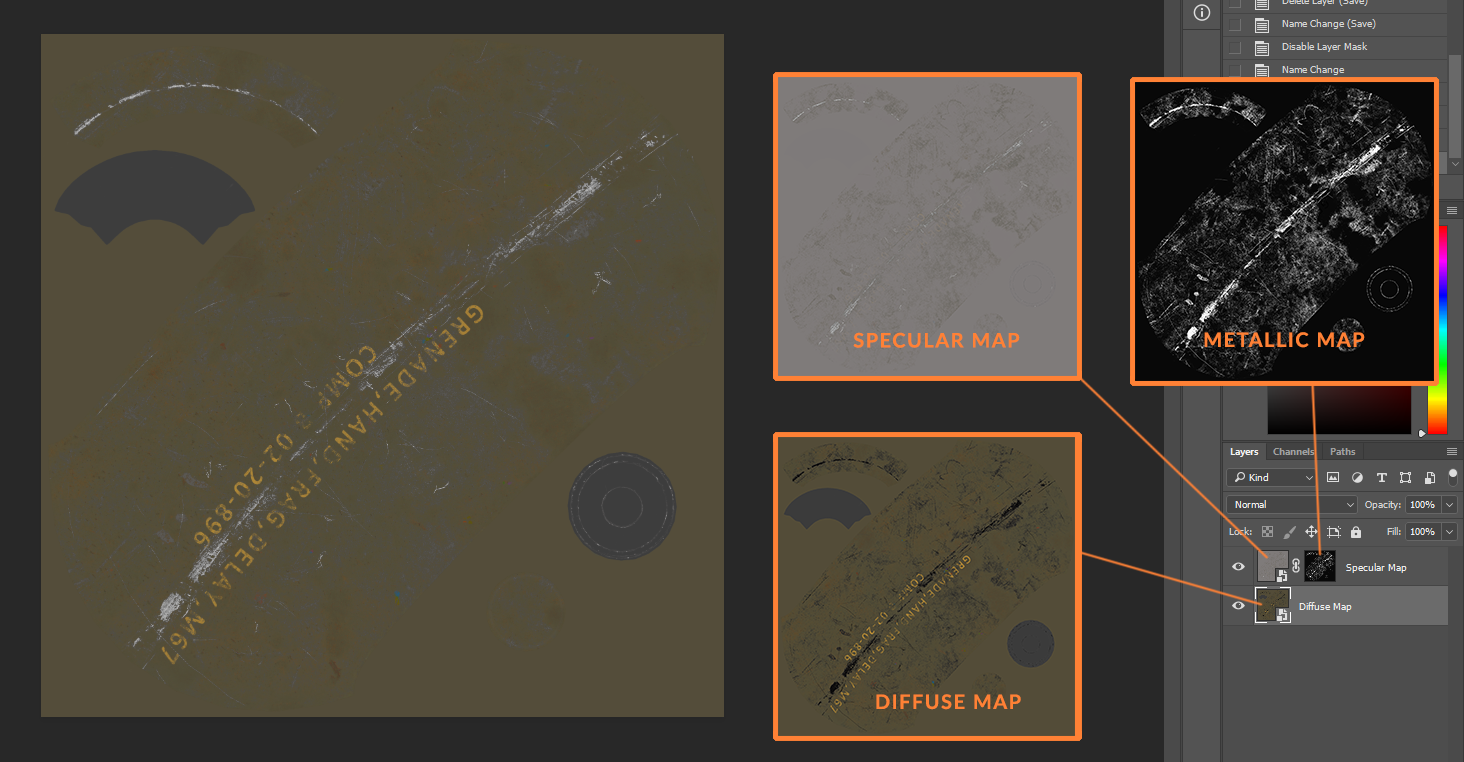 Specular map is masked using the Metallic map. Then layered over the Diffuse to get BaseColor.
BaseColor to Diffuse Map
The BaseColor Map provides both the Diffuse color and the Specular color values. These colors and values need to be extracted into a new Diffuse Map for the PBR Specular conversion. A 5% black value fill layer is masked using the Metallic Map on top of the BaseColor layer. This removes the Specular color values for metal surfaces from the BaseColor map. The resulting combined image is the Diffuse Map.
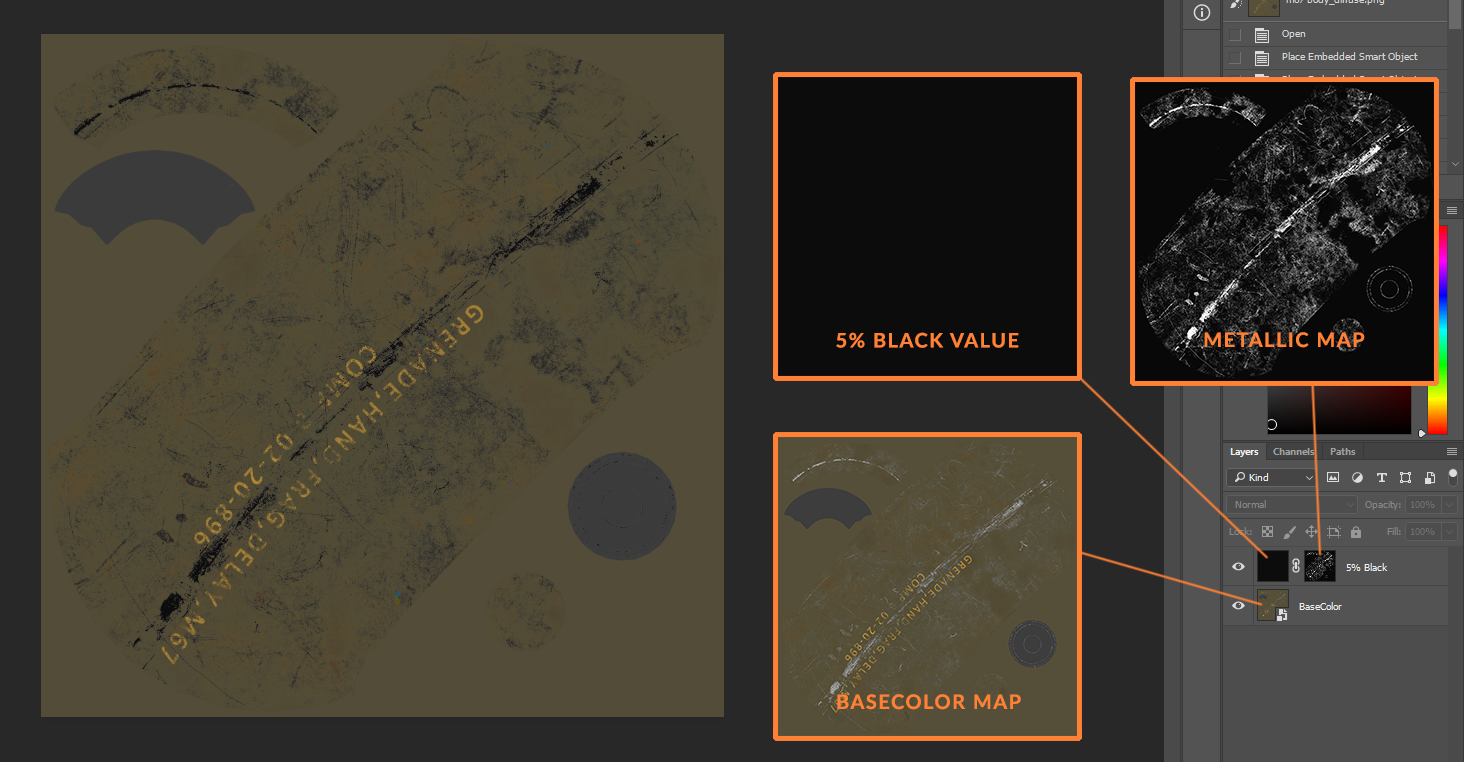 A 5% black fill value is masked using the Metallic map. Then layered over the BaseColor to get Diffuse.
BaseColor to Specular Map
The BaseColor Map provides both the Diffuse color and the Specular color values. These colors and values need to be extracted into a new Specular Map for the PBR Specular conversion. A BaseColor layer is masked using the Metallic Map on top of the 50% Grey fill layer. This removes the color values for non-metal surfaces from the BaseColor map. Resulting combined image is the Specular Map.
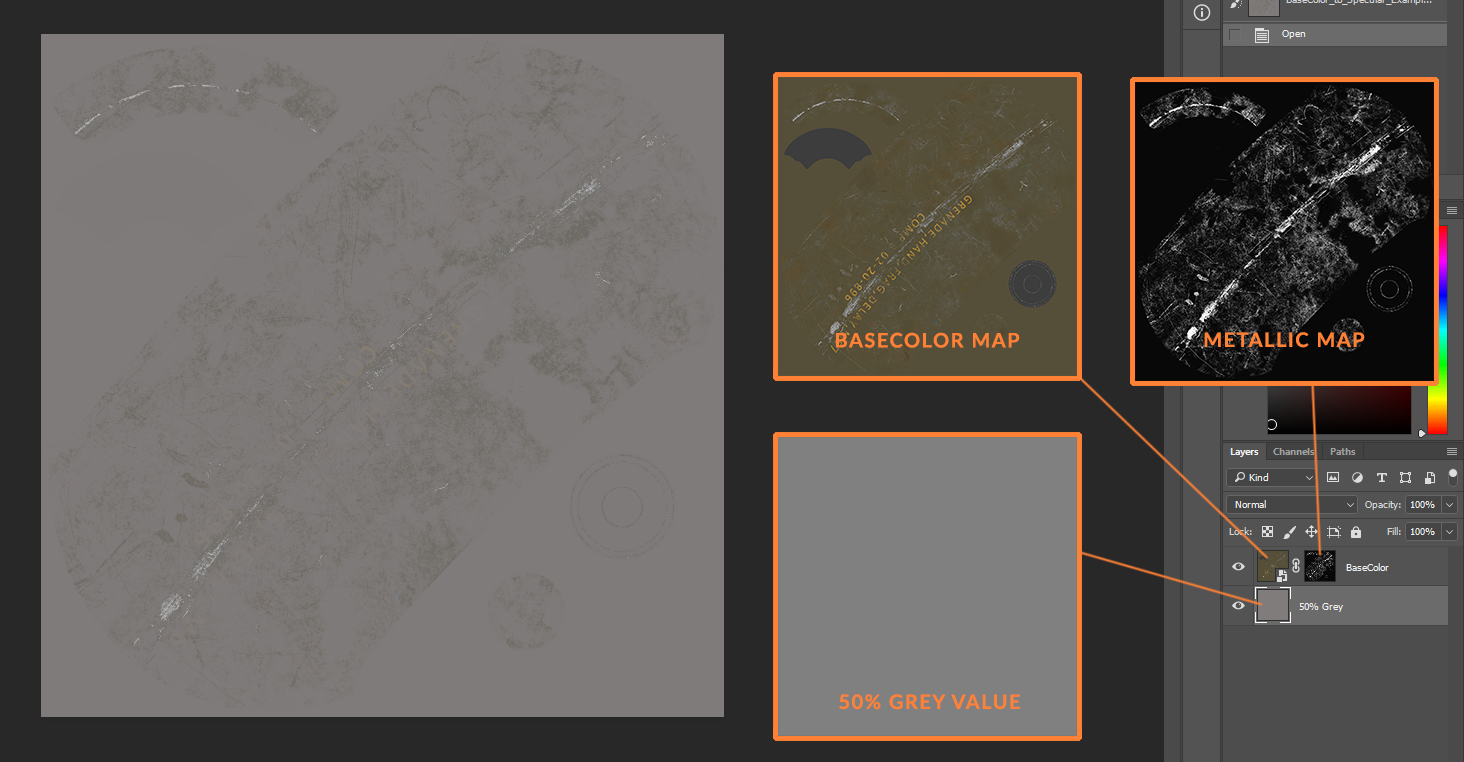 The BaseColor map is masked using the Metallic map. Then layered over a 50% grey value to get Specular.
Glossiness and Roughness Maps
Converting between Glossiness and Roughness is fairly straight forward. Simply invert your Glossiness map to get a Roughness map, or Roughness map inverted to Glossiness map. You may need to adjust the values after conversion 10-20% as these are linear maps and will get gamma corrected brighter.
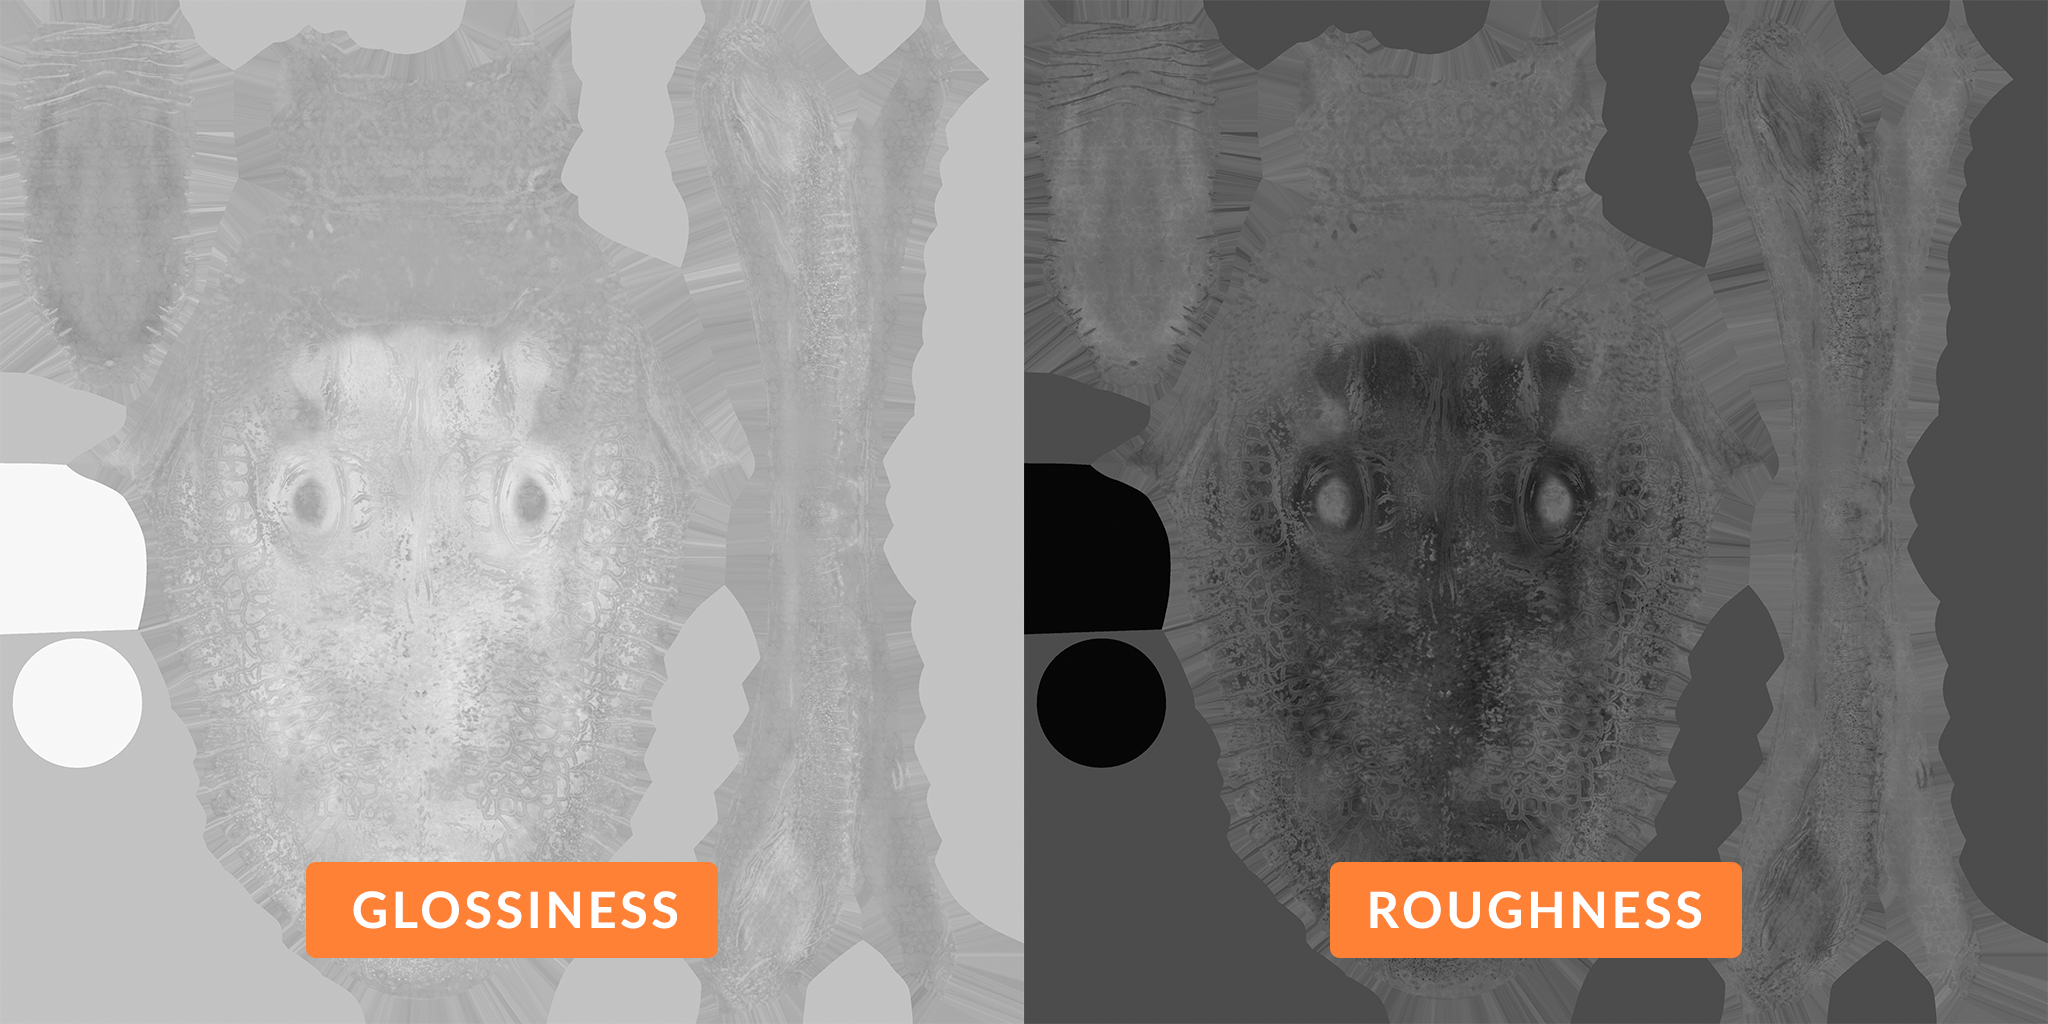 Comparison of Glossiness and Roughness maps.


