
PixelSquid Specification
Updated: May 25, 2023
1 Eligible 3D Models
1.1Photo/Real
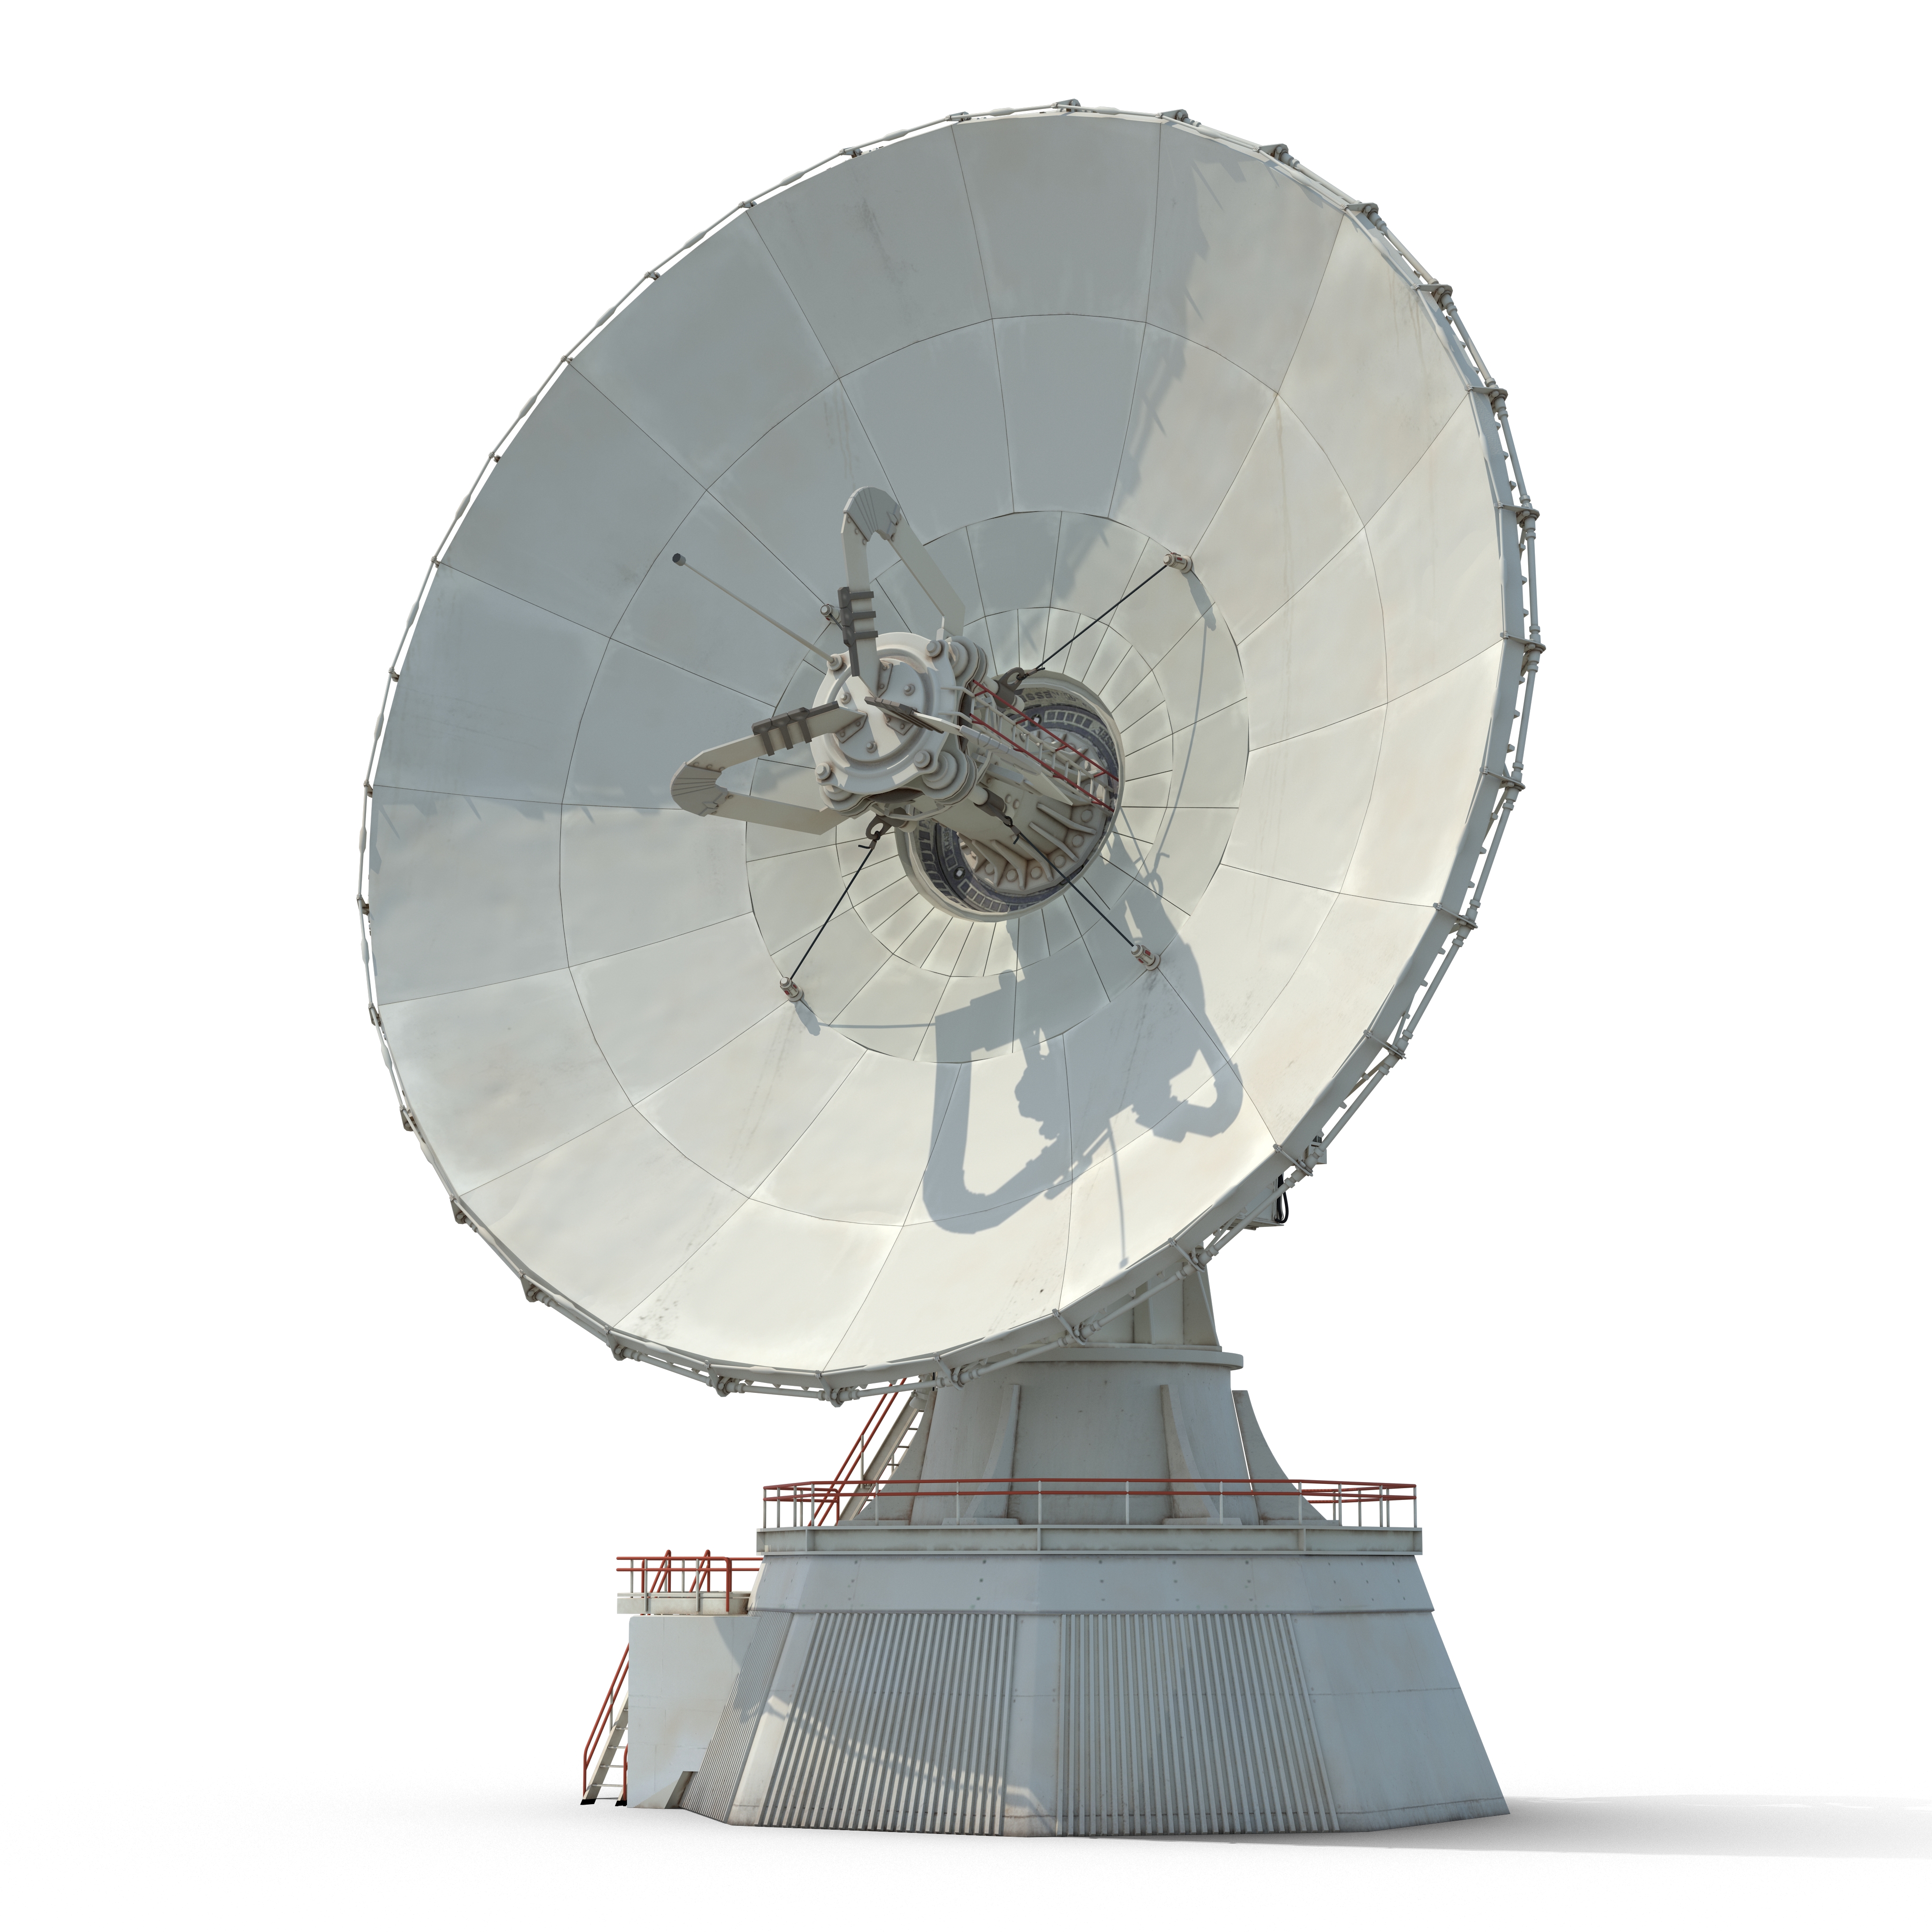
The first hurdle for a PixelSquid model is photo realism. The 3D model must be indistinguishable from a photograph of a real-world object when rendered full frame at 2048 x 2048. If the model is intended to represent a real-world object, it must accurately represent that object in proportion, texturing, and appearance. Quality of a model is more than just making a pretty picture. Materials and texture maps must be detailed but also render efficiently. There must be no texture stretching, UV seams, faceting, visible tiling, or visible symmetry when rendered. The render should not contain visible cloning.

1.2 Stylized
Stylized content means 3D models and scenes that are treated in a non-realistic style such a cartoons or graphics. Stylization can range from materials, such as an all white plastic apple, to geometry such as an iconic heart shape instead of a real human heart. Stylized objects must still have three dimensionality and accept lighting and shadows.


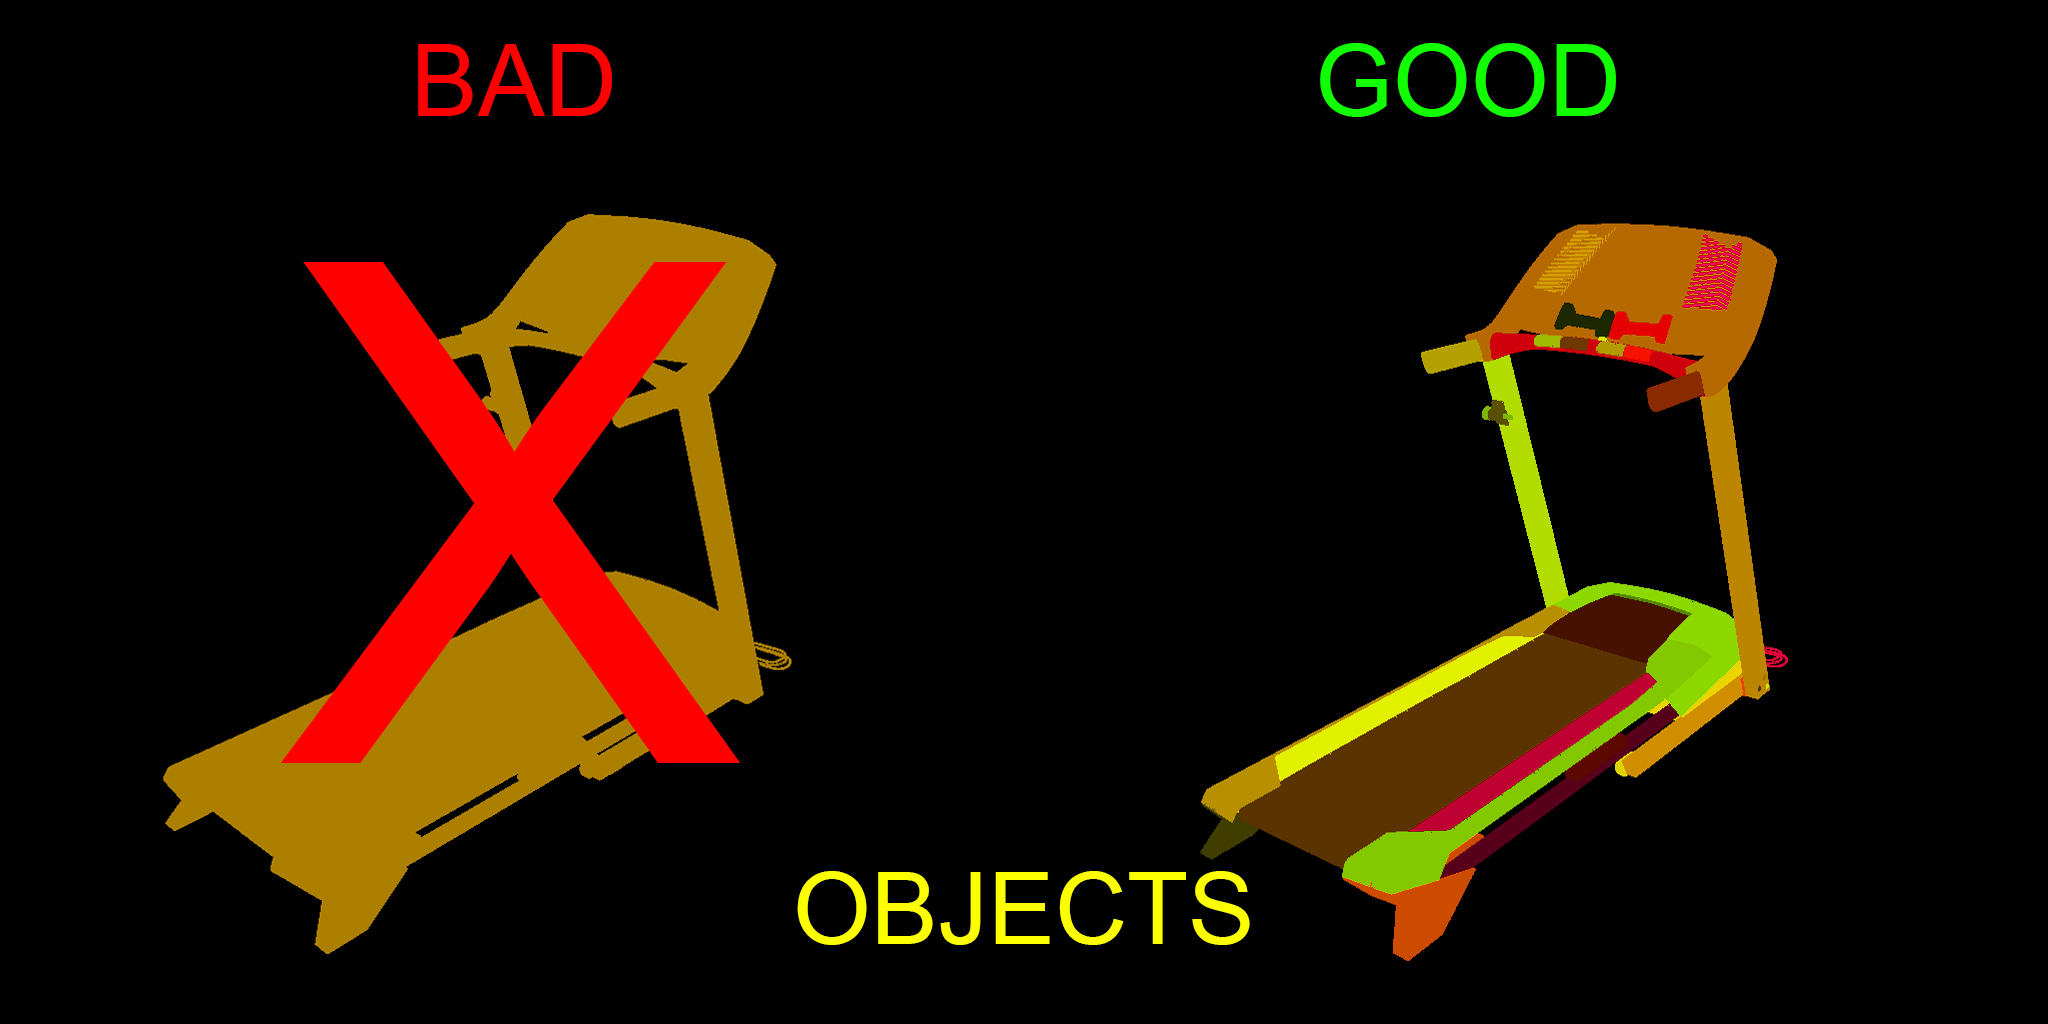
1.3 Object Grouping
The model must consist of objects logically separated into individual pieces and individual materials. See Scene Organization and Best Practices for more information and examples.
1.4 Collections
Collections are not eligible for PixelSquid certification. They can be submitted as individual objects but we do not publish collections posed as sets.
1.5 Animated
Animated models, such as walk cycles, are not eligible for PixelSquid. However, a rigged model posed frame by frame may be submitted for certification.
1.6 External Plug-ins
Models that require external plug-ins other than V-Ray version 2.3 through 3.6 and 4.0 through 4.3 (such as hair/fur/cloth/particle simulation plug-ins, or other 3rd-party renderers) are not eligible for PixelSquid. However 3rd-party plugins can be used for creation as long as the scene can be opened without them. UV unwrap programs and sculpting programs are usable, as long as it does not destructively affect the model.
1.7 3ds Max Version
Acceptable max versions are 3ds Max 2011 through 3ds Max 2020. You can work in more recent versions but you must back save to version 2020 or older.
NOTE:
Back saving from newer versions of 3DS Max may cause issues if using newer features, such as modifiers, that do not exist in the older versions you are saving to.
2 Standards for 3D Model Inspection
2.1 Model Setup
Models must be prepared using the PixelSquid Studio tool. The script will prepare the scene with a stage, camera, lighting, and render settings, so efforts can be focused on texturing. It is very important that you do not rename or remove anything the script creates. Have in mind our farm is set to work in centimeters.
Note: PixelSquid Studio Tool is only compatible with V-Ray versions 2.3 through 3.6 and 4.0 through 4.3
2.2 Geometry
2.2.1 No Isolated Vertices
2.2.2 No coincident vertices
NOTE:
There are exceptions to this rule. Examples are posing a rigged model or simulated meshes.
NOTE:
There are exceptions to this rule. Examples are posing a rigged model or simulated meshes.2.2.3 No coincident/coplanar faces
NOTE:
There are exceptions to this rule. Examples are posing a rigged model or simulated meshes.
NOTE:
There are exceptions to this rule. Examples are posing a rigged model or simulated meshes.
2.2.4 No Inverted Face Normals
No backfacing or inverted face normals. All normals should be pointing out toward the correct direction for rendering without errors.
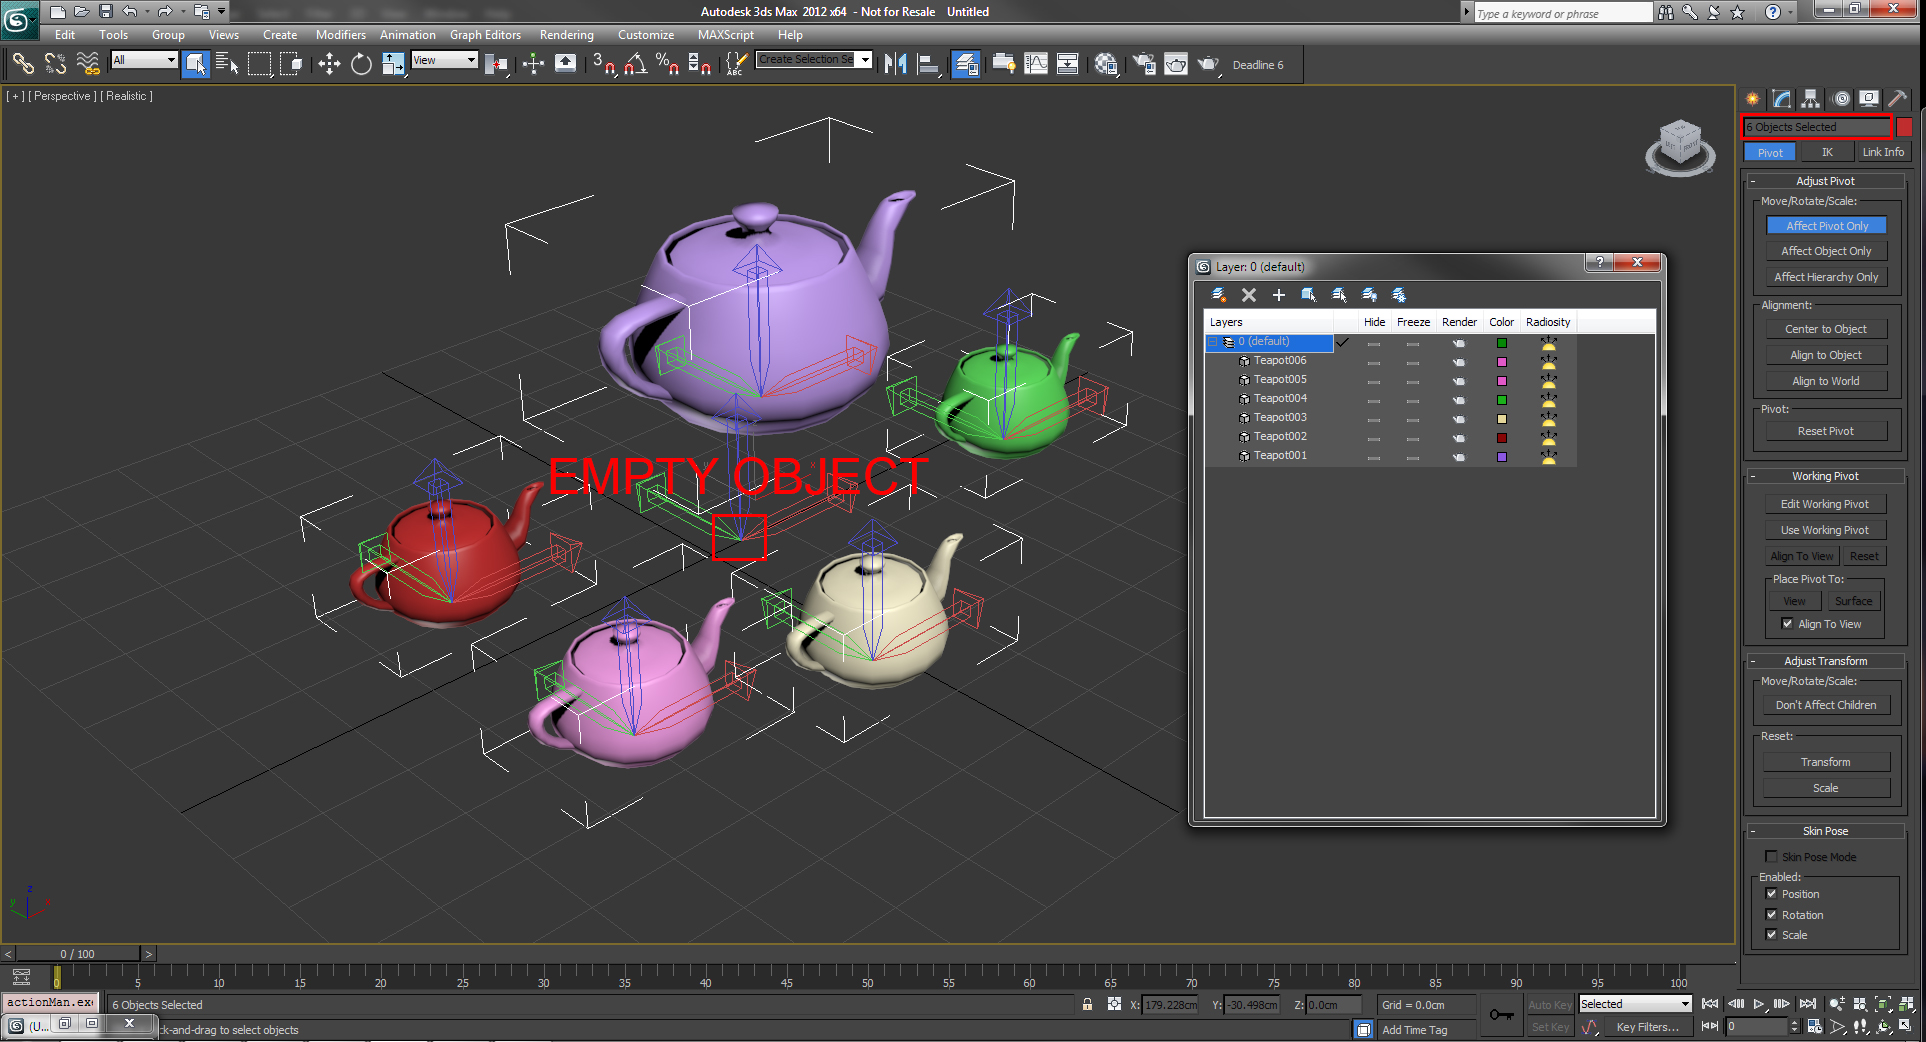
2.2.5 No empty objects
All objects should have geometry or splines, or should be null/control helpers. Named object nodes that are empty bounding boxes are not allowed.
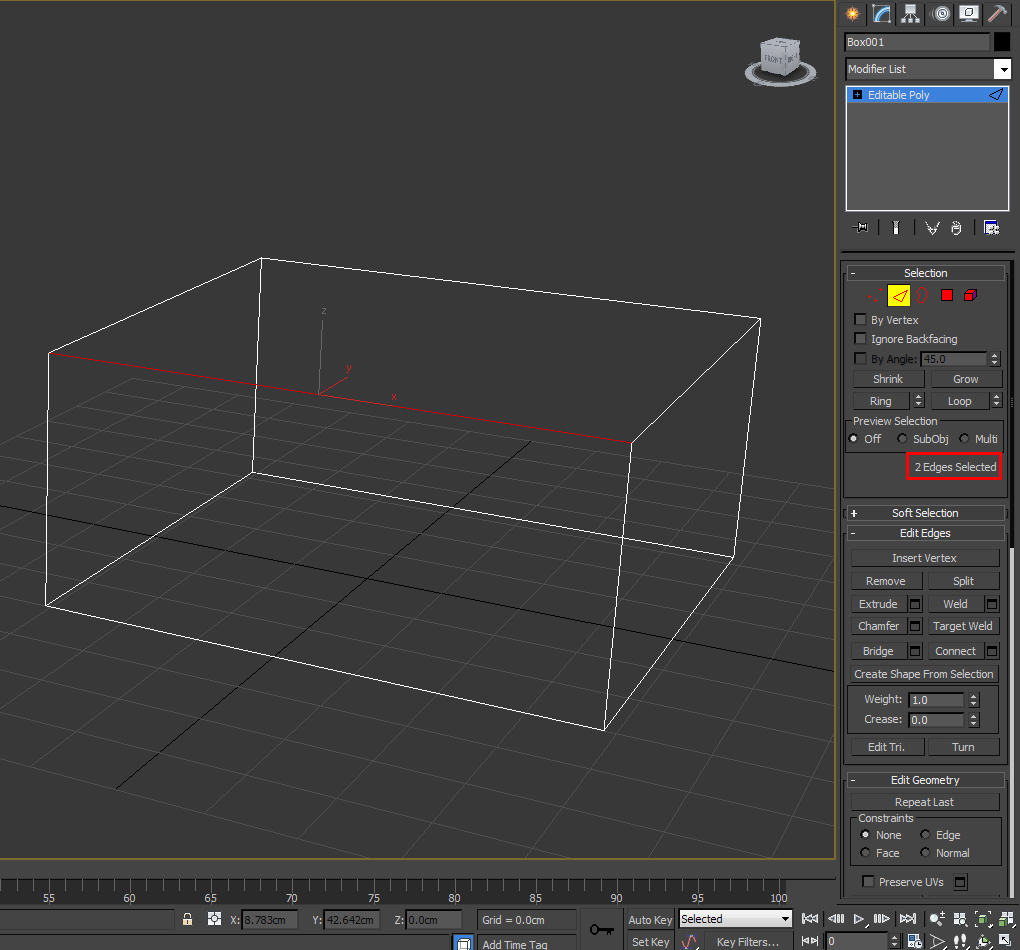
2.2.6 No unwelded seams (coincident edges)
Any two edges on an object that meet or overlap in the same position must be welded.
2.3 Position and Orientation
2.3.1 Center Origin
The model should be centered over the origin in X and Y axes, and the lowest Z point of the object sitting on the ground plane. When the model is prepared using the Studio tool, this should happen automatically.
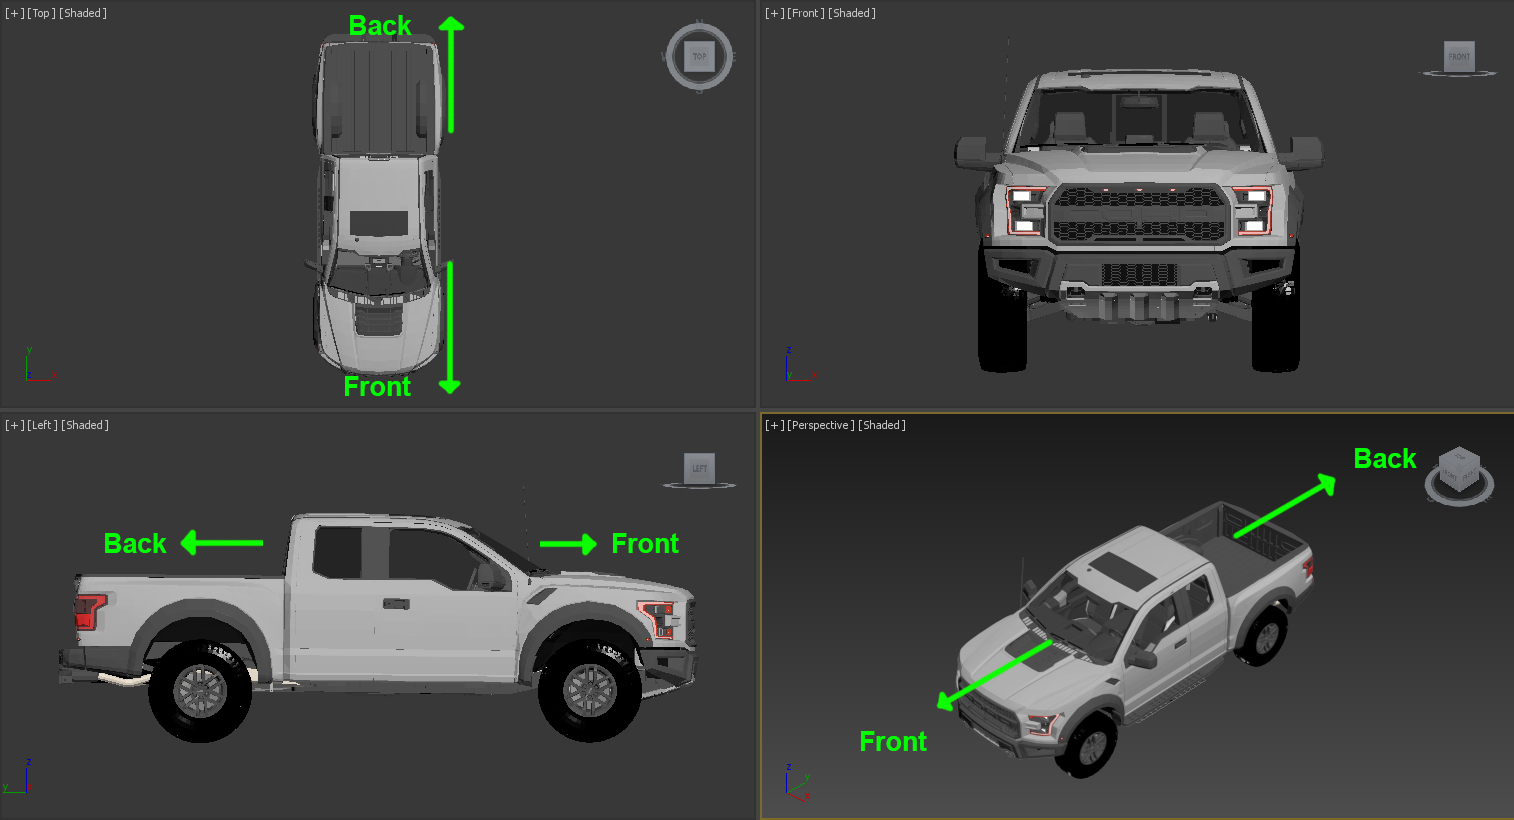
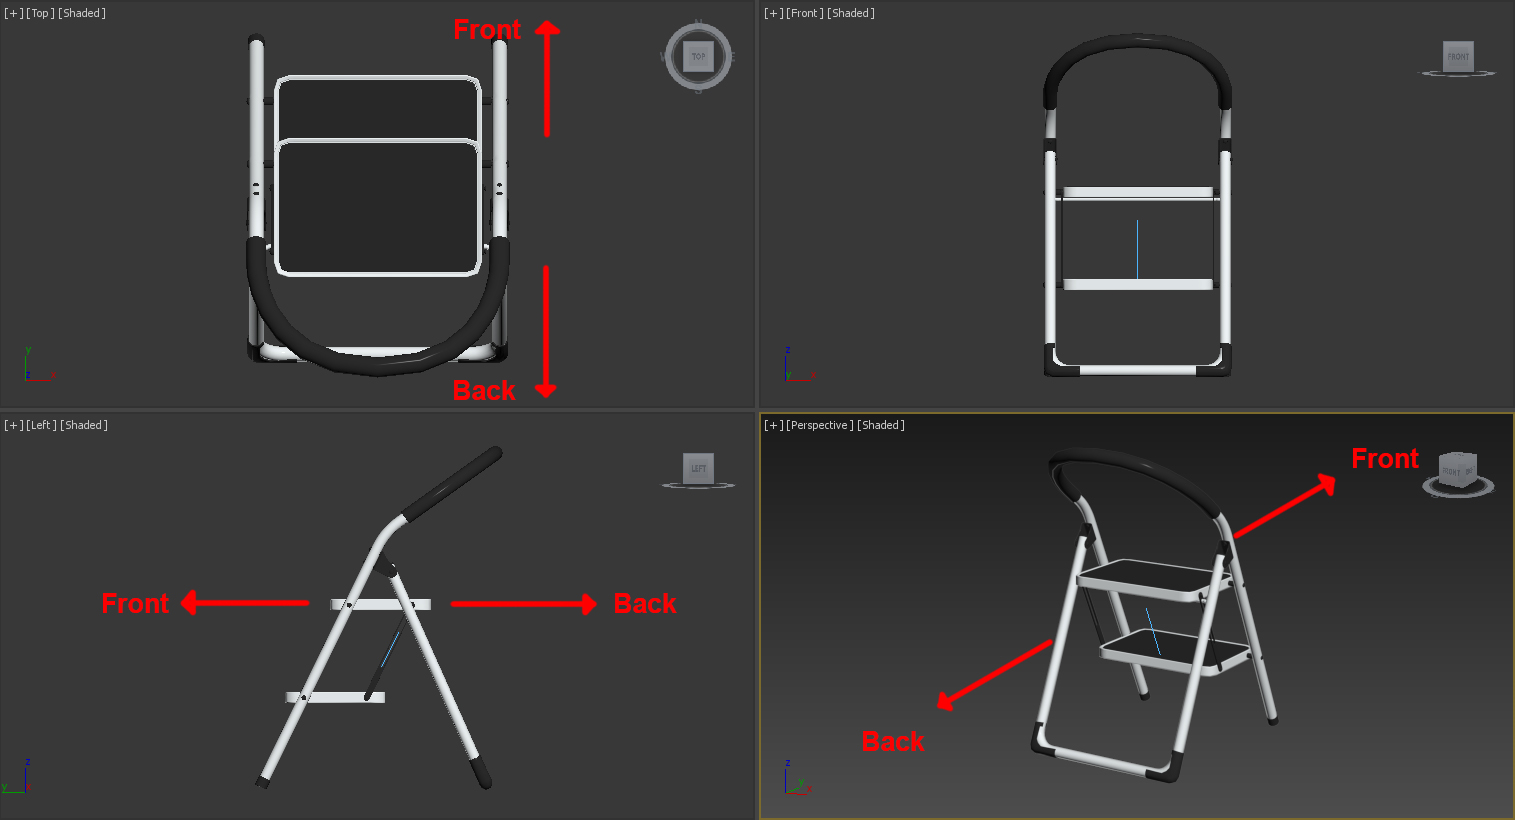
2.3.2 Object Orientation
The model should be oriented to the orthographic positions as it would be considered in the real world. In other words, the model can’t be lying on its side, upside-down, backwards, or turned sideways when the file is opened. EXAMPLE: A car’s front end must be facing Front View and it’s roof facing Top View.
2.4 Organization
2.4.1 All objects are in HeroObjectGroup
Grouping the object helps retain organization when exporting, or importing/merging the model with other scenes. All objects and “sub groups” of the model should be contained within the HeroObjectGroup generated by the Studio tool. The Studio tool will automatically group your model into a single group when scene is prepared.
For v-ray fur objects: Prepare the scene first and then create/merge the vray-fur object and attach it to the HeroObjectGroup, otherwise the spinner won’t be created properly.
For lights: When preparing a scene with the PS tools all lights are deleted, so to use extra lights for a specific model the scene needs to be prepared first as well and then the lights need to be created/merged and attached to the HeroObjectGroup.
See Scene Organization and Best Practices for more detailed information.
NOTE: There is no need to group the whole model into a single group before preparing the scene. Smaller groups can be used if desired for organization.
2.5 Textures and Materials
PixelSquid requires specific base settings for materials in order create optimum Render Element Contribution. Please see the PixelSquid Material Specification for required settings.
2.5.1 All materials used must be a type of V-Ray material
Objects do not have to have texture maps, but each one must have a V-Ray material type applied. This includes base and sub materials. Multi/Sub-Object materials should only be used when necessary, but are highly discouraged.
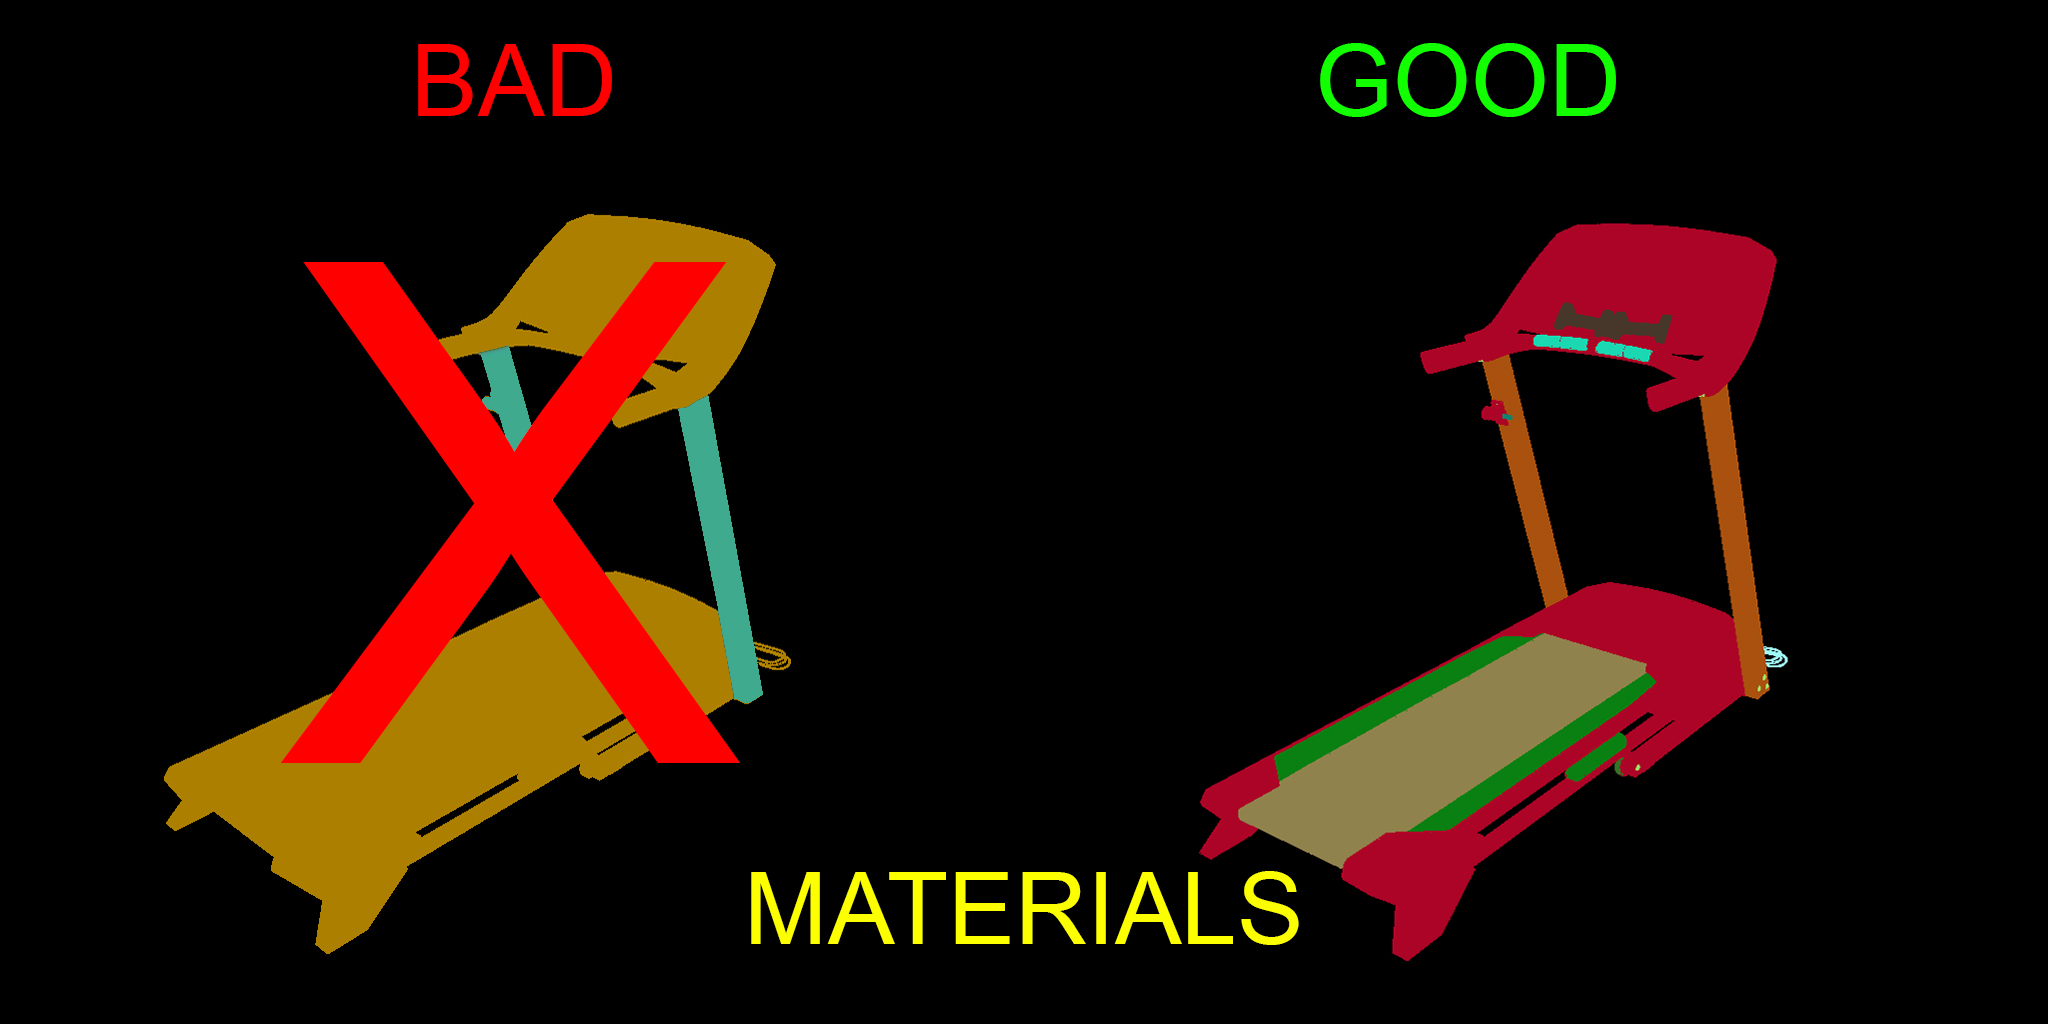
2.5.2 Materials broken up logically
Materials should be separated with consideration to the different surface types or intended material properties.
See Scene Organization and Best Practices for more detailed information.
2.5.3 Materials Calibrated in Light Rig
The materials must be calibrated in the Light Rig provided. This ensures consistent Texture, Material, and Shader quality. You cannot use a different HDRI as environment or any type of exposure control.
2.5.4 No mapped texture paths
Any texture paths must be stripped from model and be relative for submission.
2.5.5 Texture maps saved as lossless or uncompressed formats
Such as PNG, EXR, and TGA. This excludes TIF files due to compatibility issues.
2.5.6 Texture maps size determined by amount of detail needed
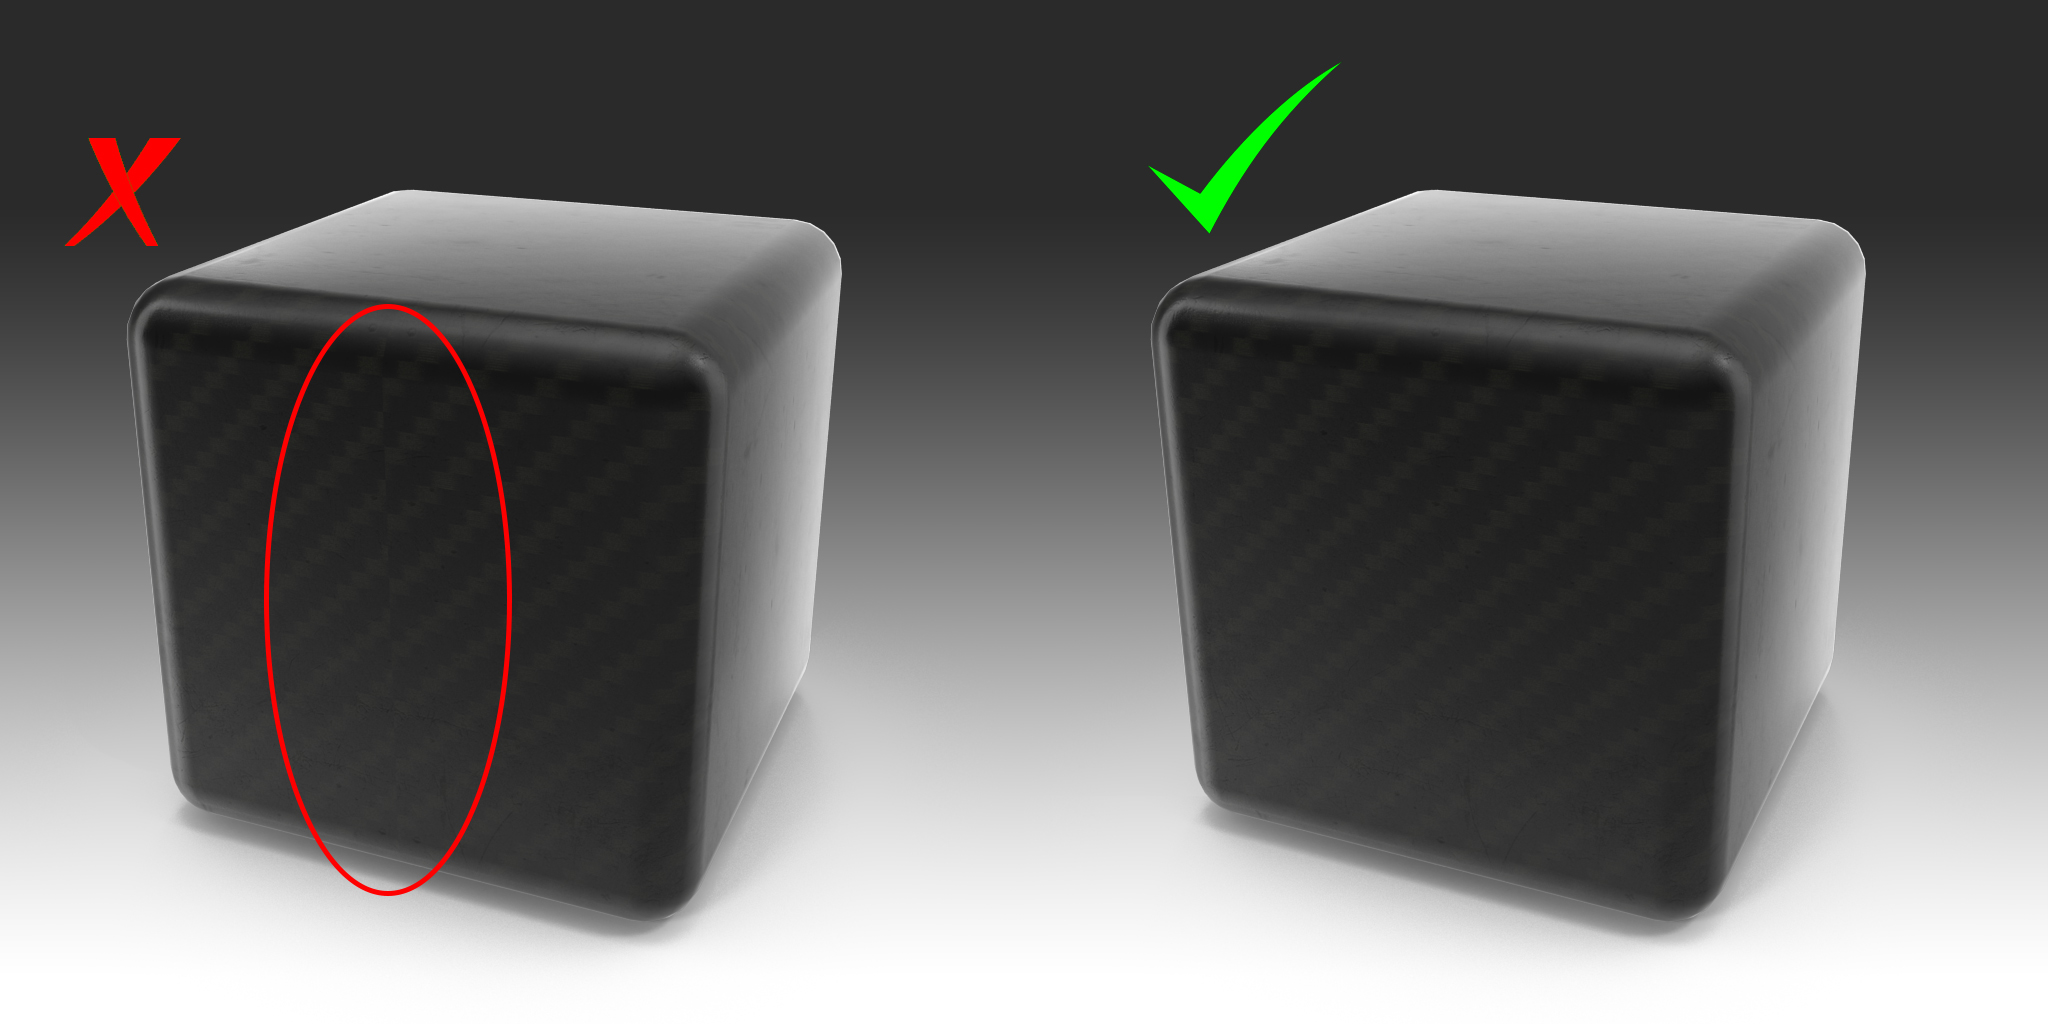
Try to keep map usage and size as efficient as possible. If using a texture map for a solid color swatch, it does not need a large resolution. A fine detail map like carbon fiber or brushed metals, larger resolution may be needed to retain some of the finer details. If a smaller resolution can be used with no noticeable difference on the render, do so. Being conscious of the texture size helps optimize render times and file transfers for submission.
2.5.7 Texture Maps are Square Resolution
Texture maps must be square resolution, meaning height and width of a texture maps are the same.
2.5.8 Procedural textures are permitted
2.5.9 Gamma correction
Gamma correction must be done according to linear workflow. It is important that your scene be set up to work in a linear workflow from the start. This will provide more consistent results when texturing and lighting. To better understand linear workflow and its importance, you can reference this article: Gamma 2.2 setup or Linear Workflow
2.6 UVs
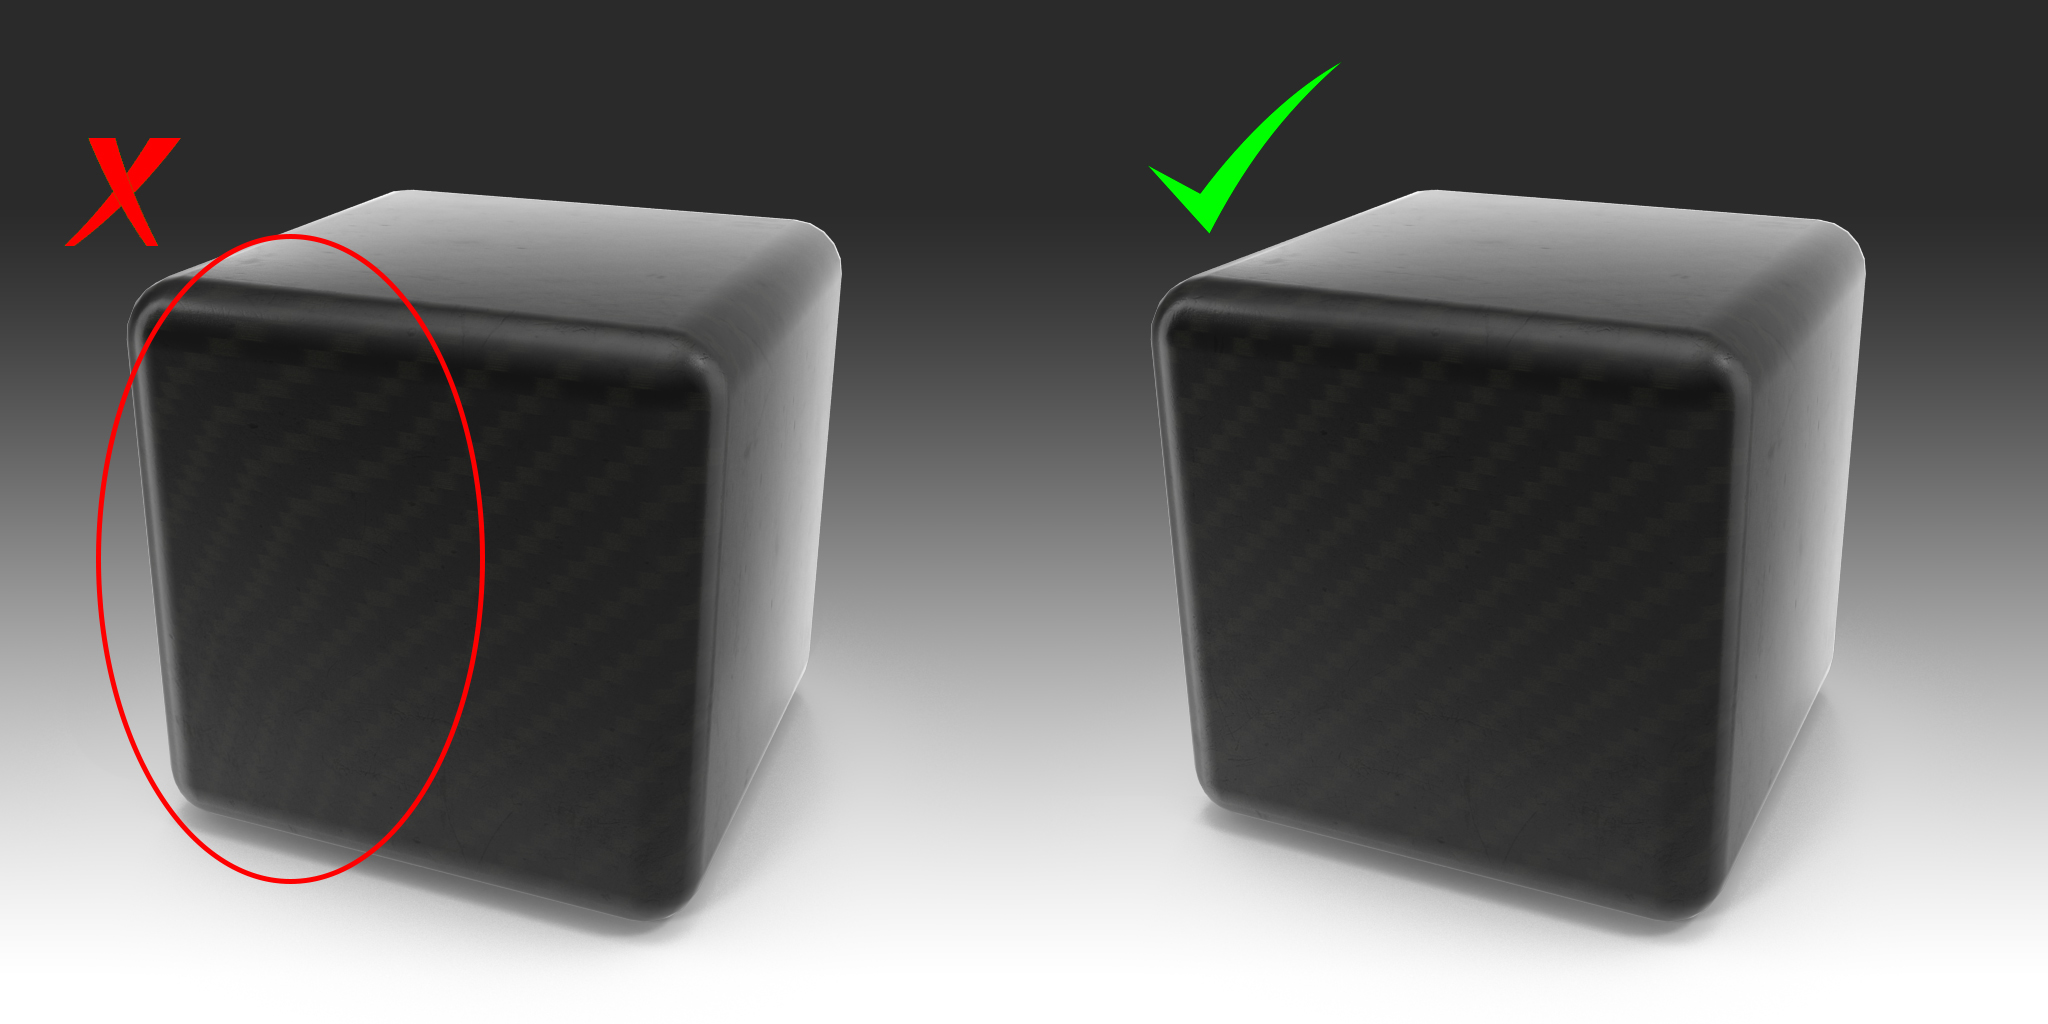
2.6.1 Texture Seams not visible
Texture seams are any visible break in a texture usually caused by UV differences or non-tiling materials. This is most noticeable as details or patterns that don’t line up.
2.6.2 No obvious texture stretching on model
Texture stretching is the visible uneven scale of a texture caused by poor distribution of UVs. Usually visible as warping, stretching, or compressing of details or patterns in areas of a model
2.7 Rigging
2.7.1 Rig must function as expected
A Readme, PDF document, or other documentation on how to use the rig must be included. Rigs that use Biped or CAT are not required to have a Readme unless there are custom controls.
2.8 Lights
2.8.1 Studio Light Rigs Used
Lighting for the scene must be one of the calibrated light rigs provided by the Studio tool to ensure proper lighting levels. This maintains quality of lighting for proper material contributions.
While most objects should be submitted in Product Shot light rig, there are some guidelines for specific types of models.
- Architecture: Everything is processed in outdoors midday light rig, except for distressed, apocalyptic structures, these are processed in Product Shot light rig.
- Plants and Trees: Processed in Outdoors midday light rig, except potted plants or single flowers, these are processed in Product Shot light rig.
- Vehicles: Luxury vehicles can be prepped in Automotive, Utility Vehicles in Outdoors midday light rig. Regular vehicles in Product Shot.
- Outer Space: Everything is processed in Outdoors midday light rig.
2.9 Camera
2.9.1 Camera Rig
Most models are processed with 50 mm lens Full Spinner Camera rig, with the exception of certain large scale architectural models that might get too distorted so 85 mms lens is suggested.
3 Final Scene Setup
3.1 Render Elements
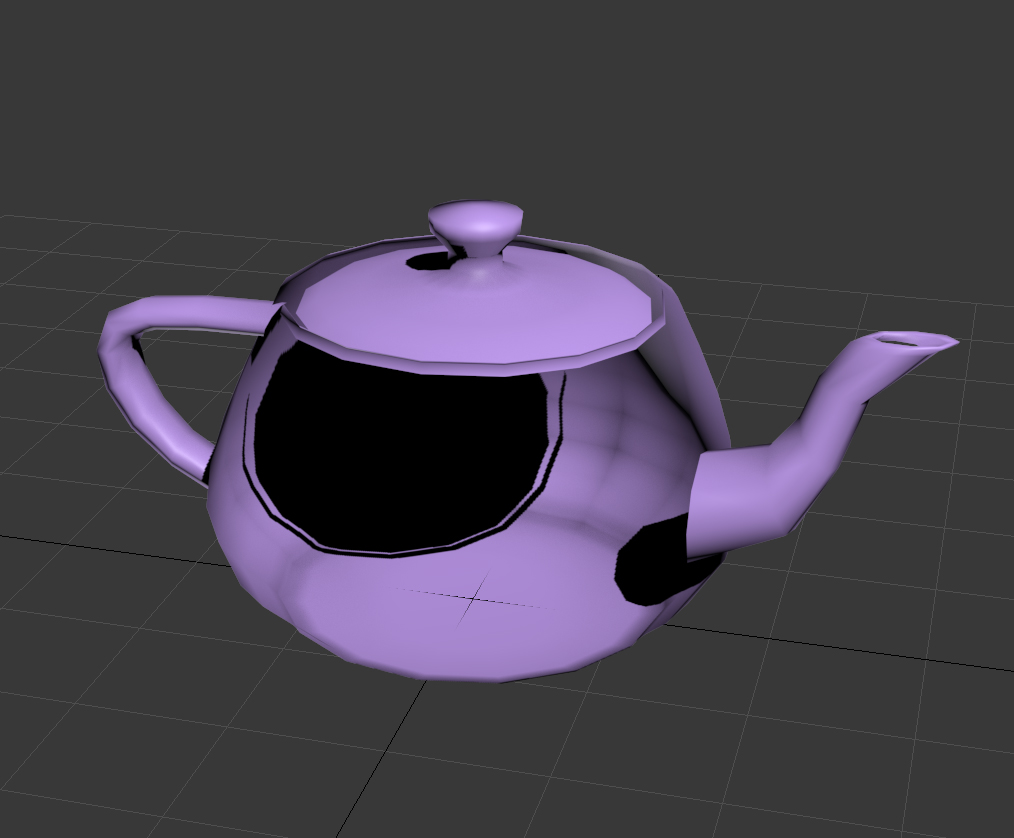
Render Elements are automatically applied when the scene is prepared by the Studio tool. Rendering in V-Ray Frame Buffer, default when V-Ray is turned on, check that all render elements contain information from the render. No layer should be completely black. The sole exception: if there are no materials with refraction, then the Refraction layer will be black.
Refer to Understanding Render Elements & Contribution page for more information.
3.2 Render Setup dialog settings
- Render Output, Save File: unchecked
- No render path specified
- Time Output: Single
- Area to Render: View
- View: RenderCamera
- In the VRay Framebuffer, Render Region: Off


