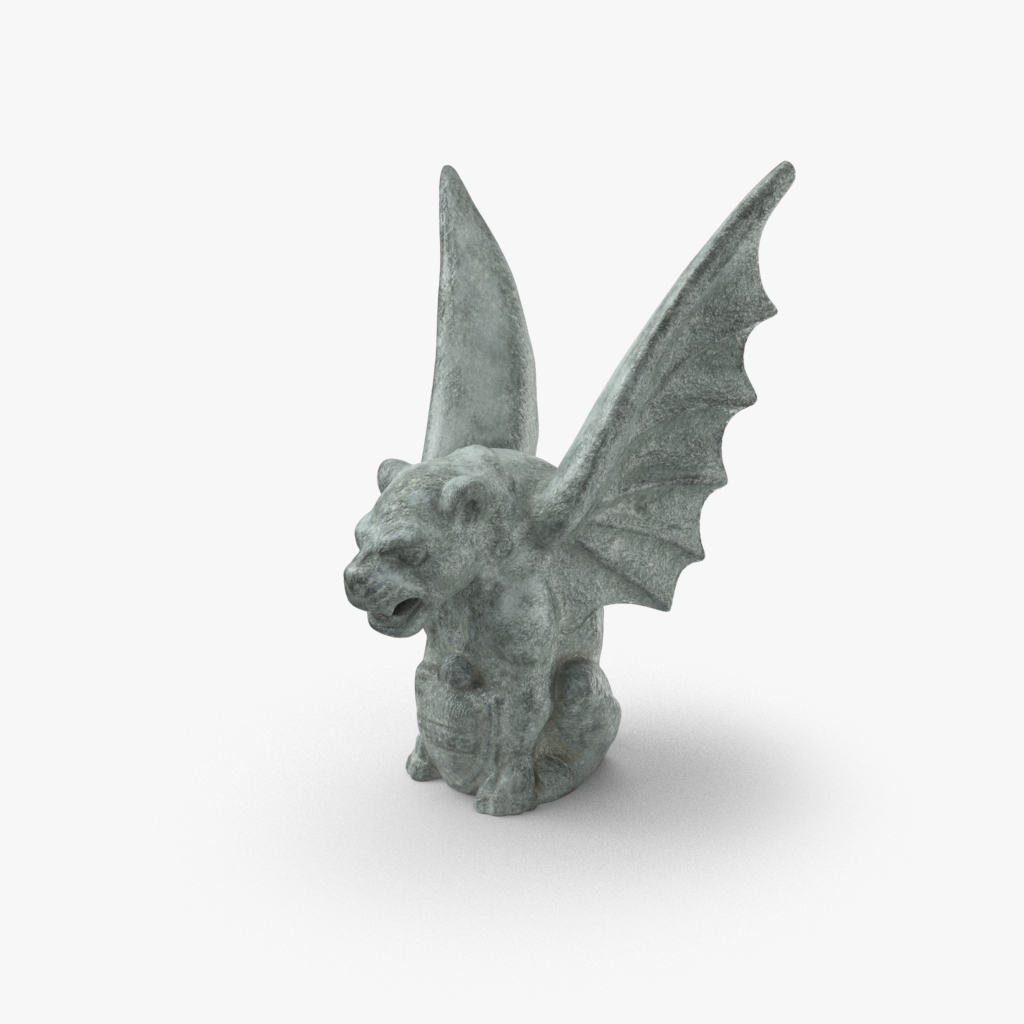
We are sure there are several ways in which an artist can create their Signature Image, but for those who may be struggling, here is a guide on just how to do that.
To create a Signature image with a RGB(247,247,247) background and grounded shadows, take a look at our quick guides below.
Note: These tests were rendered with StemCell_Studio HDRI. For other HDRI, shadows may come in brighter or darker depending on what HDRI is used. If a different HDRI is used, adjustments may need to be made to the Diffuse value for the groundplane. Other than that, the remaining steps should stay the same.
- Set the groundplane’s Base Color value to RGB around (0.77,0.77,0.77).
- Shrink groundplane so that it does not clip or become close to the render edge borders.
- Travel to Render Setup > Arnold Renderer Tab > Background (Backplate): Set Source to Custom Color and the color to RGB(236,236,236).
- Set the groundplane’s Diffuse value to around RGB(196,196,196).
- Shrink groundplane so that it does not clip or become close to the render edge borders.
- Set the Background Color value to RGB(236,236,236).
- Select Dome Light. Under Options, select the checkbox for Invisible. This will hide the HDRI and use the Background color selected.
- Set Background color to RGB(236,236,236).
- Set Groundplane Diffuse to around RGB(0.77,0.77,0.77).
- Shrink groundplane so that it does not clip or become close to the render edge borders.
- Set the Camera contribution value to 0 on the domelight that holds the HDRI.
- Set the Base Color value for the groundplane to RGB(226,226,226).
- Shrink groundplane so that it does not clip or become close to the render edge borders.
- Add a Background and apply a material to it with a Diffuse Color RGB(247,247,247).
- Set groundplane diffuse color to RGB(196,196,196).
- Shrink groundplane so that it does not clip or become close to the render edge borders.
- Create a secondary Sky. Apply a material with a Diffuse value of RGB(237,237,237).
- Upon the same Sky that was just created, add a Compositing Tag and deselect all checkboxes besides “Seen by Camera” and “Seen by Transparency.”
- Create an aiRaySwitch material and apply it the Background slot located in Render Settings > Arnold Renderer > Environment.
- Within the aiRaySwitch material, set the Camera value to RGB(237,237,237).
- Shrink groundplane so that it does not clip or become close to the render edge borders.
- Set groundplane Diffuse color to RGB(196,196,196).
- Within the DomeLightShape > Visibility, set the value for Camera to 0.
- Select the VRayLightDomeShape. Within the Options tab, select the checkbox for Invisible.
- Select CameraShape > Environment. Set the Background Color to RGB(237,237,237).
- Shrink groundplane so that it does not clip or become close to the render edge borders.
- Set groundplane Diffuse color to RGB(196,196,196).
- Select DomeLightShape. Within the Render Stats tab, deselect the checkbox for Primary Visibility.
- Select CameraShape > Environment. Set the Background color to RGB(237,237,237).
- Shrink groundplane so that it does not clip or become close to the render edge borders.
- Set groundplane Diffuse color to RGB(196,196,196).
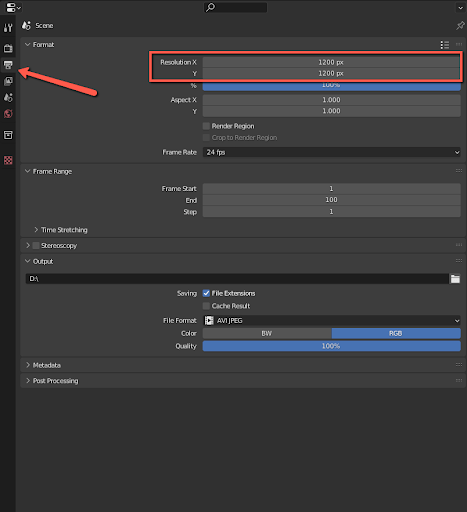
- Go to output settings. And adjust the X, and Y resolution px. Needs to be square and minimum of 1200 x 1200.
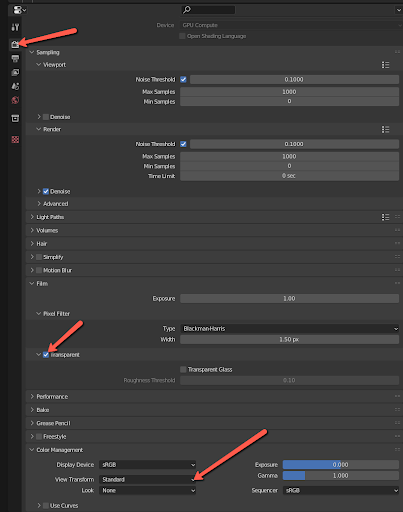
- Go to Render properties. Check the box for Transparent. And open the color management tab and go to view transform, and select standard.
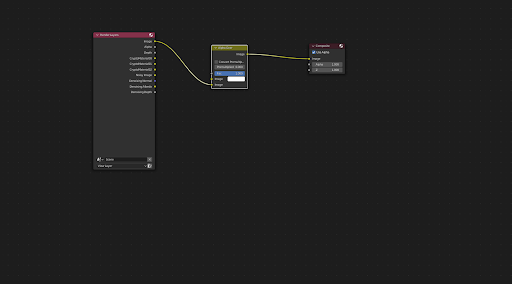
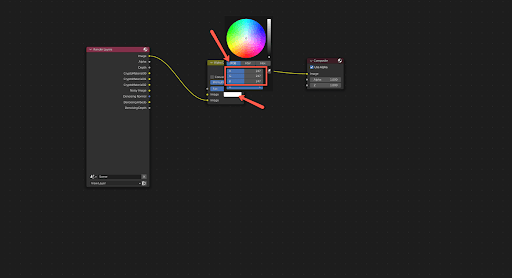
- Now select the Compositing tab. If for some reason you are unable to get the compositing layout you can go to the drop down in the editor type and select the compositor. Check the box for Use Nodes. Go to add, then input, render layers. Add another node, go to output, and then composite. Another node to add is the Alpha over. Go to add, color, then alpha over. To organize nodes correctly, set up the nodes from left to right. With Render Layers on the left, alpha over in the middle and then composite on the right.
- In the render layers node, left click and hold on image and drag it to the second alpha image on the alpha over node on the left side of the node. On the right side of alpha over, left click and hold selecting image, and then select image on the Composite node. Let’s check the color for the render in the alpha over node. Select the color box, then RGB. Set each color channel R, G, B to 247.
This will make the renderer render the model and then put a white background of 247, 247, 247. Save the file as a png or jpg and upload it in the publisher for the signature image. Great job!


