Creating wireframes can be a daunting task, but it does not have to be stressful. It is a fairly simple process that should take you little time to master. We have created some quick guides to walk you through creating wireframe renders like a pro.
Getting Started
Regardless of the application you’re using, you will first need to get your render scene ready. Once you’ve done this, use the guide below that corresponds to the software and renderer that you’re using.
Tip
Your wireframe should be easy for customers to view. We suggest that artists use a dark color for the mesh (such as black or gray) rendered on a light background. This provides customers with the contrast that they need to best see how your model is constructed.- Apply a new V-Ray material to the entire model.
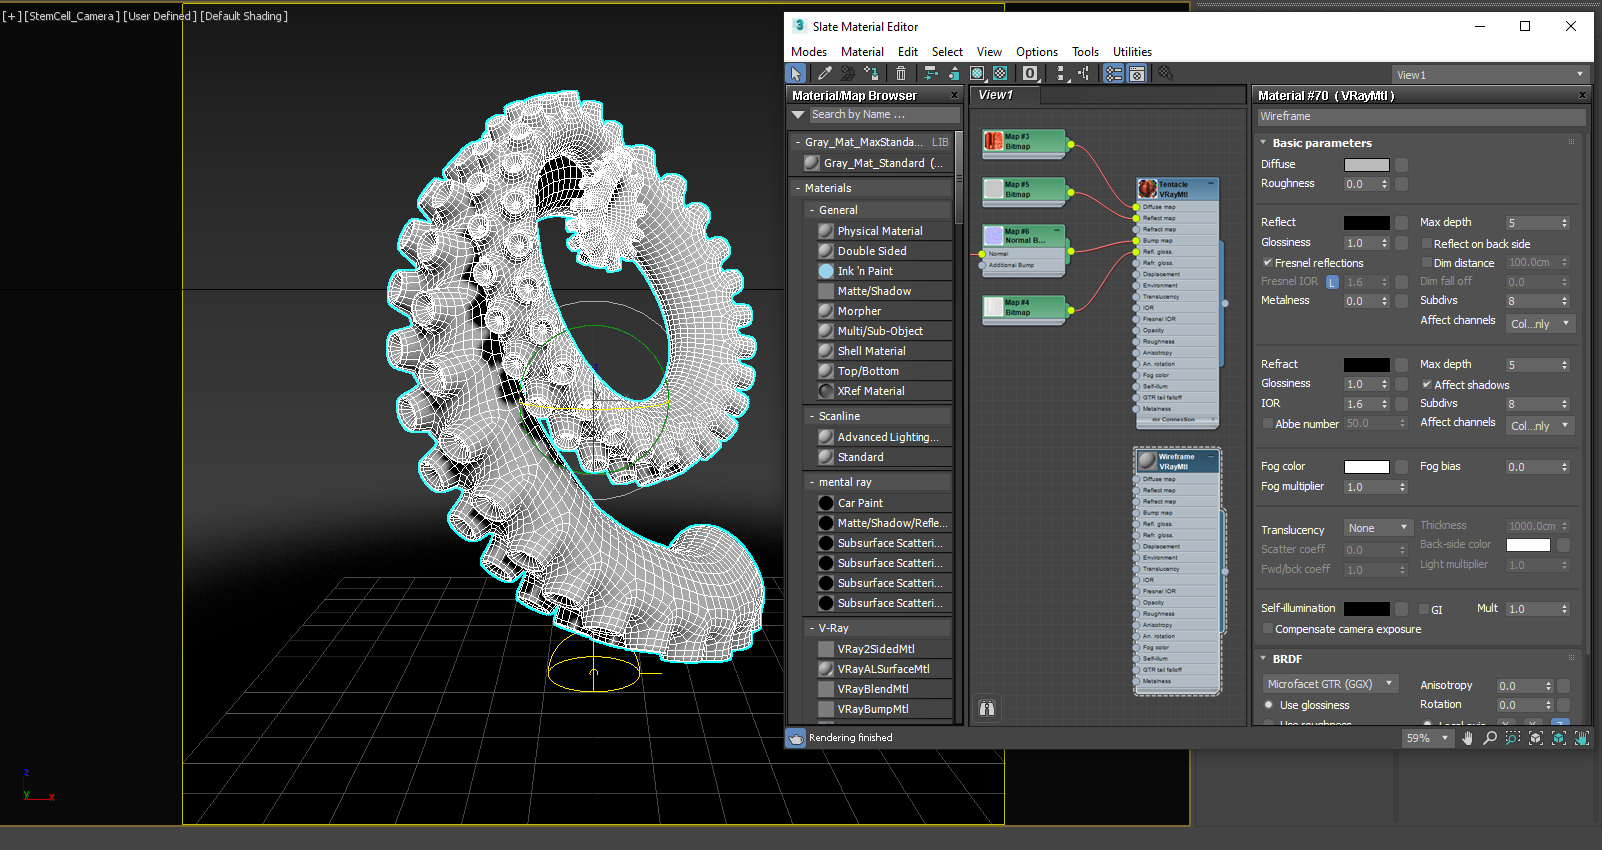
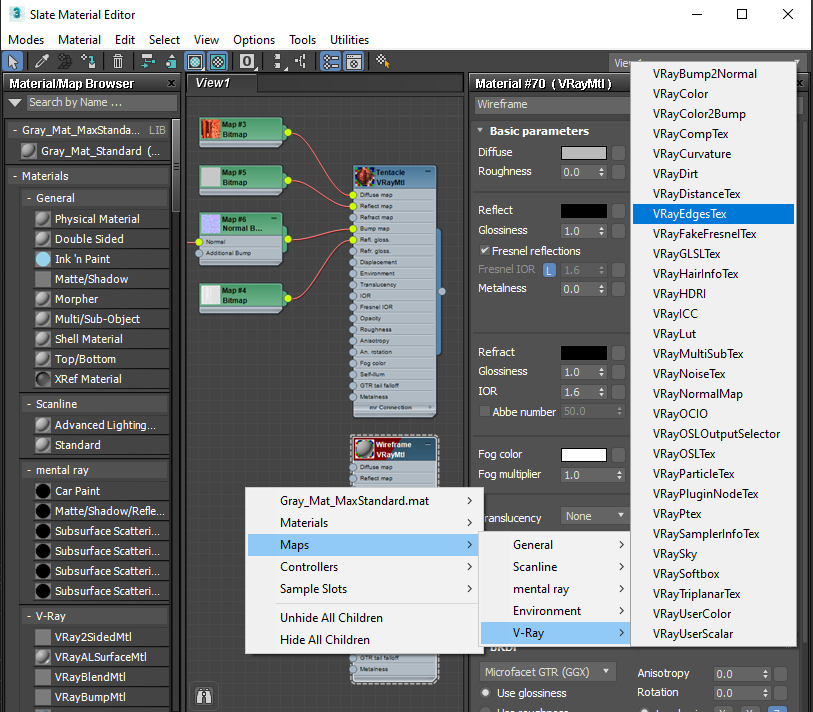
- Create a VRayEdgesTex node.
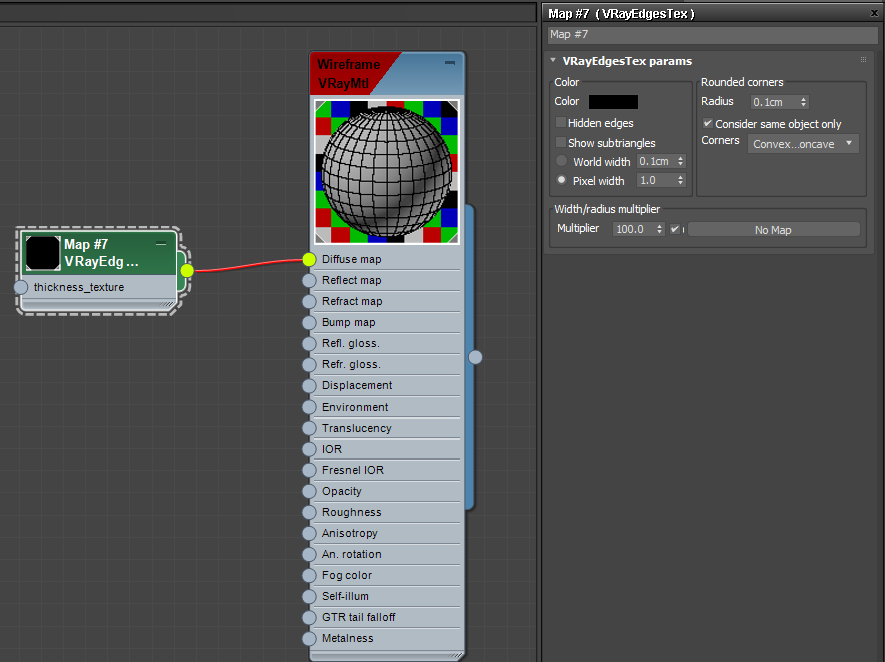
- Apply the VRayEdgesTex node to the Diffuse map slot of the shader. You can adjust the wireframe color and thickness within the VRayEdgesTex parameters.
- All that is left now is to render!

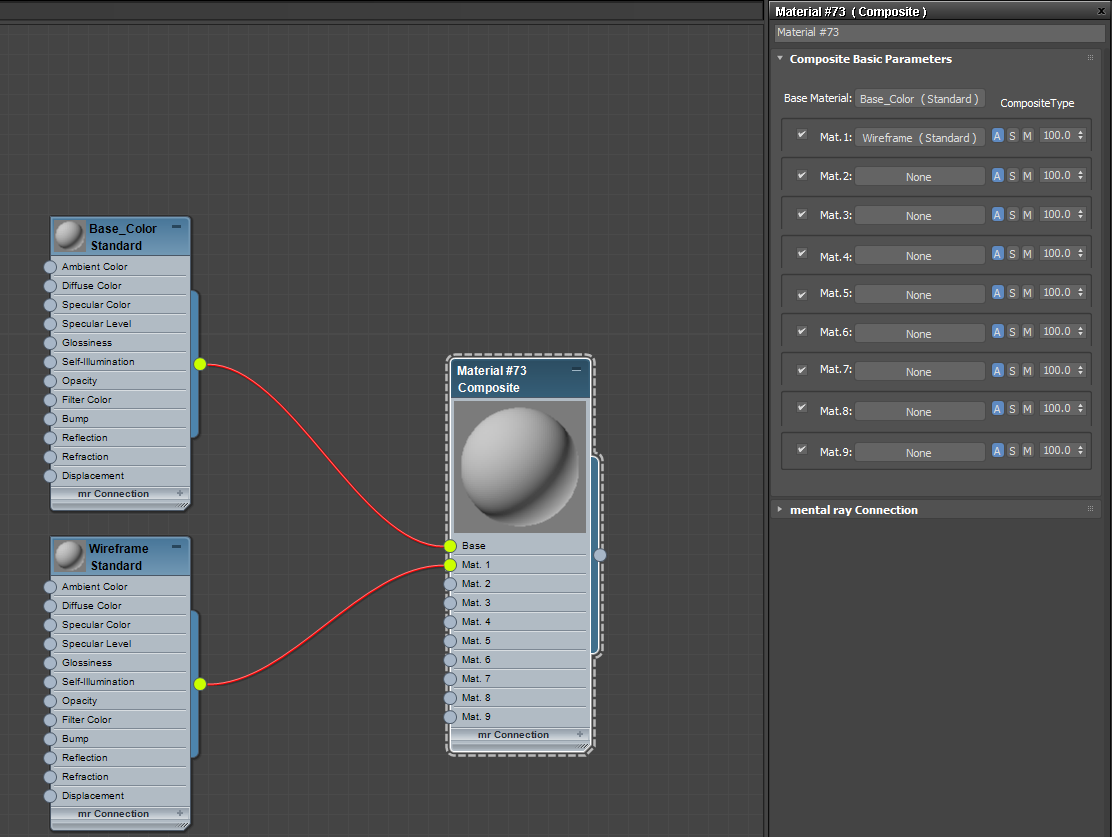
- Create and apply a Composite Material to the entire model.
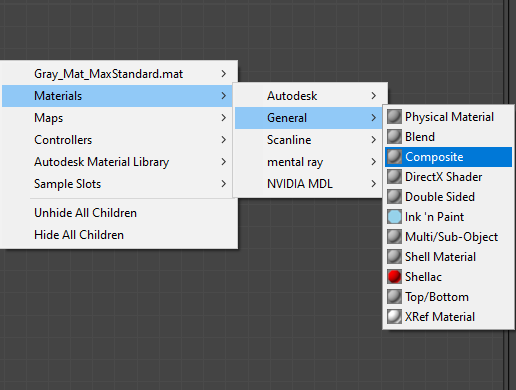
- Within the Composite Material, plug a Standard material into the Base Material and Material 1 slots. The first Standard material will be used as the model’s base color while the second will be used as the wireframe’s color.
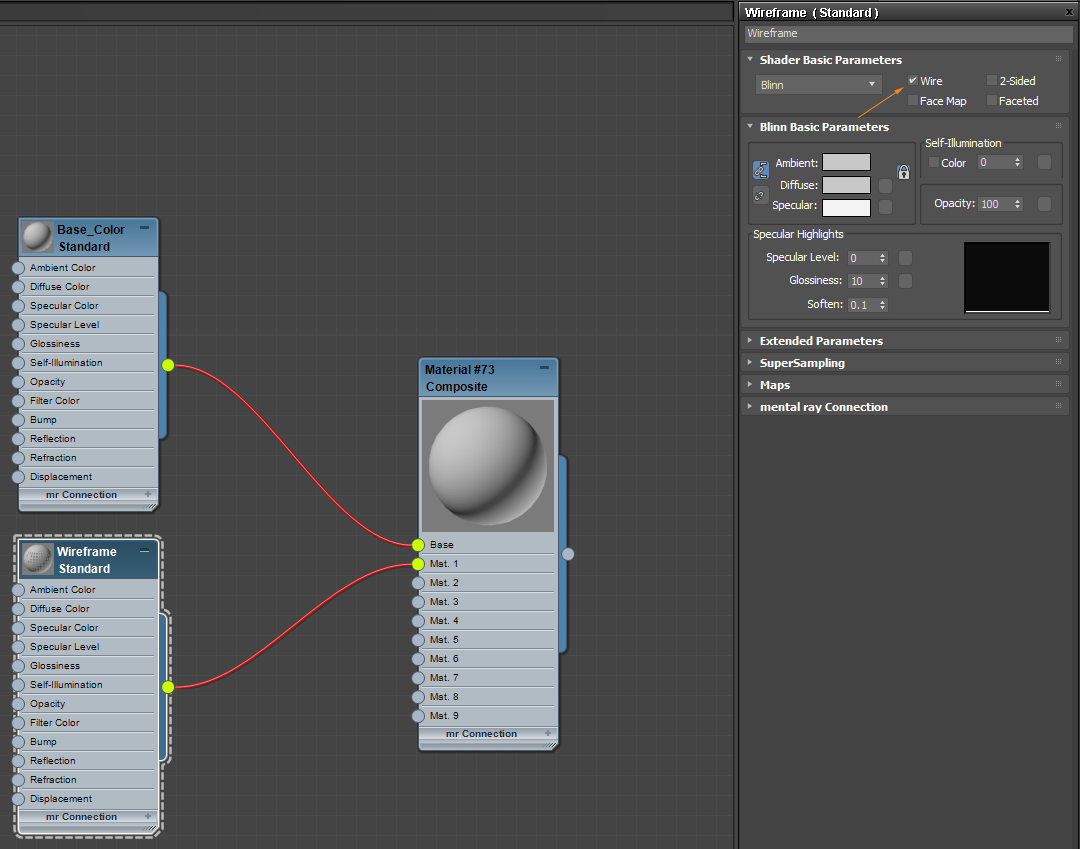
- To display the wireframe, select the second Standard material. Once you select this, check the checkbox labeled “Wire” within the Shader Basic Parameters settings.
- If you change the Diffuse color to Black, you should then see the wireframe displayed on the material.
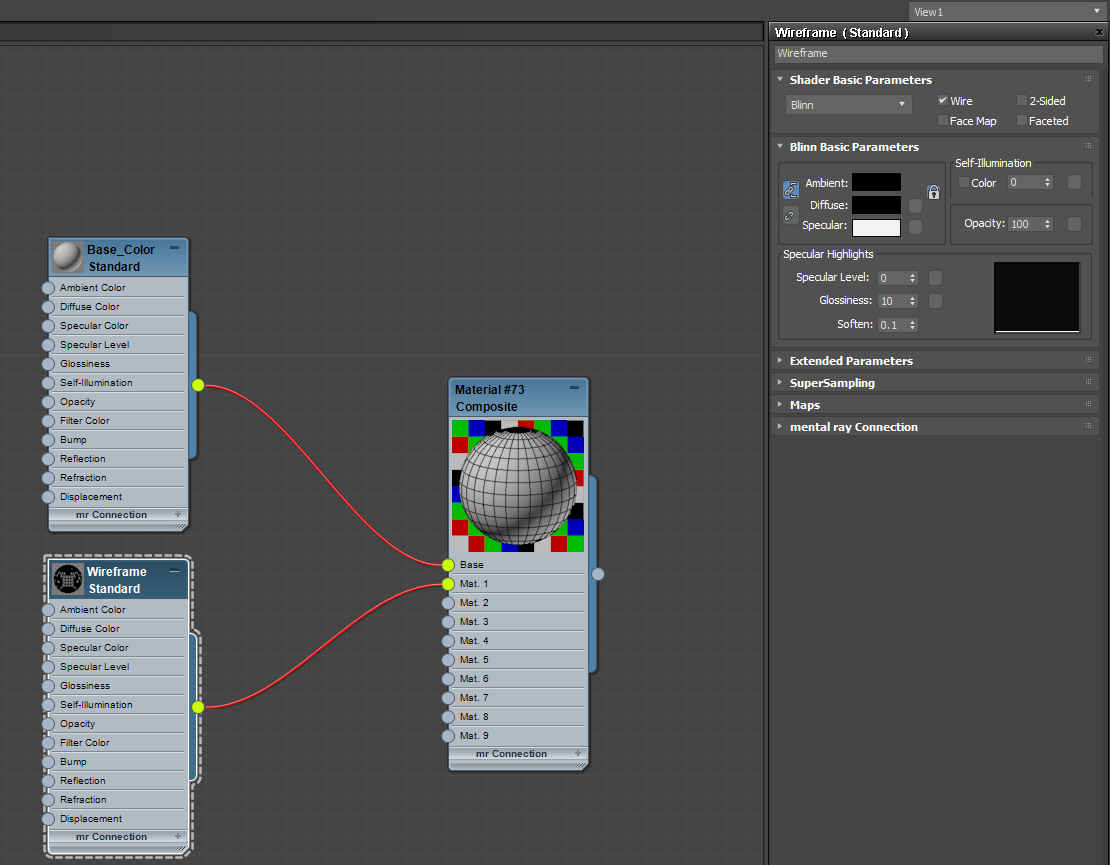
- All that’s left to do now is render!

- Create and apply a new Arnold Standard Surface material to the entire model.

- Create a Wireframe node.
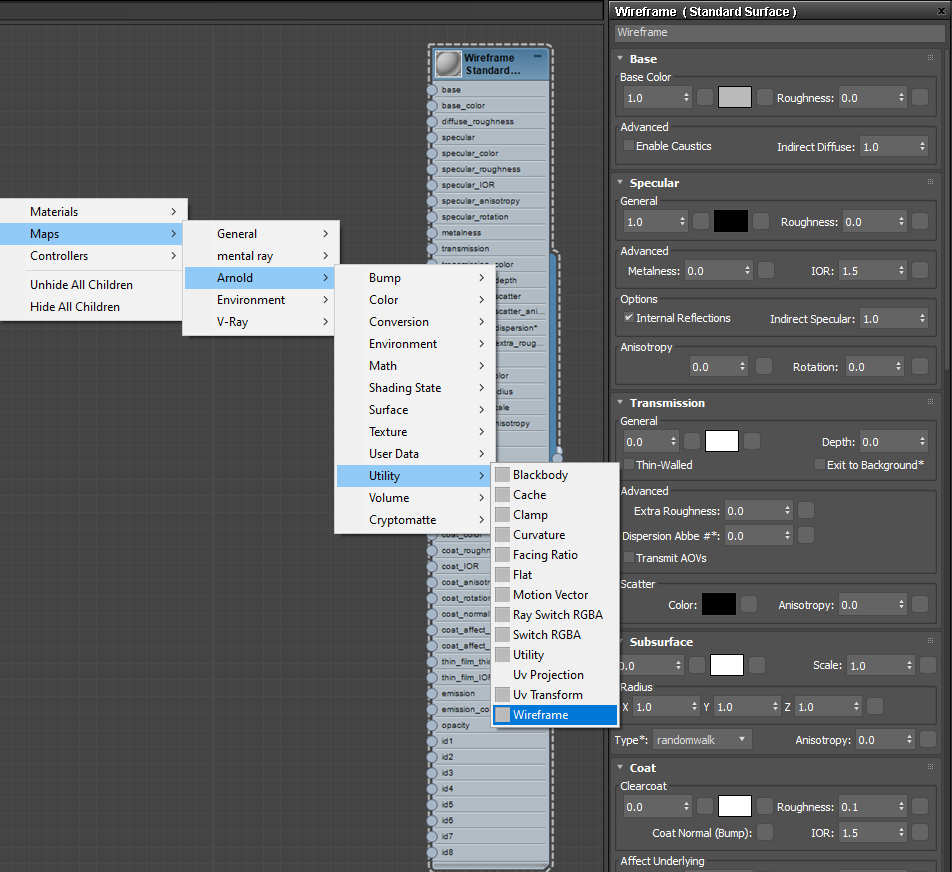
- Plug the Wireframe node into the new Standard Surface material’s Base Color slot. You can adjust the Base Color, Wireframe Color and thickness within the Wireframe node parameters.
- This option may not be necessary, but if you find that your model is rendering as triangles and not quads, navigate to Render Setup > Arnold Renderer > Geometry, Subdivision & Hair, and make sure that Geometry Translation is set to “Always Use Quads.”
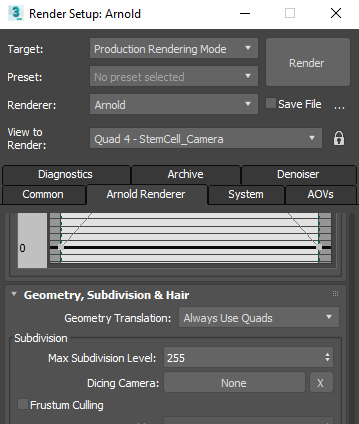
- All that’s left to do now is render.

- Apply a new V-Ray material to the entire model.
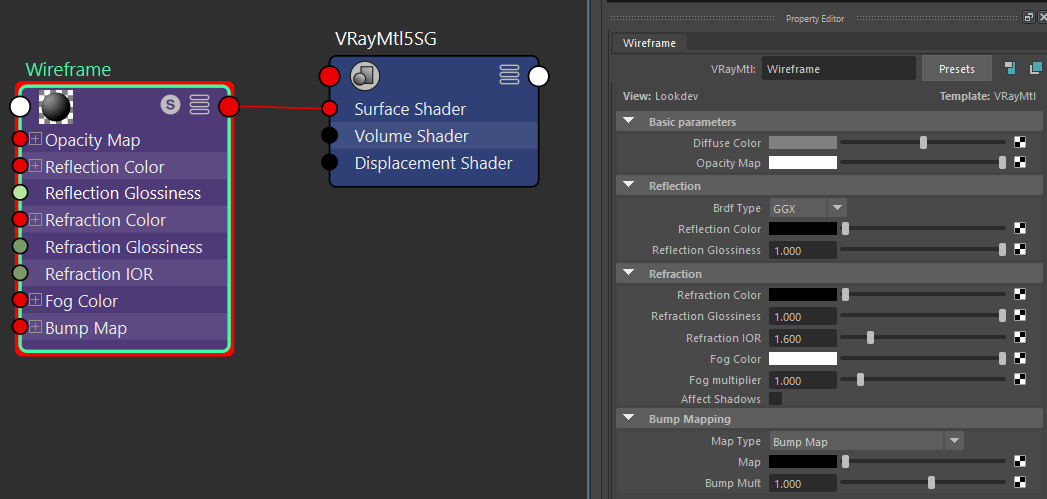
- Create a VRayEdges node and apply it to the Diffuse Color slot of the new material.
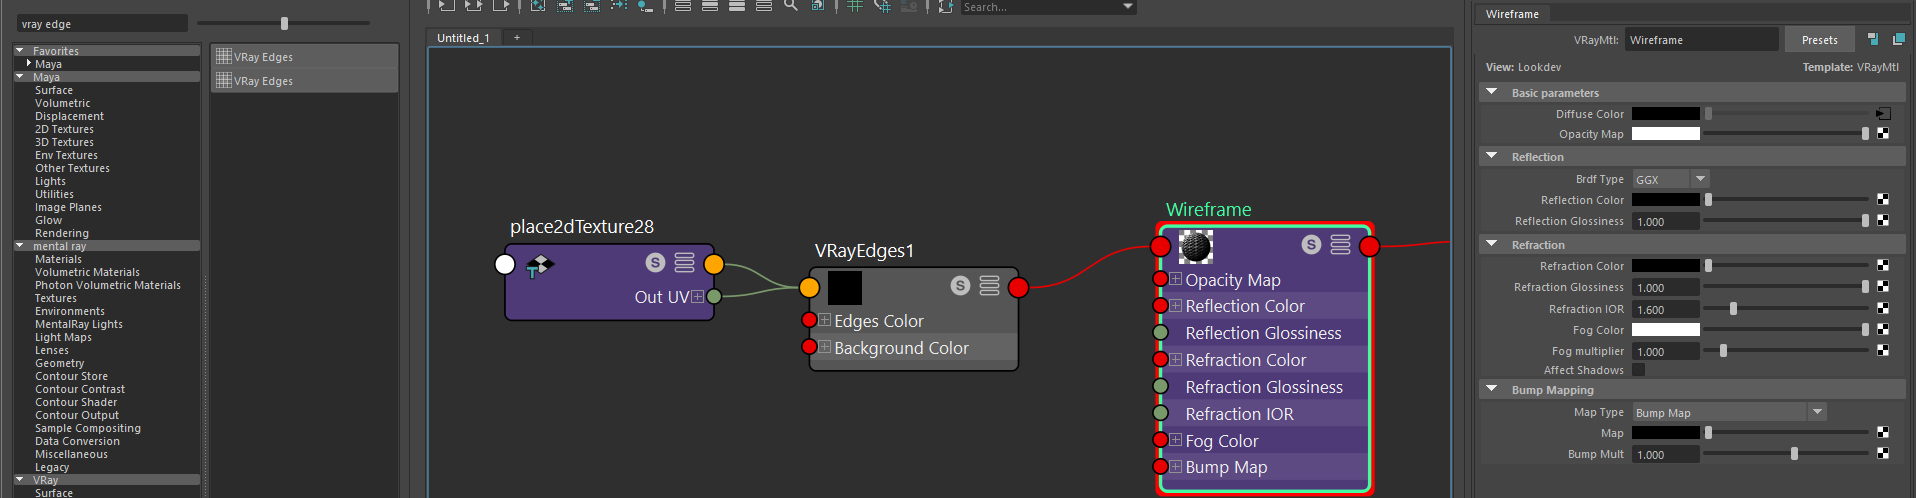
- Within the VRayEdges node parameters, you can change the base color, wireframe color, and wireframe thickness.
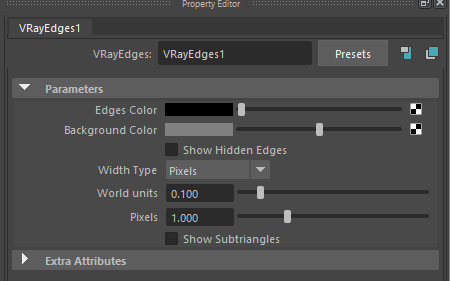
- Once set to your liking, all that’s left is to render.

- Navigate to Render Settings > Quality. Select the checkbox for Show Advanced Settings.

- Scroll down to Legacy Options and change Sampling Mode to “Legacy Sampling Mode.”

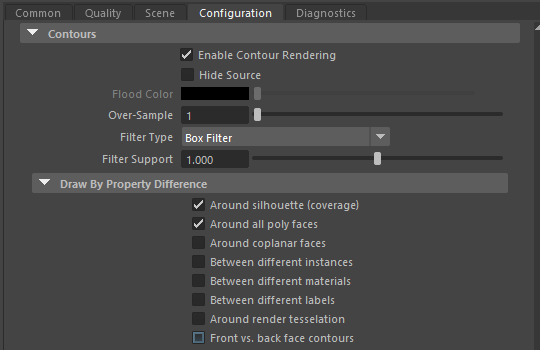
- Navigate to Render Settings > Configuration. Select the checkbox for Show Advanced Settings.

- Scroll down to the Contours tab, and select the checkbox for “Enable Contour Rendering.” Also, make sure to check “Around silhouette” and “Around all poly faces.”
- Apply a new material to the entire model. Select the Shading Group node for this new material, and navigate to Mental Ray > Contours. Make sure that you select the checkbox for “Enable Contour Rendering.” Once checked, changing the Color will change the wireframe color. Changing the Width will adjust the wireframe thickness.
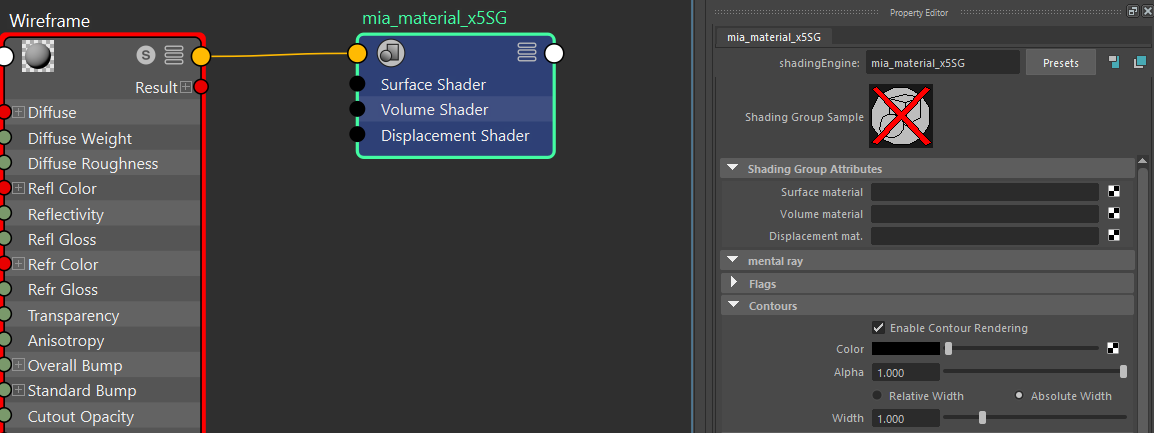
- All that’s left now is to render.

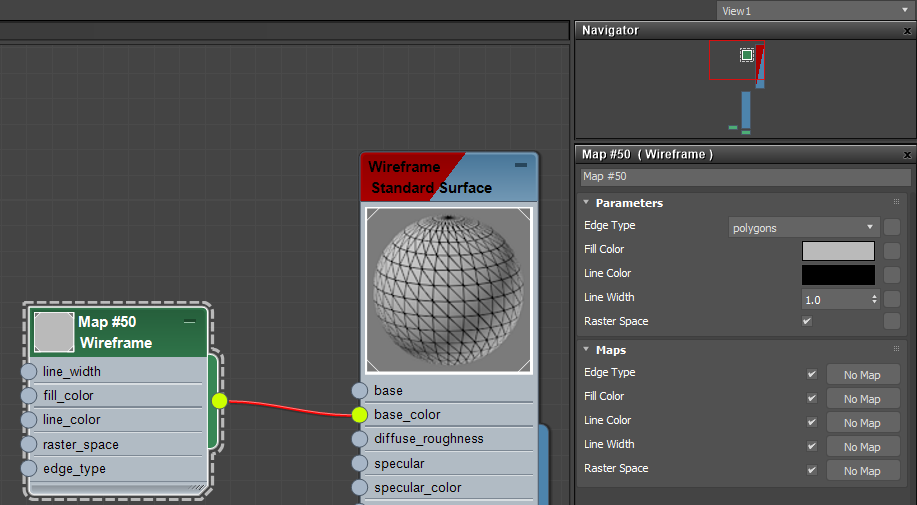
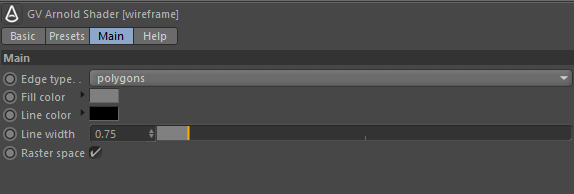
- Create and apply an aiWireframe material to the entire model.
- Change the Edge Type to “polygons.” Set the color, wireframe color, and line width within the Wireframe Attributes dropdown.

- All that’s left to do now is render.

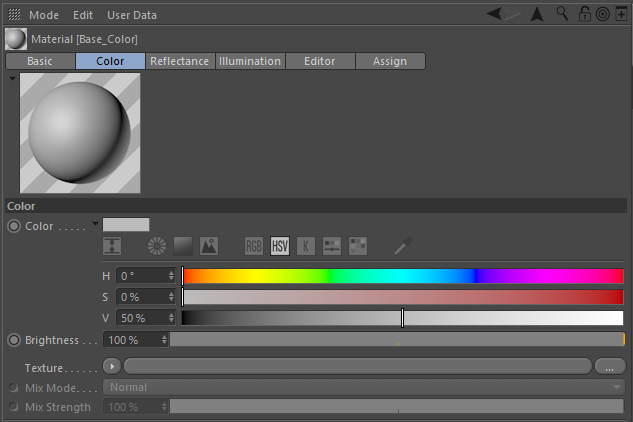
- Create and apply a new material to the entire model. This first material will act as the Base Color for the wireframe render. Change the Color swatch for desired Base Color.
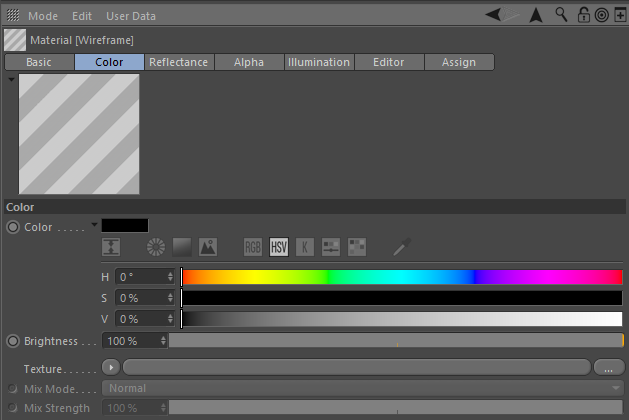
- Create and apply a second material to the entire model. This material will act as the wireframe. Set the Color swatch to the desired color for your wireframe.
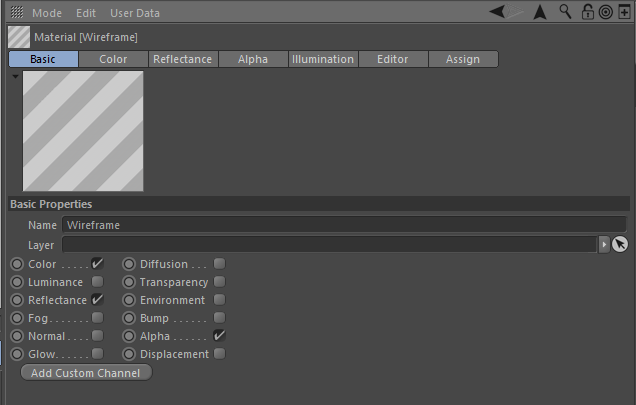
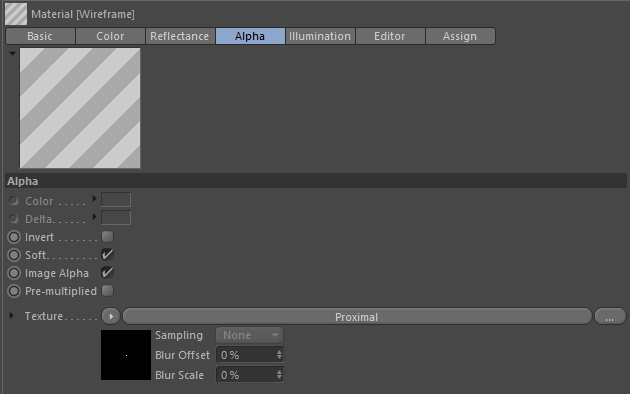
- Within the Basic tab of the wireframe material, select the checkbox for “Alpha.”
- Next, select the Alpha tab. Within the Alpha tab, select the triangle next to “Texture” and navigate to Effects > Proximal. You should now see the word Proximal in the texture slot.
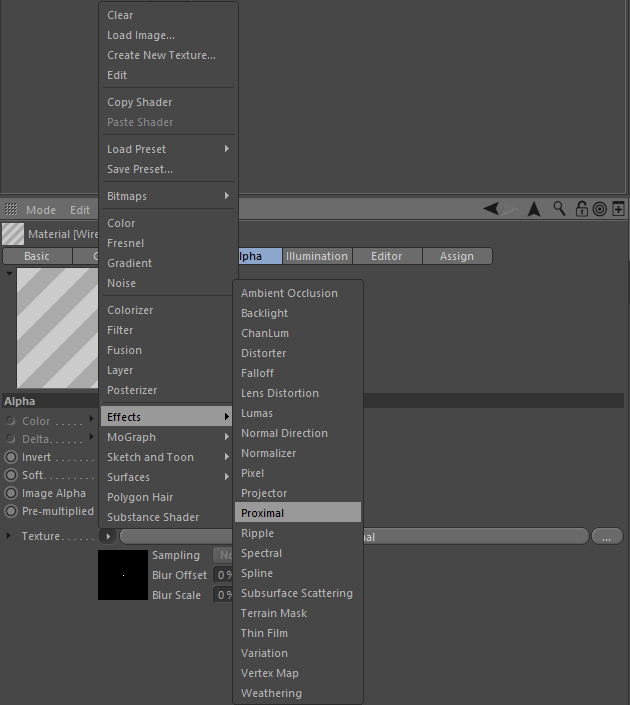
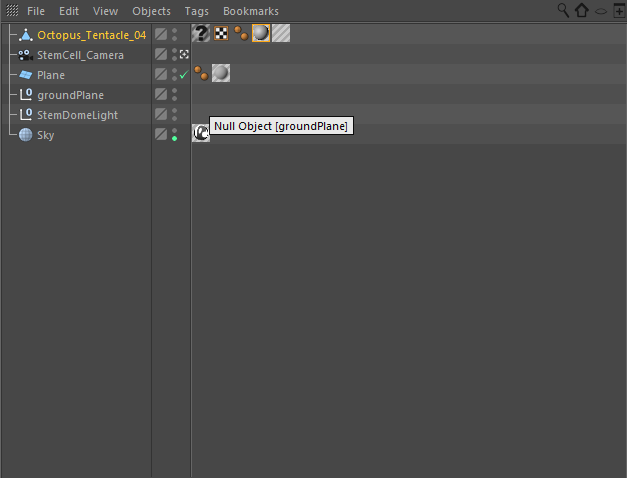
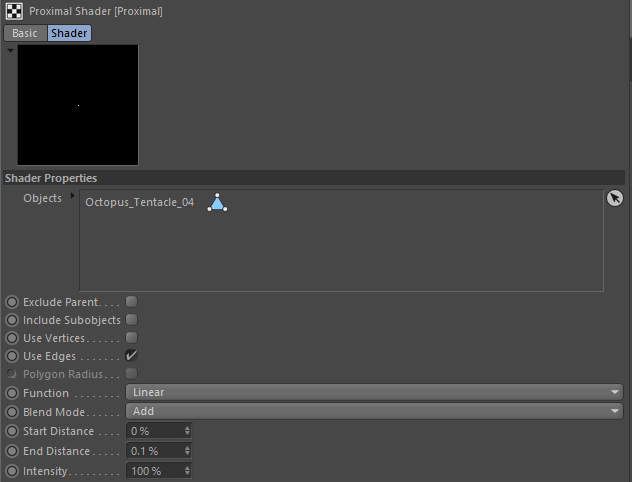
- Select the texture slot. This will lead you to the Proximal Shader Properties. Next drag the model from the Objects tab into the “Objects” section of the Shader Properties. You should now see the model listed in the Proximal’s Shader Properties.
- Still within the Proximal Shader Properties, select the checkbox for “Use Edges.” End distance can be adjusted to adjust wireframe thickness.
- All that is left now is to render.

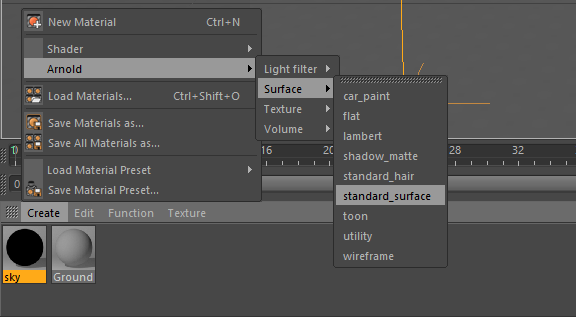
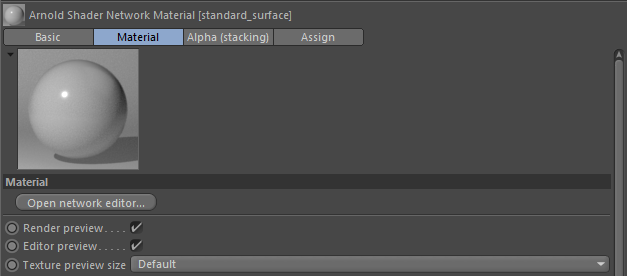
- Create a new Standard_Surface material and apply it to the entire model.
- With the new material selected, navigate to the Open network editor.
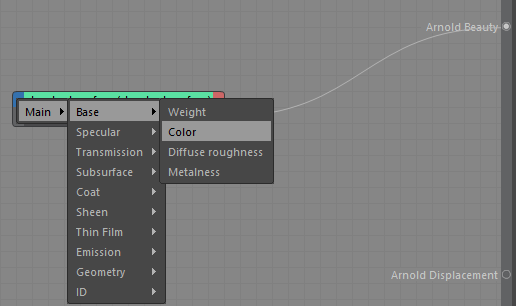
- Within the Network Editor, we need to open up a Base Color slot. To do so, select the blue square on the edge of the Standard Surface Shader node. Navigate to Main > Base > Color. This will provide a slot for a texture map to be plugged into the Base Color.
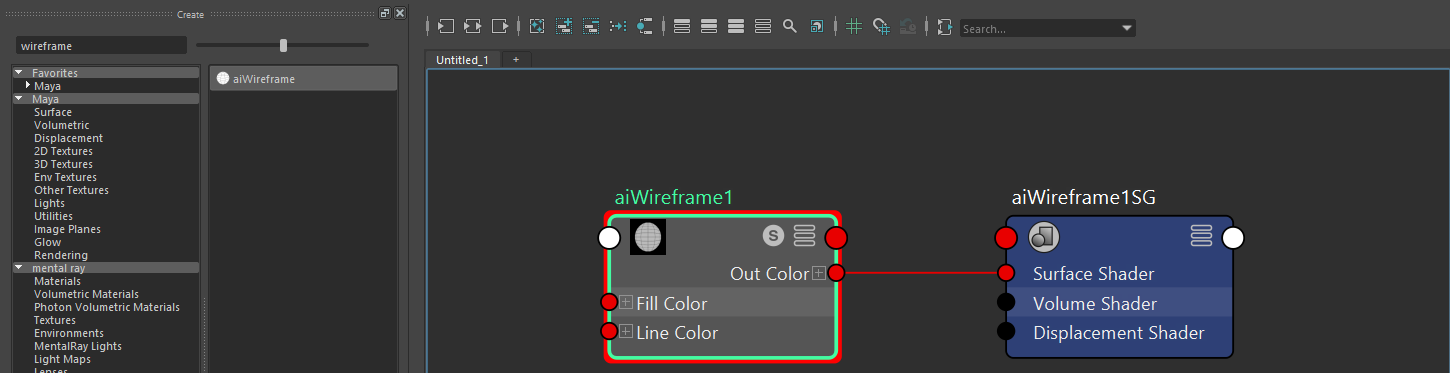
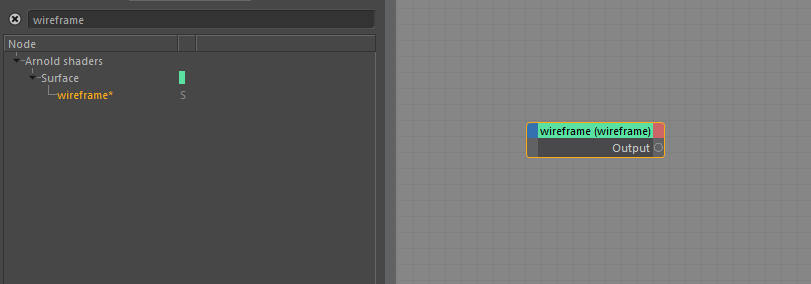
- Search for a wireframe node and drag it into the Network Editor.
- Plug the wireframe node into the Base Color slot you just created.
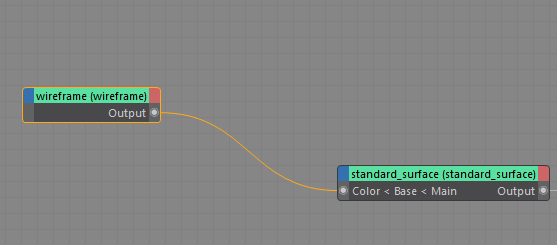
- Within the wireframe node parameters, change the Edge type to “polygons.” You can also set the Base Color, wireframe color, and wireframe thickness here as well.
- All that’s left to do now is render.