
StemCell UV Mapping
Understanding the Importance of UV Mapped 3D Models
StemCell relies solely on textures for material values, and the only way to assign a texture to a model is by having some type of UV mapping assigned to the mesh. But UV mapping is an art form, just as much as modeling and texturing is. Often times it’s completely overlooked by modelers, but should actually be part of the modeling process. Since the majority of TurboSquid customers are buying models to save them valuable time, an unwrapped model immediately becomes the most attractive option.
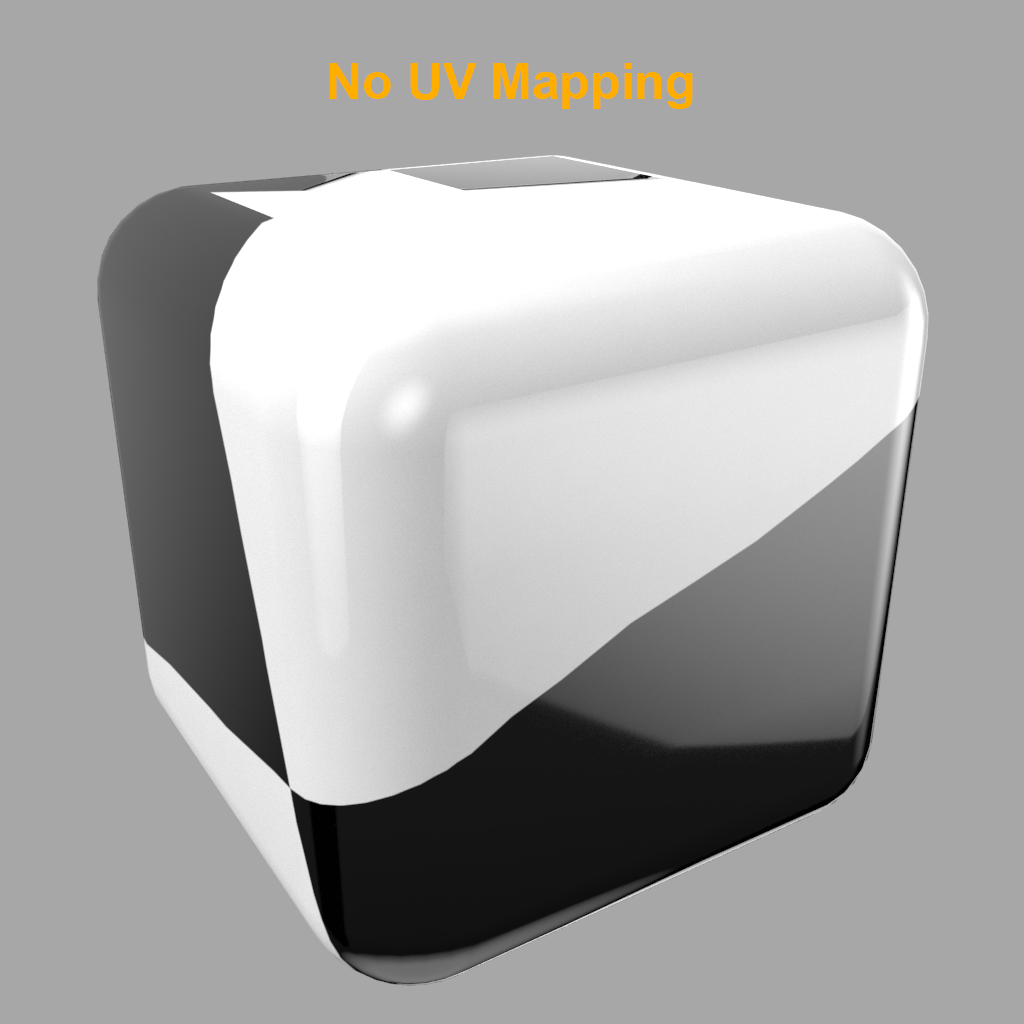
Applying texture maps to a model with no UVs mapped can render as stretched or distorted. After applying some simple UV mapping makes sure textures are aligned correctly
Unwrapping Techniques:There Is More Than One Way To Skin A Mesh
Sometimes there’s simply no way around manually unwrapping a mesh, but there are times when a faster solution can work well enough. So it’s good to know what your options are and how different techniques can save you tons of time.
Manual Unwrapping
You either love it or hate it. Manual unwrapping is a true art that many artist either struggle to grasp or simply won’t do. For many models, there’s just no other way to handle it. Luckily there are a few tricks that can reduce some of the tedious effort needed to create proper UV maps.
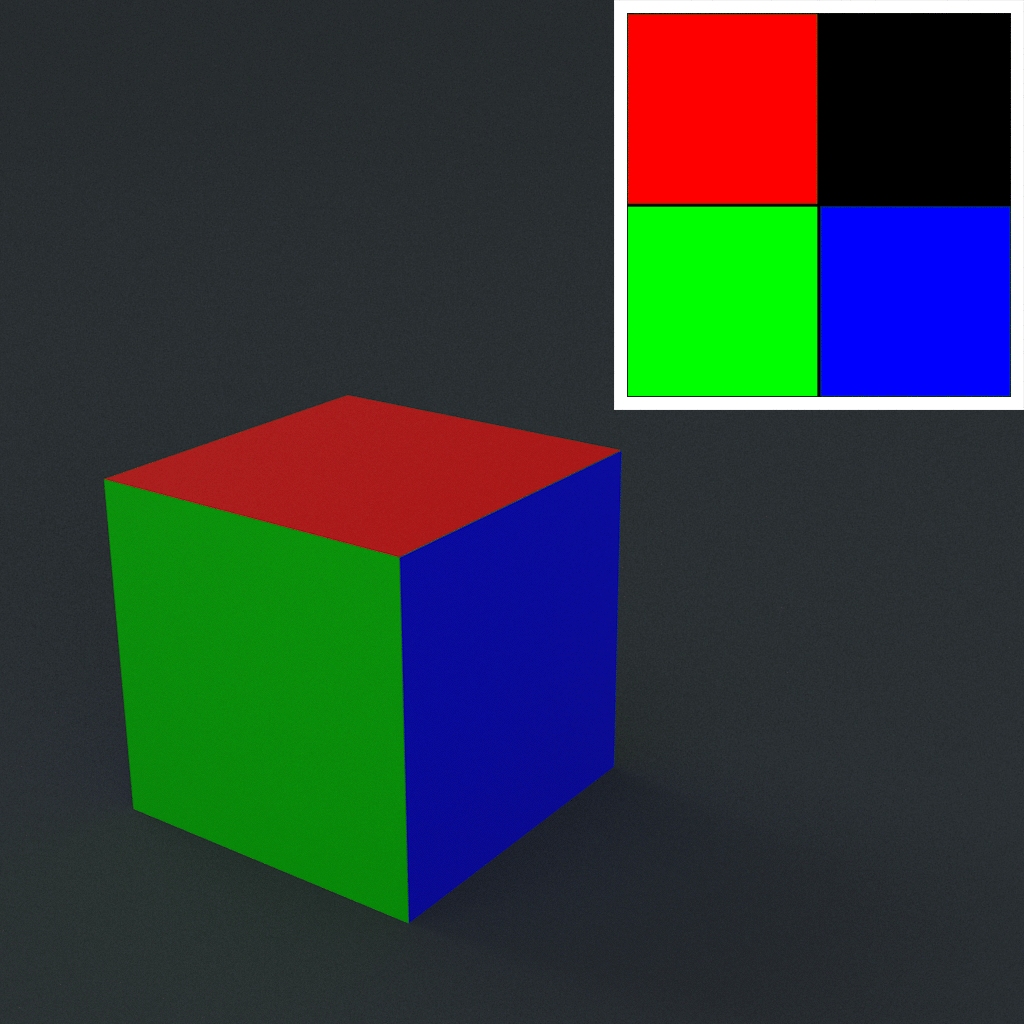
Manually unwrapping this cube allows access to all 6 sides individually for texturing, while minimizing seams for contiguous edges. This is the most ideal for UV mapping method.
Clean up your mesh.
There are a variety of application tools and third party plugins that can automatically unwrap UVs. While these application can save you tons of time they often produce undesirable results. Seam placement and packing tends to be very random, often resulting in noticeable breaks in the texture and increased difficulty to edit. Automatic UV mapping can also make texture creation difficult, so try to use them sparingly.
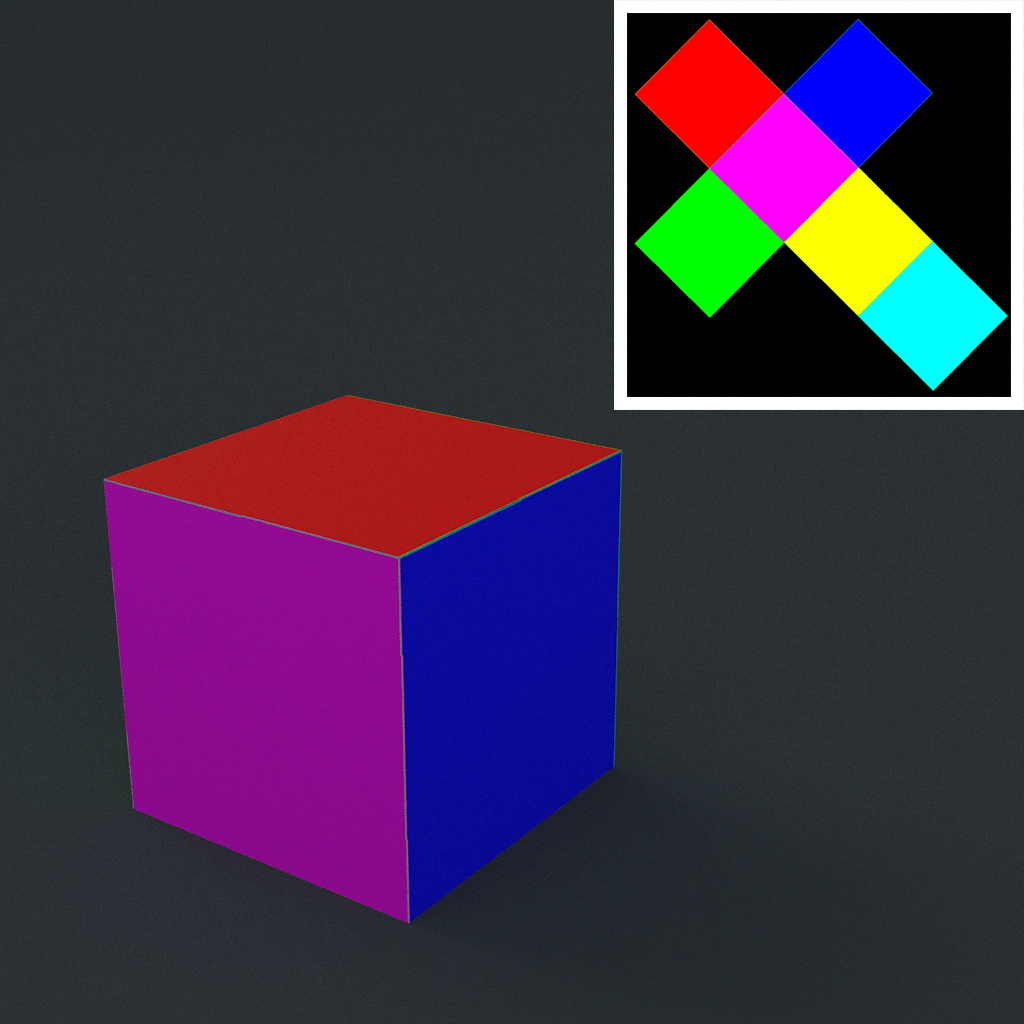
Automatic unwrapping this cube planar mapped from each axis. This creates overlapping UVs with the faces parallel to each other, but offers more editability than a simple UV map projection.
Simple Projection Mapping
The most basic of UV mapping methods are simple projection mapping. These include cube, planar & sphere methods which work great for flat surfaces and small details on models. They are also great starting points for manually unwrapping your models.
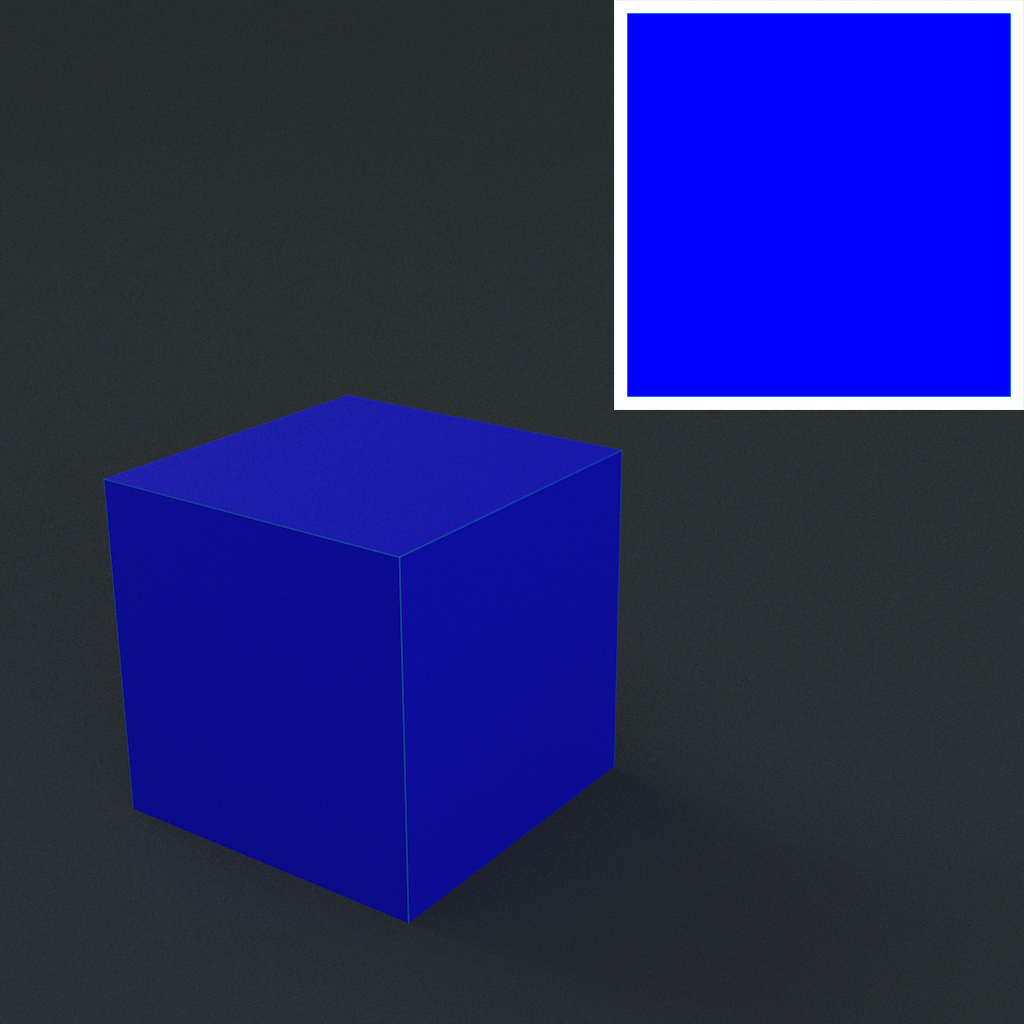
A simple Box map was applied to this cube. All 6 faces are overlapping so each face will be identical.
UV Organization:Understanding the Terms
Keeping your UV maps clean and organized won’t just make your life better, but also the life of your customer. Like project and scene organization, UV organization can quickly become a useful habit when practiced often. It’s easier than you might think.
Normalizing UV mapping
Normalizing UV mapping is simply the process of making sure all projections are relatively the same scale on the UV sheet in relation to the size of the objects. This is most often checked by using a checker pattern for consistent size across the entire object or model.
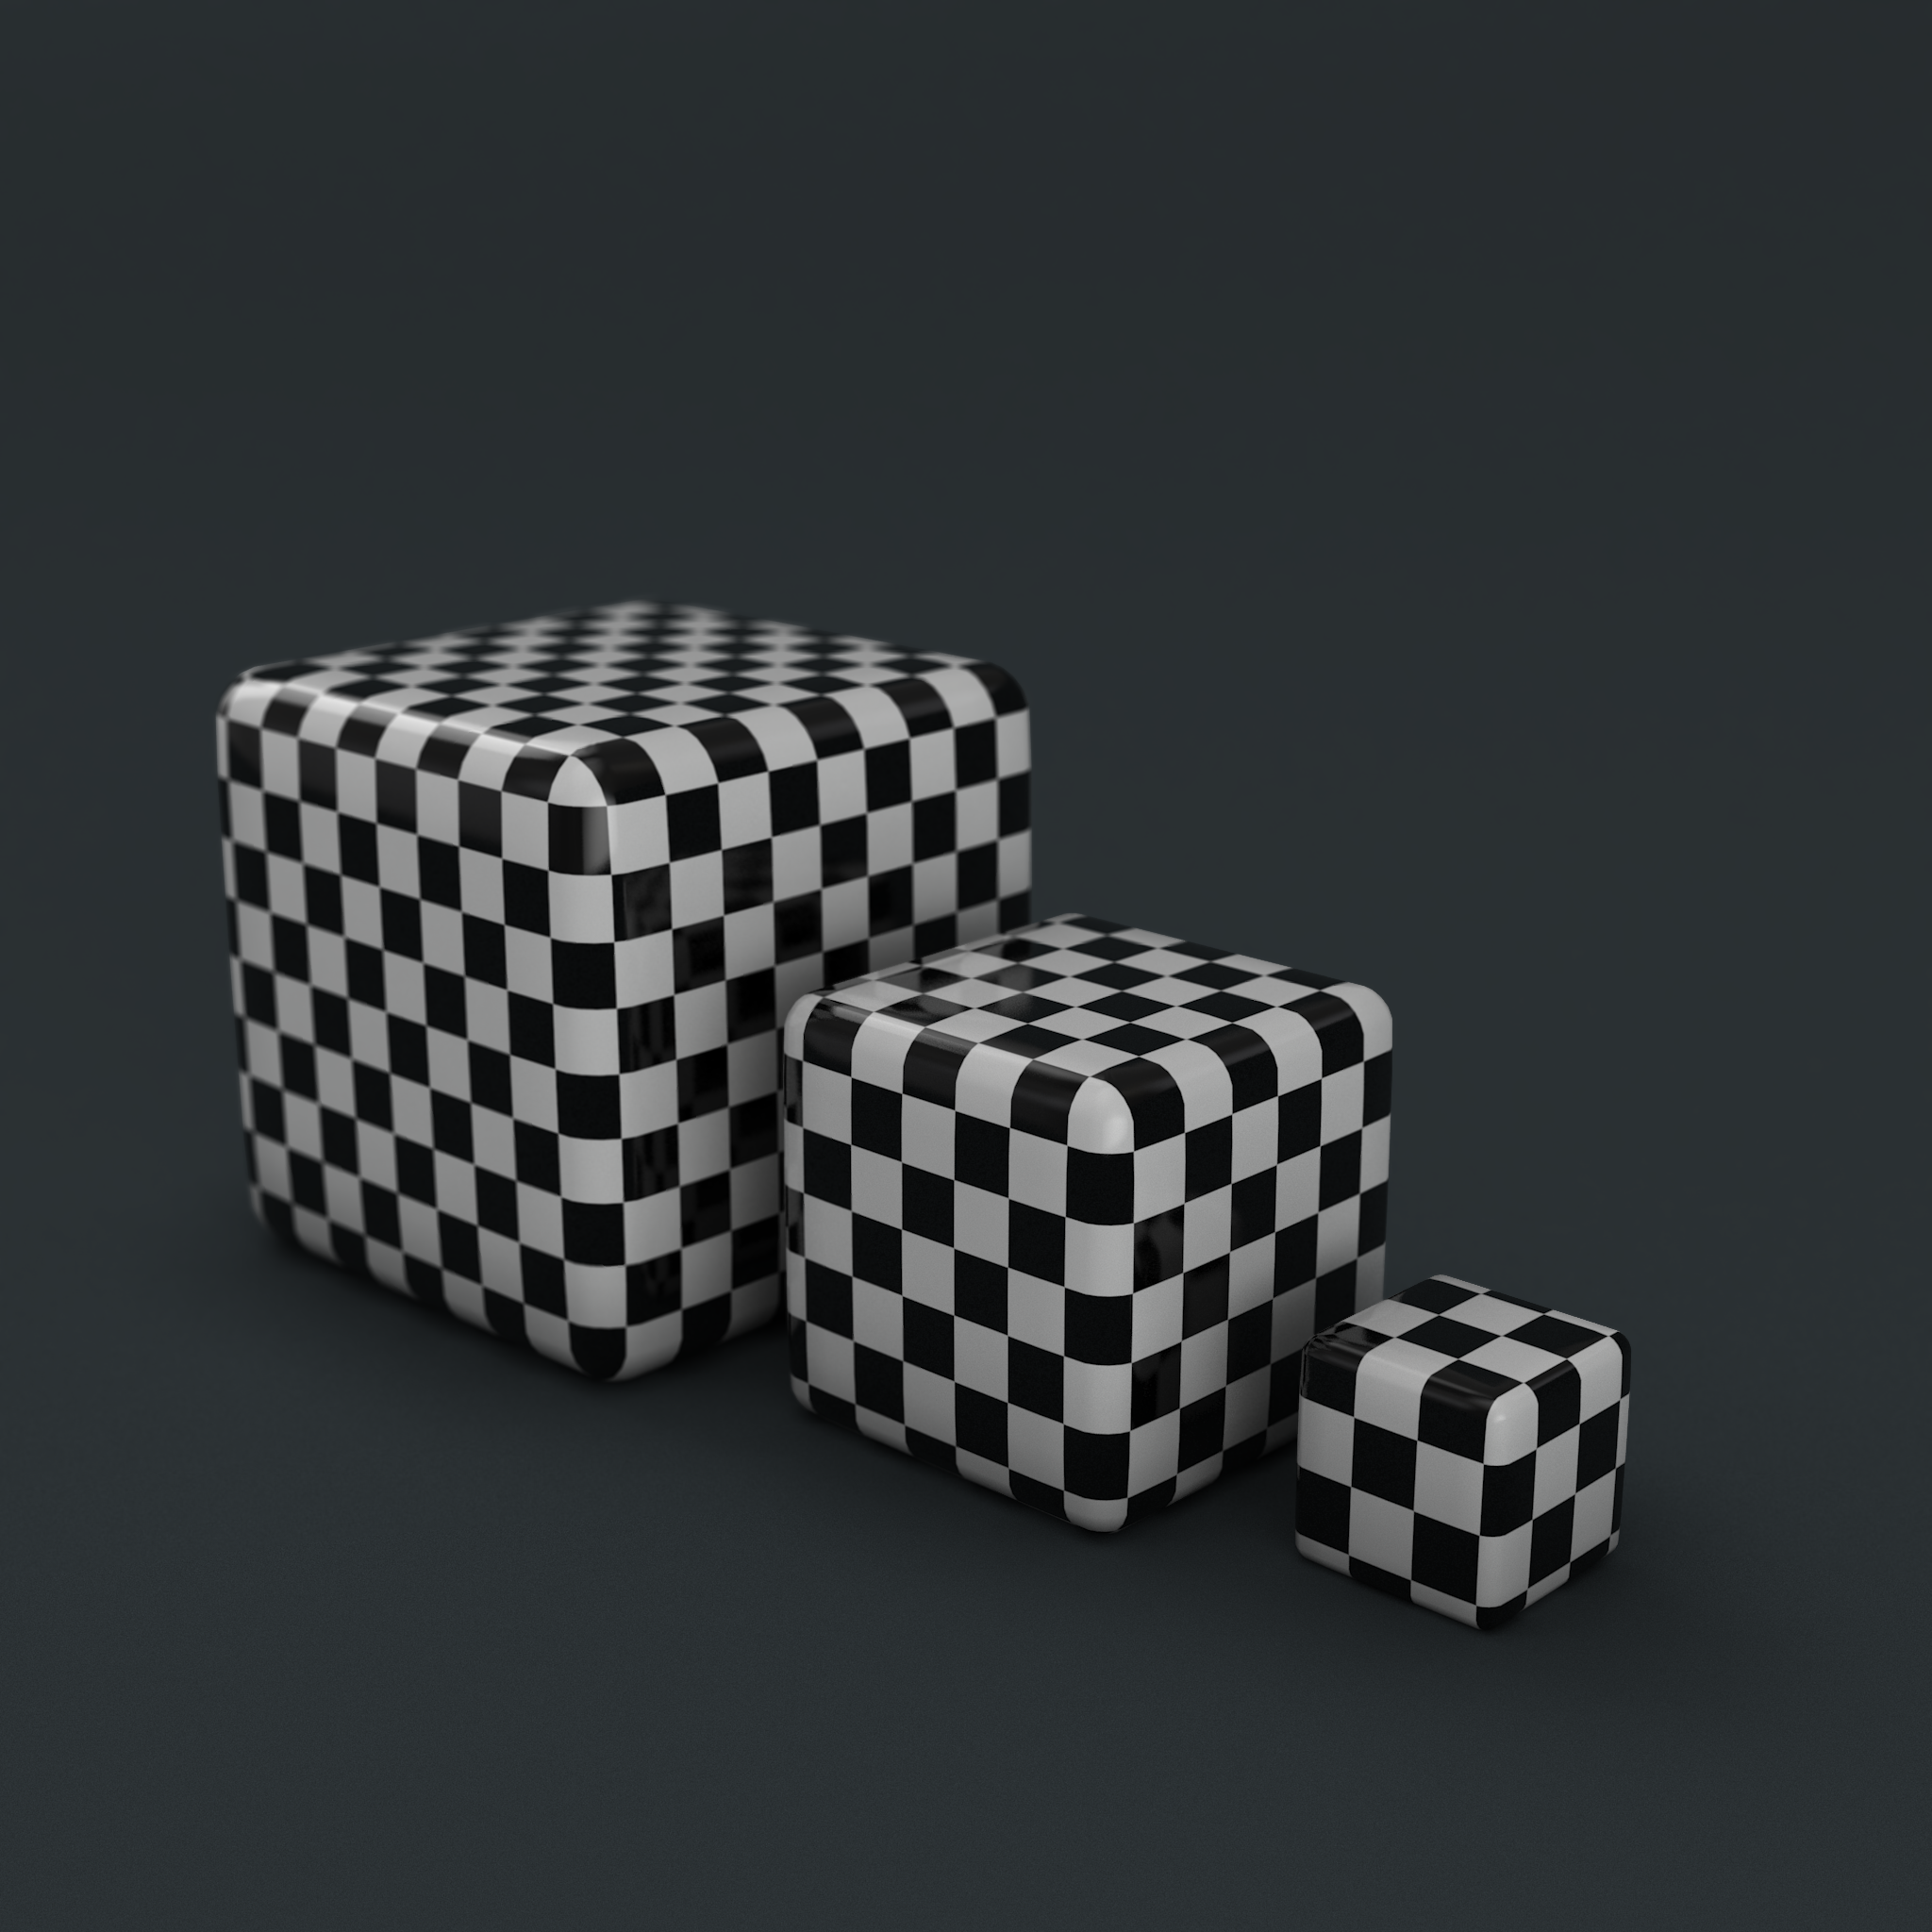
These 3 boxes are normalized so each cube uses UV space equal to its size, relative to the other cubes. This keeps consistent detail between all objects
UV Organization & Atlasing
There are many good reasons for keeping your UV maps organized. Organized UV maps are easier to edit, make painting textures easier, and can even reduce the amount of textures and materials needed for your model. More importantly, nicely organized UV maps make happier customers.
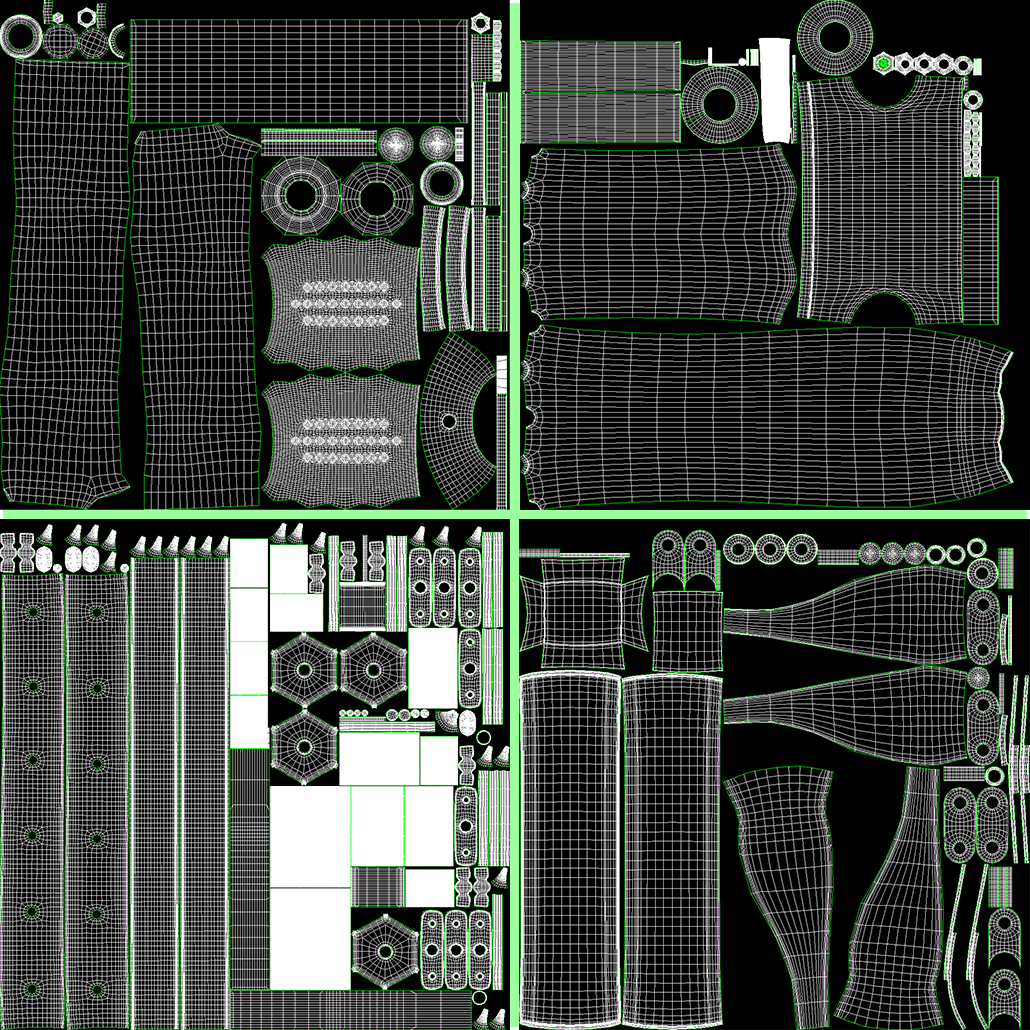
These are from a StemCell model with UV sets for each material type. Multiple objects are organized on to each UV sheet so each material only calls one set of texture maps.
Packing & Padding
When organizing your UVs in 0-1 space you should try and pack pieces of the model with like materials near each other. This can often make texture painting easier. Be sure to pad or leave room between your UVs to allow for texture bleed beyond seam edges.
Padding should be kept minimal to maximize texel density of UV elements. Packing elements together with similar materials and/or adjacent UVs keeps the sheet cleanly organized and simplifies texture painting.
Texel Density
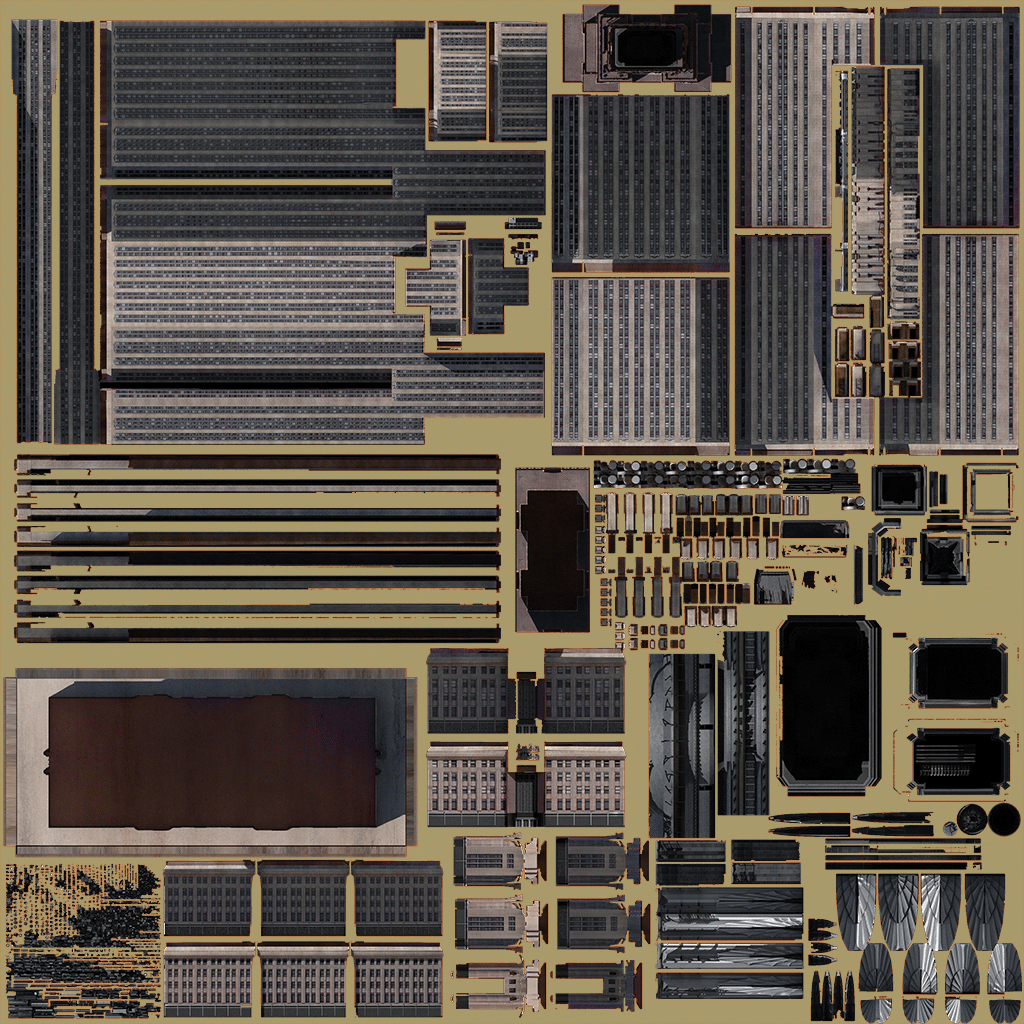
Texel density is simply the texture resolution or amount of pixels on a mesh. Large objects or model sections will use more pixels of a texture map than small objects or model sections.
This texture map of the Empire State Building has been efficiently packed onto a 4096 x 4096 resolution. This resolution has enough texel density to allow for zooming in on fairly fine details of the model.
Seam Placement
You should try to place your UV seams on natural breaks on the real world version of the model or hidden in non visible areas. Visible seams can be jarring and break the realistic appearance of a model.
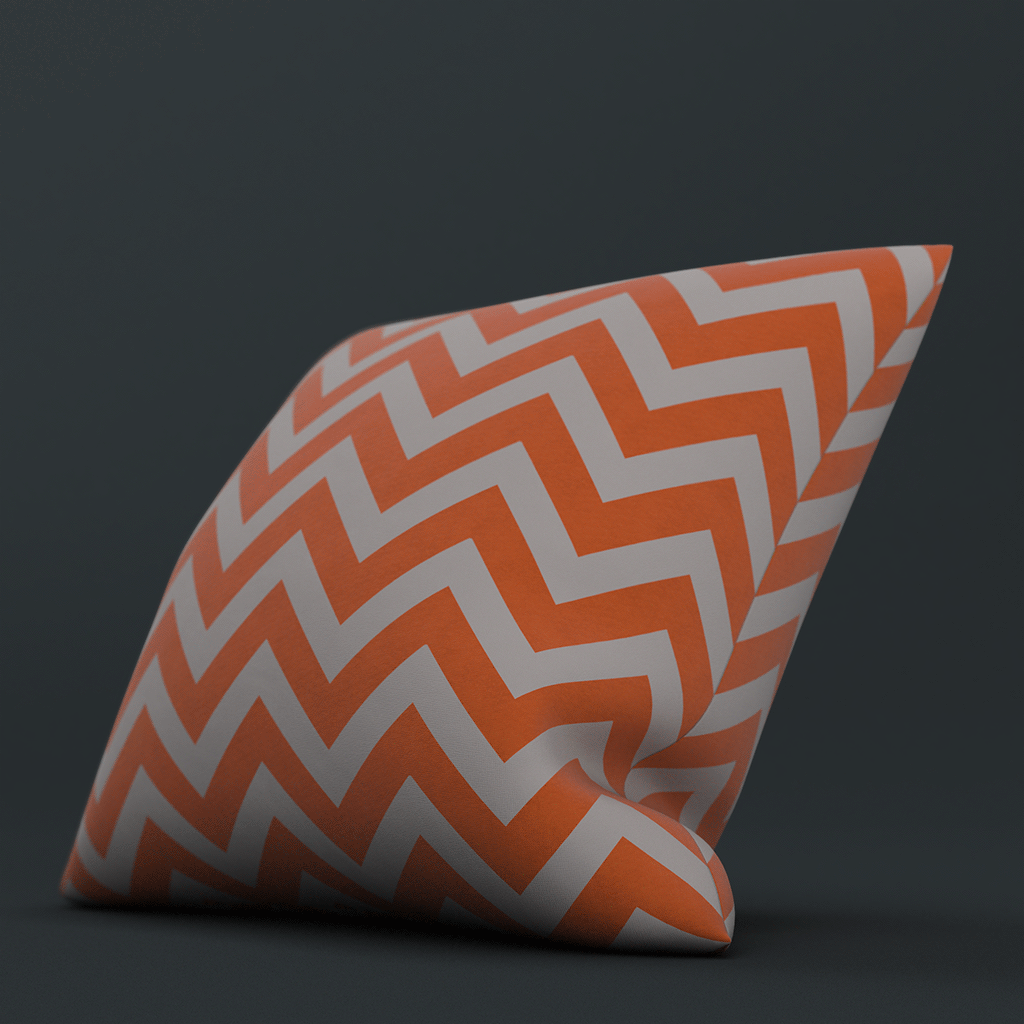
The UV seam on this pillow is placed on the upholstery seam for a natural break in the texture.


